Showing posts with label DIY. Show all posts

Saturday, June 27, 2015

DIY How To Make Vanilla Extract

Why do we put things off? My excuse is time, but this takes maybe 15 minutes max, when you have on the ingredients on hand.
Now, I know there are people that can not even have alcohol in the house  so I found a recipe that is alcohol free, gluten free, sugar free & vegan. I have the link at the bottom.


Making your own vanilla extract is so very simple.

1. Slice down the length of the vanilla bean and put the bean(s) in a bottle. I am making small batches here. Small bottles, I cut the beans in smaller pieces, so they would fit in the bottles. O.k. I am making myself laugh at the simple directions.  EDITED: I was using 4 oz. bottles and used one vanilla bean for each bottle.
2. Pour vodka over the beans. Not in your mouth. In the bottle. The beans need to be covered. Note: Personally I think the best type of alcohol for extract has a neutral favor. So go for it. Though I have read about using other types of alcohol which creates a different flavor profile.
3. Shake that bottle several times a week.
Here is a slammin song to shake to...


Love Israel Houghton. So do my dogs. I kid you not, I am playing this vid while writing the post and they all jumped and started dancing around. I tell you, I have a great life.
Step 4. Wait about 8 weeks. I keep tasting it, to check and see how it is doing. 
Then you will some delightful homemade pure vanilla extract. Way better than the store bought. 

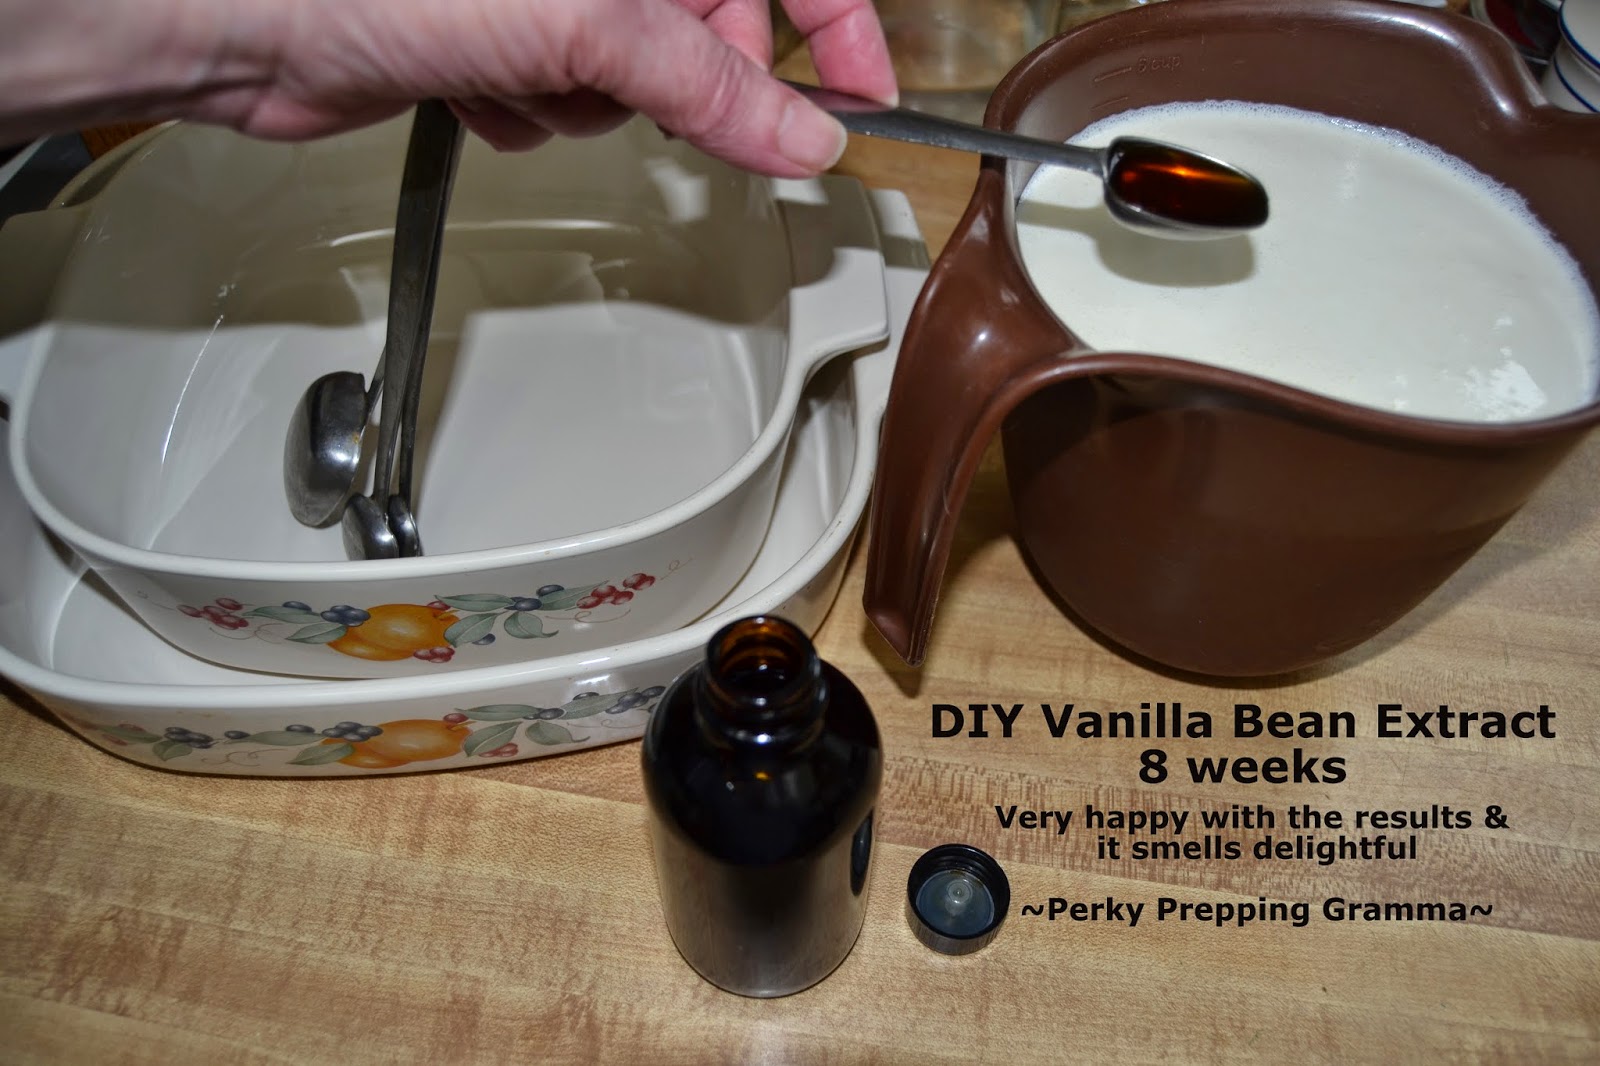
Update: The vanilla extract has reached it's 8 weeks extraction point & look...


I am planning on leaving the beans in there awhile longer to develop more flavor and a richer brown color. 
You are able to leave the beans in as long as they are submerged. The flavor just evolves.

If you will note, I have made my vanilla extract in dark amber bottles. I feel that this helps keep preserve the extract in darkness. If your pure vanilla extract is keep in a cold, dark location if should keep indefinitely.

Now, I know there are people that can not even have alcohol in the house, I found a recipe that is alcohol free, gluten free, sugar free & vegan. DIY Alcohol-Free Vanilla Extract by Desserts with Benefits.

The first time I used vanilla beans from Yoder's Market and got the smaller bottles from Amazon. 
I ordered more vanilla beans today (011315). I am planning ahead for Christmas gifts. 

What you see here are things I try. If you like this article, please feel free to join our community on Facebook
 (Perky Prepping Gramma).
Items I have used in making the vanilla extract:

   
I participate in the Amazon Associates program, where I receive a small recent commission for my recommendations and there is no extra cost to you. Personally, I only share items I have used and like. Each time you use my store for any purchase it helps make a dream possible. Thank you.

Monday, March 30, 2015

DIY, Teeny Tiny Books

This isn't the first time I have blogged. Once upon a time, I blogged about stage designs I created, occasional lessons I taught & little things I did with my grand babies. You will only need a little technical computer skills to make these cute little books for wee hands.
Goodness, these are 5 years old, I may need to make some new ones for them. 
So this isn't about canning, dehydrating or preparing for emergencies.


First, find a picture of a book you'd like to recreate. I used their favorite books & then some classic books.
Right click on the image and download the jpg image onto your computer.


Insert the document images into a document. 


Back to our regular postings...


Friday, February 27, 2015

DIY Cute Little Chicken Coops or "Canning Chicken"

This is "Spirit" & she is a "Hennie"
"Hennies are sweet chickens with gentle dispositions, fresh from the brooder, and eagerly awaiting you to adopt" & they were hatched (created) by a wonderfully creative mom from Born Imaginative. She hand makes these cuties and sells them on etsy. I've been watching and thinking about these little peeps.
One of my biggest dreams is to have my grandbabies become excited about farm life with us. Passing on skills for their future; having them revel in the good life. 
So, I hatched this little gift idea to present to them on Easter. 


I got three little hennies, which come with "origami nesting box (from paper bags), wool hay and a wooden egg. They also come with a birth certificate detailing their date of birth, their breed and the unique and special details specific to their breed. " from Jackie's Esty site.
I picked up some edible grass & jelly bellies from Target. 


I made a little nest from the edible grass, tucked in some jelly beans, the wooden egg & their birth certificates into a canning jar. Then I nested each little hennie inside and added a lid and ring to finish off their new coop.
On Easter each child will receive their hennie & coop, plus the original origami nesting box and an additional certificate that will entitled them to each name one of the chickens on gramma's farm!
I did have to adjust the peeps to face the other way. Here are "Spunk & Cheer".


Very Important Tip: Make sure you don't put the lids on too tightly, because the hennies need to be able to breathe. (1127)


Monday, February 16, 2015

12 Natural Remedies for Cold & Flu Symptoms

Have you been battling a cold or flu recently? It is certainly that time of year. Before running to the pharmacy, try some of these natural remedies to relieve your symptoms. 


1) Blow your nose properly. One side at a time.

2) Wash your hands

3) Drink plenty of fluids: Warm drinks helps relieve congestion and helps with hydration

4) Elderberry Syrup: I start taking this when I am exposed to someone with a cold. It is easy to make and certainly works for me. Usually I add some ginger.


Back Row: Elderberry Juice, Water Kefirs (mango & strawberry)
Front Row: Blue Berry Juice, Candied Ginger, 2 Go-Go Juices

"Elderberries contain natural substances called flavonoids. They seem to help reduce swelling, fight inflammation, and boost the immune system.
Studies have found that elderberry eases flu symptoms like fever, headache, sore throat, fatigue, cough, and body aches. The benefits seem to be greatest when started within 24 to 48 hours after the symptoms begin. One study found that elderberry could cut the duration of flu symptoms by more than 50%.
Lab studies have found that elderberry might be effective against H1N1, or swine flu." (Web M.D.)
5) Ginger Tea: Clears out those sinuses. I also keep some candied ginger on hand too.

6) Gargle: Try a teaspoon of salt dissolved in warm water, four times daily. "To reduce the tickle in your throat, try an astringent gargle - such as tea that contains tannin - to tighten the membranes. Or use a thick, viscous gargle made with honey or a mixture of honey and apple cider vinegar, a popular folk remedy. Steep one tablespoon of raspberry leaves or lemon juice in two cups of hot water and mix in one teaspoon of honey. Let the mixture cool to room temperature before gargling." (from Web M.D.)

7) Cold or Hot packs on your congested sinuses: Wet a washcloth, warm it up in the microwave for about 50 seconds. Test the heat. Or cold may make it feel better, bag of frozen veggies.

8) DIY Nasal Saline Solution: I have been using this for years now at the first sign of a sinus infection or to clear out my sinuses. Findings show that if saline irrigation is used regularly, it can help to thin mucus, decrease postnasal drip, and cleanse your nasal passages of bacteria. The two main ways to use saline irrigation are with a Neti pot or small squirt bottle.
How To: In a clean container, mix 3 heaping teaspoons of iodide-free salt with 1 rounded teaspoon of baking soda and store in a small airtight container. Add 1 teaspoon of the mixture to 8 ounces (1 cup) of lukewarm distilled or boiled water.
Use less dry ingredients to make a weaker solution if burning or stinging is experienced. For children, use a half-teaspoon with 4 ounces of water. (Web M.D.)


If you get the Neil Med Sinus Kit, get the smallest one and make your own saline solution.
9) Take a steamy shower

10) Add Peppermint essential oil in the shower. Helps with the drainage of your nasal passages.


11) Rest: You know this, so put it into action, or inaction.

12) Other helpful foods:
  • Vitamin C-containing foods like bell peppers
  • Blueberries curb diarrhea and are high in natural aspirin, which may lower fevers and help with aches and pains
  • Carrots, which contain beta-carotene
  • Chili peppers may open sinuses, and help break up mucus in the lungs
  • Cranberries may help prevent bacteria from sticking to cells lining the bladder and urinary tract
  • Mustard or horseradish may helps break up mucus in air passages
  • Onions contain phytochemicals purported to help the body clear bronchitis and other infections
  • Black and green tea contain catechin, a phytochemical purported to have natural antibiotic and anti-diarrhea effects. (Web M.D.)
TIP: I also find that blueberry juice energizes me. I mix elderberry syrup & blueberry juice and call it Go-Go Juice.


Thursday, February 12, 2015

DIY: How To Make Wine (part 2)

We are having our homemade blueberry wine for dinner tonight. The two weeks of  fermentation time has passed & it is time to bottle our home brew.


I made two small batches, one with honey, the other with raw organic sugar. After the fermentation process, I found very little difference in the final taste.
So I gathered my siphoning equipment: the fermented juice, swing top bottle & food grade tubing.


It's is fairly important to actually siphon the wine out of the original container, this eliminates the sediment that has settled in the bottom for the jars. See the sediment in the bottom of my container?


Actually I was amazed at how simple this was to make the wine. The skill level necessary is very basic. Obviously, you are able to apply this DIY wine making process to other fruits, I just happened to have some nice blueberries to work with. The wine tastes fine and is dry. 
I are going to experiment with this process more.
Chalk up another skill learned! 

I currently have access to a lot of fruit that would make great wine at this time and plan on growing more soon.
What I need to increase is my storage of yeast. Currently we have only three pounds of yeast stored in the freezer.
This is the blog post on the first steps of making the wine: DIY: How To Make Blueberry Wine

Amazon Associate Links:


I participate in the Amazon Associate program, where I receive a small % commission for linking products that I recommend. I only recommend products I personally used and like. Your support is very appreciated, anything you choose to purchase through my link, is helping me to be able to share more things that I do with you. Perky Gramma Teaches Amazon link.


Tuesday, January 27, 2015

DIY How To Make Blueberry Wine: Blueberry Week


Seriously, this is the recipe I wrote down to make the blueberry wine. Here is what it says:
1 pk, 2 gal., ferment, water warm, activate
15-20 day, stir, gas, shy (?), cheesecloth, moonshine jug, balloon w/ pin hole
sit 2 wk, clean, sed. settles, syphon tubing ----> 
arrow, bottles
Now do you know how to make blueberry wine? LOL. Now maybe you will understand when I say I don't use recipes.
Let me try to translate.

I pack of dry active yeast will ferment 2 gallons of juice into wine.
I decided to make only 1/2 gallon of wine for my first time. So I adjusted accordingly.
Add very warm water (110-115 degrees) to the yeast to activate.


Then mix the yeast and the (blueberry) juice.


I decided to start with small batches and test making the wine with honey (on the left and raw organic sugar (on the right). I used 1/4 cup for each batch.


Now it is going to sit on my counter for 15-20 days and will be stirred daily. I opted to use canning jars to store in while fermenting. There are several options to cap off the wine, one was placing a balloon on the top with a pin hole in it to release the gases. I didn't have a balloon so I used rubber gloves. See how they inflated? Just to be silly, I taped the fingers down to create the "I love you" sign. Mr. Perky suggested another sign. He is such a bad boy. But, then one of his nicknames for me is Mary Poppins. 
Just sharing the journey as I learn...


DIY How to Make Blueberry Wine (part 2)
                                               

I participate in the Amazon Associate program, where I receive a small % commission for linking products that I recommend. I only recommend products I personally used and like. Your support is very appreciated, anything you choose to purchase through my link, is helping me to be able to share more things that I do with you. Perky Gramma Teaches Amazon link.


Tuesday, January 6, 2015

Happy Water Kefir (part 3)

Since I have ordered my second batch of water Kefir grains, production has really picked up. Now this is a happy routine. There are many health benefits to the various kefirs, the one that has been the most beneficial to me is it stops my acid reflux in it's tracks. BIG bonus, now I don't have to take OTC's any more.
Here is my set up. Currently I am using 1/2 gallon containers.


Start with organic water kefir grains. you may have a friend who will share, since the grains will grow. I personally ordered mine from Amazon. I started with a smaller size and added more later as our needs grew.
To maintain the health of your kefir grains use non-chlorinated water. While I started with bottled water, I quickly just started a half gallon jar set out with water on the counter, so the chlorine is able to dissipate.  
The second is a jar with the water kefir grains, water and 1/2 cup of organic raw sugar.
The third is one that has the grains strained out & whatever fruit added to it.

Each day I sample the water kefir and when it gets to the effervescent level I like, then I set out all my jars and start by draining the fruit out of jar 3 into storage bottles. This is what I keep in the fridge. If I reach a point that I have a lot of completed Kefir, I have a gallon dispenser that I use.


Next, strain out the water kefir grains out, placing the first fermented water into another 1/2 gallon jar. Put the grains back into the first jar and add the correct amount of sugar and the new water to start the fermentation process again.


Add your fruit at this point. The nice thing, the grains come with directions, it is pretty simple to do and you learn to experiment and find what works for you.


If you need to slow down production, put the jar with the grains in the fridge. Just remember, it still needs to fed some sugar & it will take extra time (days) to warm up the grains again.
I have made raspberry, mango, ginger, kiwi & blueberry Kefir water. Blueberry is Mr. Perky's favorite so far. You may use fresh fruit, dehydrated or freeze dried fruit. My preference is for dehydrated, it seems to concentrate the taste in my opinion. I am going to have to break out my blueberries in simple syrup soon, since we are quickly going through our dehydrated blueberry stock.
As always I enjoy people sharing the progress. Join me on facebook & share a picture. We are on this journey together.
P.S. Just a cool side note: This is what the dehydrated blueberries look like after fermentation. They bloat up and there is NOTHING left inside. 


Thursday, December 25, 2014

Making Lip Balm (not Hand Cream)

Making Hand Cream Lip Balm
I am grateful you all follow me, but honestly I am not sure why. LOL. I make a lot of mistakes and I don't use/follow recipes. 


Like I mentioned, I found a recipe for making hand cream and purchased the ingredients to make some batches. I wanted to give some to my mom (and other family members). Then couldn't find the recipe I saw before. Someday I will learn to carefully bookmark something I really care about.
Anyway, so I found a similar recipe and being my silly self, I adjusted the recipe.
What I wound up with is really more of a lip balm & it is wonderful lip balm.
But, I am going to have to make another batch and this time I will follow the recipe and see if I come up with hand cream. Here is what I used:

4 oz. Natural Coco Butter
4 oz. Beeswax
2 T. Coconut oil
10 drops of Vanilla Essential Oil
(on the second batch, for the hand cream I increased the coconut oil to 4 T.)


I placed the cocoa butter and beeswax in separate small canning jars (so I could use the measurement lines) and put them in a saucepan of water, heated until the items melted. Then added the coconut oil and vanilla essential oil and mixed them all together.


Carefully poured the mixture into this nifty little tins I have from last years Advent Calendar.


Sunday, September 21, 2014

It's the time of year for elderberry juice...

This weekend I made my third batch of elderberry juice for this week. Actually I made 6 batches total. Seriously, I am so glad I had all the supplies on hand in my larder. The first batch was for three people at work who had a very bad cold. They were a bit hesitant at first, but it was so much fun to make them try it and see them experience relief within minutes.
I am telling you, this stuff is golden. I personally use it for relief of allergies, colds and flu. Also the juice is great as an immunity builder, particularly if you have been exposed to someone with a cold or flu. (more on benefits of elderberries at Herb Wisdom)
I am making more since that nasty little cold bug seems to want to catch me & that isn't going to happen.
Today’s batch is made from elderberries the guys picked a little while ago, which I dehydrated. The ginger is from my friends at Gold Hill Blueberry Farm, which I also dehydrated this weekend. The honey is from a local grower.
The recipe is very simple & only takes about 40 minutes total.
NOTE: I have written the basic recipe on the top of my jar of elderberries, so that it is always handy.


Elderberry Juice
½ cup of dehydrated elderberries (If using fresh elderberries use 1 cup)
3 cups of water
I add several slices of dehydrated ginger
1/3 -1/2 cup of honey

Add the elderberries, water and ginger in a saucepan and simmer for 30 mins. Strain out the berries and ginger. Add honey to taste.


I pour the juice into these nifty bottles I got from Ikea. It will last about 6 months in the fridge. Today I am freezing some of the juice in ice cubes trays and will keep in my freezer. The five spaces with brown liquid is juice from the ginger root.
Edited: 092514 Here you have it elderberry/ginger juice ice cubes, vacuum sealed & ready to store. This morning I simply added a couple cubes to my morning drink. Yummy! Yes, I had already gone through my bottle of elderberry juice I made.
Must say it has worked wonders. I know that cold is trying to catch me, but with my juice I refuse to be caught by this cold! 


To find economical dehydrated elderberries and organic dehydrated  elderberries you are able to find them on Amazon (associates link: note these have additional shipping). I have used both and believe they are excellent products. I will be finding and planting elderberry bushes on our property. I also am going to get some ginger to grow from a friend.

Made it just in the nick of time. I have been using the elderberry juice regularly. 

EDITED 102414: Just found this wonderful blog post: "Elderberries: The Definitive Guide" by Sun Flower Press