Thursday, April 17, 2014

Storing chocolate and other happy items...

Various people are known for different skills or areas of self-sufficiency. Mine is being a newbie, who is willing to learn and try. That being said, I am very literal when it comes to storing what I use (and using what I store).
One, I think storing chocolate is extremely important. I eat; therefore I store! I need to add here that I have better results with dark chocolate than milk chocolate. 
Two: I store a LOT of coffee, since I get a pound every week for free, I store, therefore I drink. The coffee is for another post. 
This cache of chocolate is stored in the cabinet under my tv, which happens to sit on 110 gallons of water storage...


We have had multiple discussions about the Food Saver as a great tool for vacuum sealing storage, particularly in canning jars. It is so very easy to do. Here are just two methods I use for dry canning/sealing food for long term storage.. First is using a FoodSaver.
When you purchase your Food Saver you need to insure that it has an “accessory port”. 
This is the accessory tube. It is hidden in the bottom of the Food Saver.


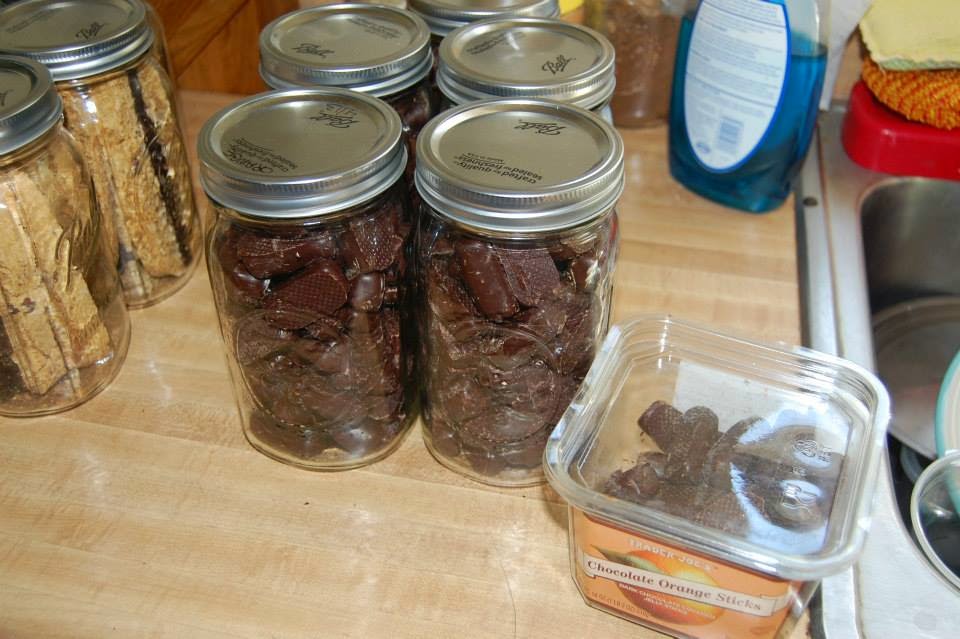
Note these empty jars. They held biscotti and chocolate candy, which "someone" had used (eaten) So, true to my word, I purchased twice the amount that I ate to add to my storage.


Here are the jars waiting to be sealed...


Now I often will do a large batch of sealing at a time. You simply place the attachment on a jar with a lid (with out the ring), insert the tube into a little hole on the top of the lid attachment & hit the accessory button. When it stops, you remove the attachment. That's it.
Here is an example:

We use our Food Saver Attachments frequently.  You can find the attachments for sale on Amazon for under $10 each. I recommend getting both the wide mouth and regular mouth attachment. This is what the boxes look like for the attachments.


Canning jars are a very cost effective way to store. When vacuum sealed (which removes the air from the jar) and stored in a dark cool place, you extend the shelf life for many years.
I recently wrote another post about vacuum sealing jars with with out electricity using a Mityvac Automotive Test and Bleeding Kit


TIPS:
Storing powdered cocoa:  Hershey Company's FAQ they state "Cocoa is considered a non-

perishable item which should  maintain quality if stored at room temperature in a tightly 

sealed container." Sounds good to me.  I have heard as long as it is kept in a cool, dark, 

dry place it lasts a very long time. 

I am now getting my Hersey's Dark Cocoa from Amazon. 

If you  are having difficulty getting a seal, try placing two lids on top, then the attachment. It will only seal the bottom lid.

If you are doing a powder type product, you can either place in individual plastic bags OR add a small coffee filter on the top of the jar to stop the fine powder from being sucked up into the tubing.

Feel free to add our own personal tips here or on Facebook & I will edit this post so we will now have a centralized location to refer people too, who are having questions.

Another tip from Tammy Milasmom: Try taking out the Food Saver attachment's gasket and then reinstalling it. I have to do that constantly to get it to work


What I do here is simply share our preparedness journey. If you liked this post we would love it if you joined our Perky Prepping Gramma community on Facebook, comment or share. Plus it would just make my day.

.
    
Your order is so very appreciated, because anything ordered through my Amazon Associate links helps me to be able to stay home and write for you. Perky Prepping Gramma is a participant in the Amazon Services LLC Associates Program, an affiliate advertising program designed to provide a means for sites to earn advertising fees by advertising and linking to Amazon.com.


Monday, April 14, 2014

Turnpike Salad, another bacon recipe from stored items...

Flashback from the 1970's. I picked this recipe up when I was in high school. It has been a family favorite forever. This is another one of my recipes from storage foods.
Ingredients:
Macaroni and cheese (pack), milk, butter 
1/2 cup Mayo (stored)
3/4 cup diced dill pickles (stored)
4 boiled eggs diced (the eggs I used were oiled in November 2013)
6 pieces of cooked bacon, crumpled up
3/4 cups of diced tomatoes (canned)

Simply make the macaroni and cheese according to the packaged directions. Add the other ingredients & stir. While we will eat when I make it, it is one of the dishes that is better the following day.


Pasta Carbonara from Food Storage

For the life of me, I never seem to be able to follow a recipe to the letter. I tend to always add and subtract based on my tastes. That being said, I wanted to make Pasta Carbonara (this was my first time making the dish), utilizing only food from storage. You know, use what you store, store what you use. This is a rich bacon and egg pasta dish,and i used the recipe here as my jumping off point. Pasta Carbonara II from All Recipes.com
These are the ingredients that I actually used from storage. I actually packed everything up in box and made the dinner at a friends house.

1 pounds of spaghetti (stored)
2 T. olive oil (didn't use, because I don't store olive oil. Everything turned out fine with out it)
8 slices of bacon (crumbled) (from my pressure canned bacon)
1 onion (that I dehydrated)
1 clove garlic (that I dehydrated)
4 eggs (stored with mineral oil)
1/2 grated Parmesan cheese (this store really well unopened on the shelf) and I also used smoked Gouda (which I waxed in 2013)
salt & pepper

It was so simple. I basically prepared the recipe, just baking my bacon
adding extra cheese.
Let me tell you, it was a big hit, especially the 12 year old. WIN!


Sunday, April 13, 2014

Bacon, bacon, bacon...

Ah, pressure canning bacon. Another controversial subject.
First, read your book that came with your pressure canner. It has exact directions for canning, especially since various canner have different equipment on them to determine pressure etc.  
I have read the information list at the National Center for Home Food Preservation many times and I recommend that you read it also to make your own informed decision about various canning guidelines. For me, I decided that though some PEOPLE don't recommend pressure canning bacon, I couldn't find any specific prohibition from the NCHFP. 
Now lets talk bacon. I am cautious to sterilize everything along the way and aware of allowing enough head-space to keep the fat content from creeping up the jars and disturbing the sealing process. With that said, did I mention you should read the guidelines yourself to make an informed decision?
In February 2013 I did my first batch of pressure canned bacon. In my opinion, it was a lot of work. It entails wrapping the bacon slices in parchment paper. It you want to try that method, I will have a link at the bottom of this post.
I thought since I recently got a shipment of Zaycon bacon, I would try another method. I like this process better. I found that a higher
quality bacon does better with pressure canning, that why I plan to only use 
Zaycon bacon from now on.
I am not going into every detail of canning since you are going to be reading your book; I am giving general instructions and I want to define some terminology that I didn't understand when I began to can.
First get all of your canning equipment, jars & lids clean, together and ready to use. I also thoroughly clean and sanitize my counter top and sink. I normally keep all my canning equipment together in a bag and inside of my canner when not in use.
That way I don't have to go looking for everything when I start canning. I also have an “s” hook, that I hang the bag from off of a shelving unit close to where I am working. I actually keep two sets of equipment in the bag, in case I happen to drop a utensil, I will have the back up already sterilized and available. Link to see how I do this: Getting Started and Organized.
I get a pot of just under boiling water (180 degrees) going on the stove. I added my lids and rings. These need to be in the very hot water for 10 minutes.

I know my Presto canner will hold 7 quarts at a time, so I work with 7 jars at a time.

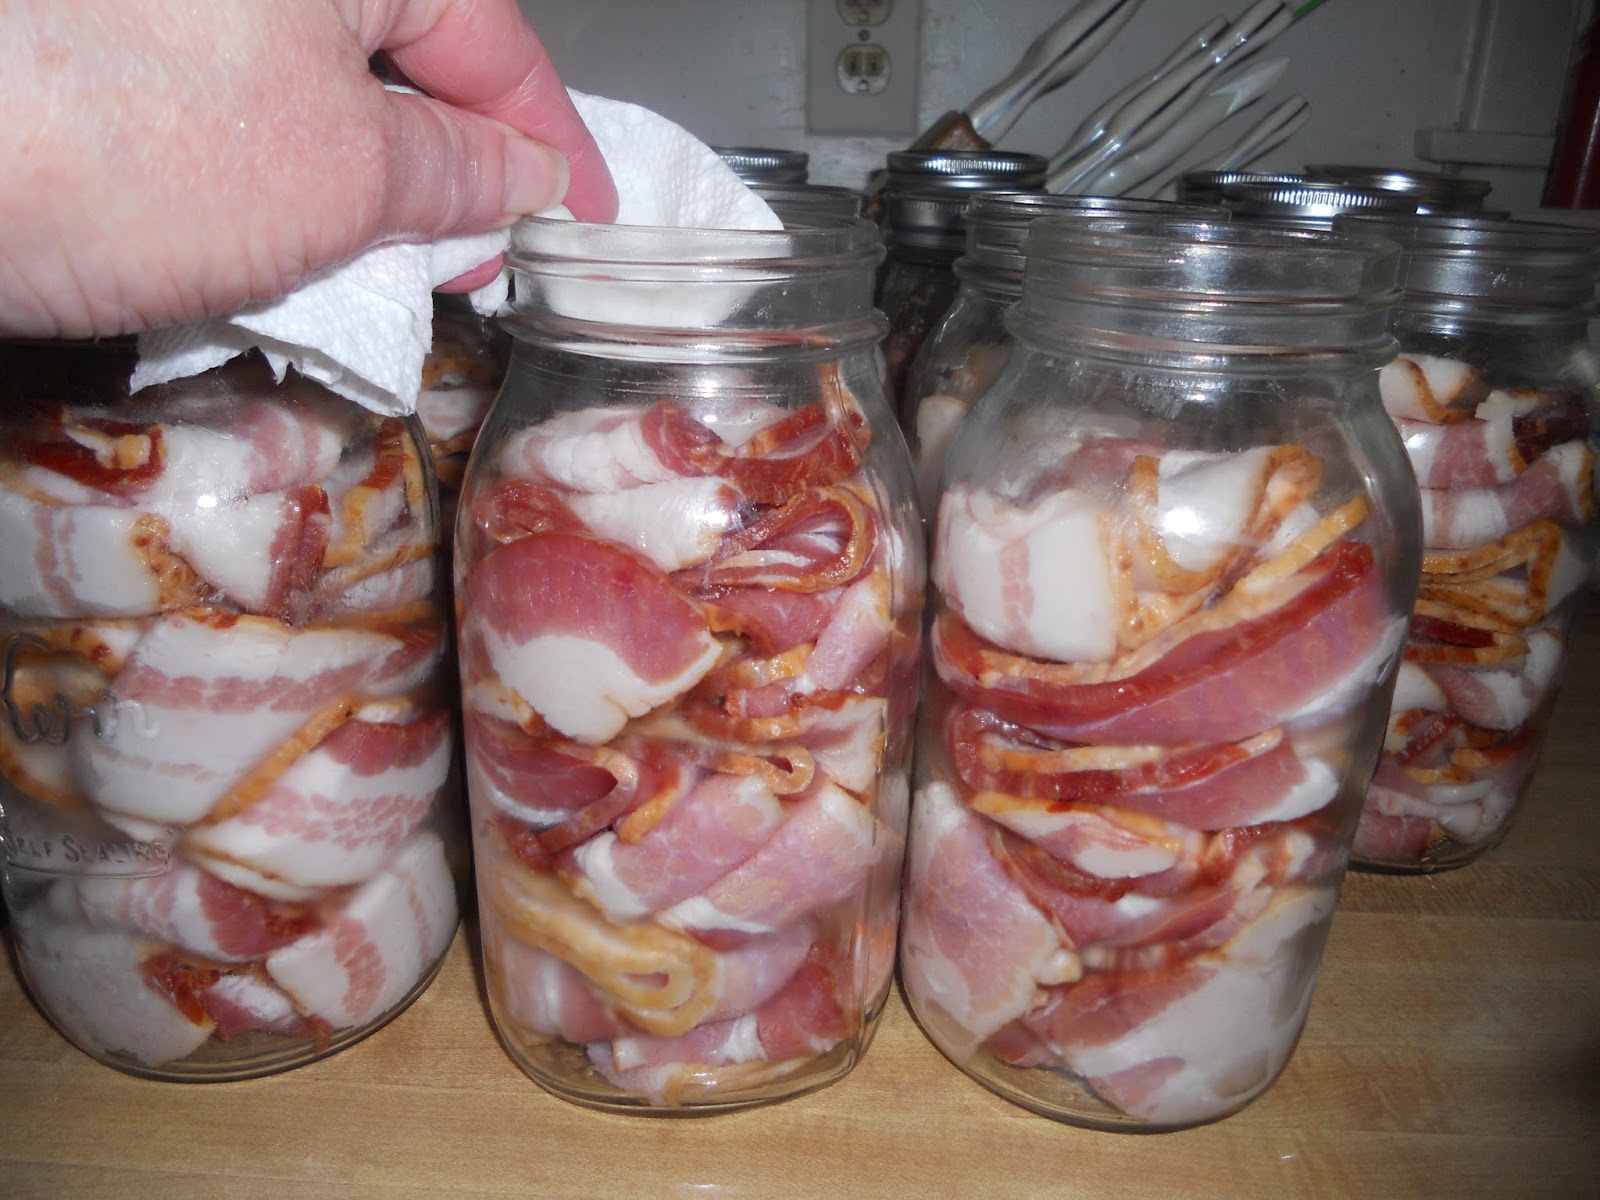
I set the clean jars on the counter, then started to add the bacon. I opened that package and folded the bacon lightly in half, then quarters & placed that piece in the canning jar.
I laid two one direction, then stacked the next layer at 90 degrees. I gently tapped the bacon pieces down, leaving at least an inch of head-space at the top.
This diagram from Presto shows what various head-space amounts look like.
Then clean the tops of the canning jars with a paper towel (or a clean cloth) and vinegar.
Add a lid and ring to each jar from your hot water.
Tighten the ring on the jar to “finger tight”. Now what does “finger tight” mean exactly? From Clemson.edu “A practical way to determine if the lid is fingertip tight is to place the band on the jar, turn it just until you feel resistance, then turn the band one-quarter turn more. For beginning canners, it may help to mark the band and lid with a marker at the point of first resistance and at the point that represents an additional quarter turn and to then turn the band to that point.
Place your jars into your pressure canner and add the appropriate amount of water, based on your canner. On my Presto there is a line inside the canner.


Check your lid to see if you are able to see air through the vent hole, and then place your lid on your canner and secure. Set heat to high and continue heating until a steady flow of steam comes out of the vent.

 
Set timer for 10 minutes, let the steam continue to vent for 10 minutes.

After the timer goes off, add appropriate weight. Check your canning book for your weight pressure based on the altitude of here you live. Here is a link to an altitude chart.
FOR WEIGHT ONLY CANNERS: After adding the weight, keep temperature up until your weight jiggles. A jiggle is when the weight on top spits, sputters or wiggles a little. After the weight starts to jiggle, reduce your heat until the weight is only jiggling 3-5 times a minute. This take s a little practice. 
Keep an eye on your pressure gauge and/or weight during the process. You are able to reduce the heat, as long as you are maintaining the proper pressure. With my stove, I am able to reduce the temp. to low during this time.
It all depends upon your stove. 
FOR GAUGES: after adding the weight and gauge, bring the pressure up to the appropriate pressure (again check your book)
Then reset your timer for the proper time for what you are canning. It will vary depending on what size jar you are using and what you are cooking (again check your book)..For this batch we are doing quarts. For my altitude it is 10# of pressure, cooked for 90 minutes.

When the timer goes off: turn off the heat and gently move the canner from the heat.
DO NOT REMOVE WEIGHT, GAUGE OR LID.
Let rest until the pressure gauge drops down to zero or when the little button drops down.
Remove the lid carefully, turning it away from you when removing the lid.
Smile when you start to hear the pings!
Gently remove the jars from the canner and set on a clean, dry dish towel.
Let them set for awhile. If a jar does not seal (ping), say in an hour (?) put that in the fridge and use it.
Let rest away from drafts. While not completely necessary, I cover my jars with a towel to help protect them from drafts.
You put a lot of work, time and money into pressure canning food. When you are done canning, you just put the jars on the shelf, right? WRONG! I often say "there are questions that newbies don't even know to ask". I don't believe I have seen a list of the simple, yet very important steps to take after you finish a batch to optimize and protect your hard work. In my mind each of these little steps are to protect the safety of my family & are easy to do. Check this link for important steps often missed. Testing 1, 2, 3...

Check the lids periodically over the next few days, weeks to insure the lids remain sealed.
There you have it. Here is the very same bacon cooked up. I simply open the jar, gently unfolded the bacon strips and laid them out in a baking dish and baked at 350 degrees until golden brown and crispy. Lay out on paper towels to absorb the extra grease and it is ready for eating! Soon, I will be sharing a few meals I plan on making from my food storage using bacon.


Here is the old method I used to pressure can bacon: How to Can Bacon with Parchment Paper.
   
I participate in the Amazon Associate program, where I receive a small % commission for linking products that I recommend. I only recommend products I personally used and like. Your support is very appreciated, anything you choose to purchase through my link, is helping me to be able to share more things that I do with you. Perky Gramma Teaches Amazon link.

Monday, March 31, 2014

Grid Down: DIY "How to" vacuum seal food in canning jars without electricity....

Imagine, the electrical grid is down and you would still like to vacuum seal various foods in canning jars. Alrighty now, this is a Mityvac Automotive Test and Bleeding Kit. Donna Hoaks was telling me that you could use this for vacuum sealing jars in a grid down situation. 

I asked DH about it and he had just happened to have an old one in his tools.
This is very simple, uses no electricity, just a little human energy.


 We had to purchase some more tubing, since it was old & we didn't have any tubing that was long enough.
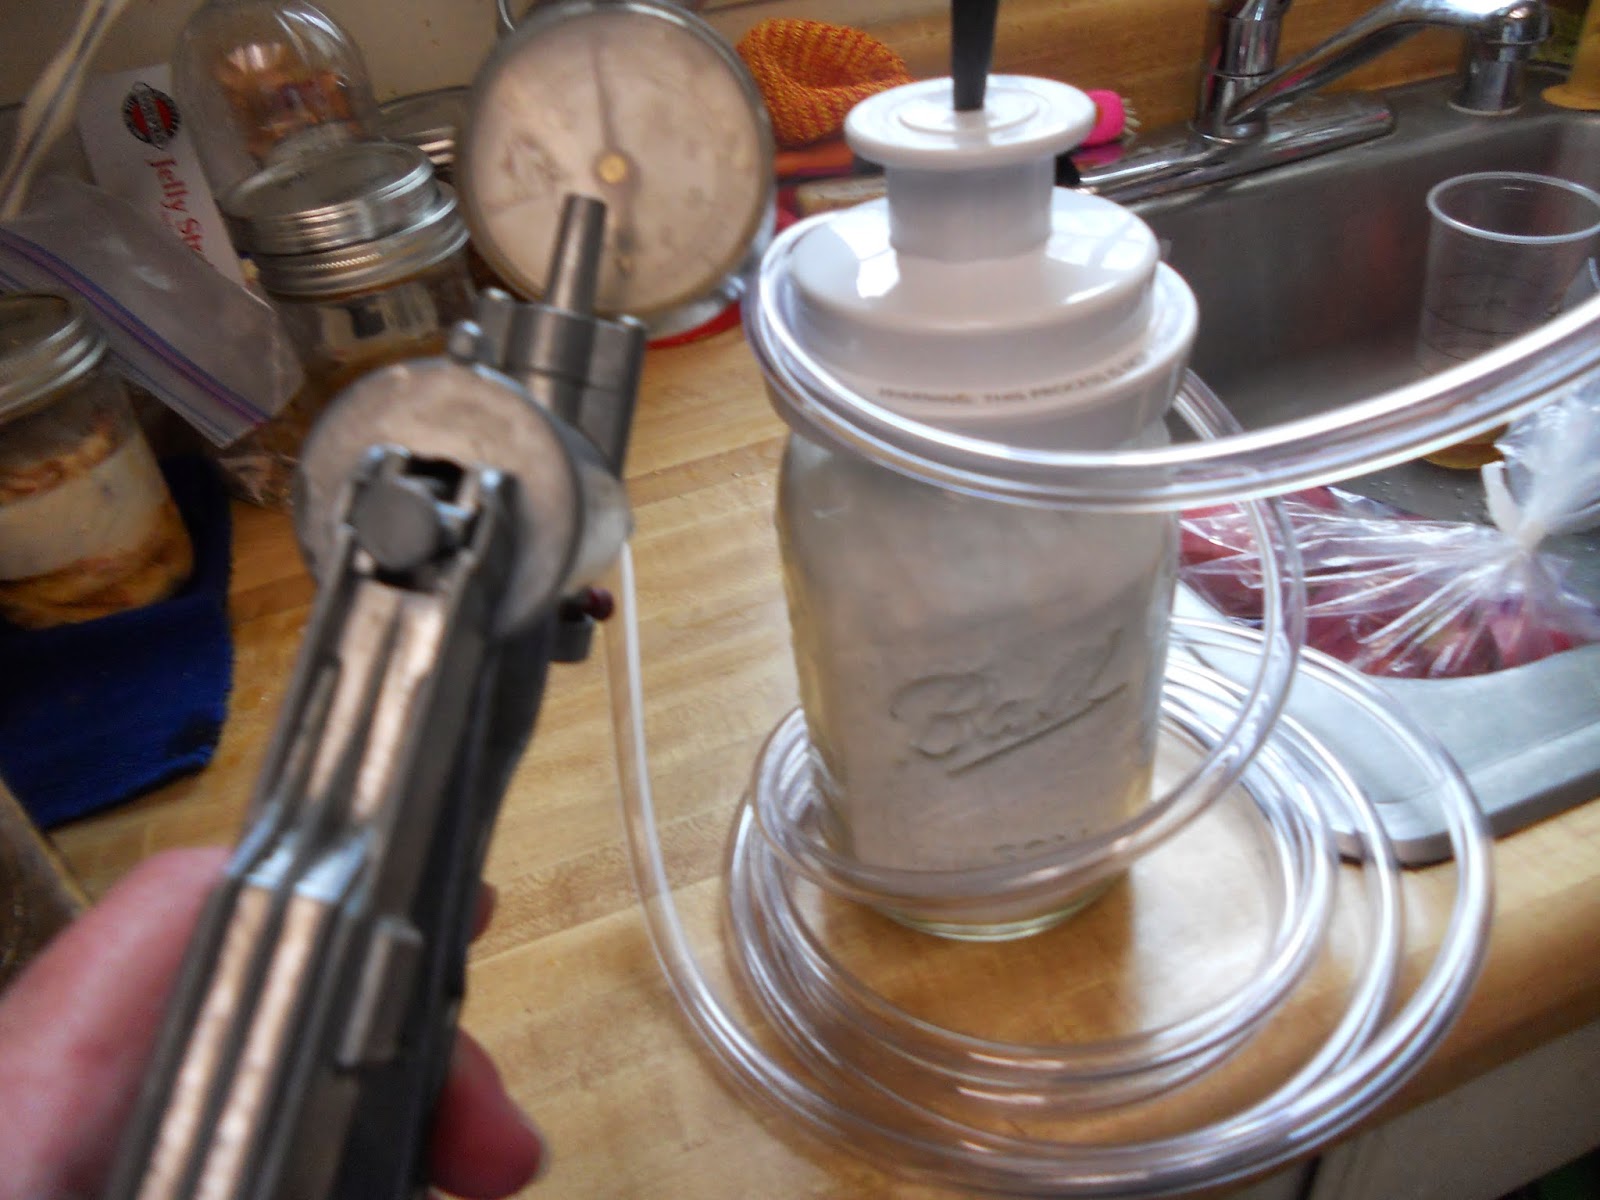
You assemble the Mityvac Automotive Test and Bleeding Kit & add a lid to the jar. You may use a "used lid" in good condition for vacuum sealing. 

Place the Foodsaver Wide Mouth Jar Sealer firmly on the jar.
Attach a tip to the hand vacuum kit, insert the tip into the top hole on the jar sealer and start pumping.
I started pumping until I heard the jar seal and continued for several more pumps. It's that simple.


Look! It is all sealed up. 


This really works well. Perfect for Grid-Down Storage.


Thank you for reading this article. As you see from the pictures, I simple share what I am doing to prepare for my family. We would love it if you joined our growing community on Facebook at Perky Prepping Gramma.
I participate in the Amazon Associate program, where I receive a small % commission for linking products that I recommend. I only recommend products I personally used and like. Your support is very appreciated, anything you choose to purchase through my link, is helping me to be able to share more things that I do with you. Perky Gramma Teaches Amazon link.

Tuesday, March 4, 2014

It’s A Bug’s Life

Once upon a time, a real life story began. A little boy, nicknamed Bug was born after a complicated pregnancy. Around 3 months old, the signs of autism started appearing. That way just one side road in the journey of his life. Bug was diagnosed with Asperger’s in first grade. Children on the autism spectrum often develop a fascination with a particular object or area of study. Bug’s was well, bugs, dinosaurs, and all things animal. It was encouraged, as this fascination will prove beneficial to him in life. And so a natural prepper was born. (But don’t use that word around him….he is just a kid that likes to play outside and eat homemade food.)
Bug Tree Climbing

After many side tracks and branches in the road of life’s journey, we arrive to present day. The fascination with animals has slightly branched out to include a love of nature and being outside. Bug is a child that struggles through the daily grind of being in a classroom or having to focus on tasks. Put him outside and suddenly it is a whole new teenager.

Solar Still

Bug is now almost 16. He attends a specialized school an hour each way from home. He often talks about animals, particularly bugs (easiest for him to go outside and capture). He spends most of the time on the bus looking up ways to track animals, snare animals, raise animals, etc on his phone. Yes, the school is quite far, but it was chosen not long after 9/11 happened and it was chosen for security purposes, as well as medical staff on hand. (Mom is on the emergency team at the school she works at and would not be able to leave immediately to get to him. This placement allows Mom peace of mind to know that Bug is safe while she does her job.)

Santa Mapping Skills

Bug gets lunch at school but due to the long ride, Mom has always insisted on extra snacks and water being carried. In the side pocket of the lunch box is a plastic baggie containing extra napkins, glo sticks, whistle and few other little emergency supplies that are within rules and regulations and safety expectations. This has paid off well for traffic on bad days, a day that an SUV ran a red light and slammed into his bus and just other life situations. What started out as something Mom insisted on is now something Bug keeps filled and up to date. Bug often reminds mom that there is bad weather in the forecast, he needs new snacks or whatever for the lunch bag. Another benefit of Bug going to school in the city….he knows just about every way in and out of the city (he is a walking talking GPS system!)

Surveying

 One of the benefits of the Asperger’s. Mom is trying to teach Bug how to use a compass, but he is struggling with that skill). As he has gotten older, he has shown Mom some of these ways as well as able to identify safe and unsafe areas.
Bug knows that when power goes out to wrap the freezer. He has a lanyard with a whistle and flashlight that when the weather alarm goes off, he puts on without thinking. Mom and Bug are always looking for new skills to learn together as this is a great bonding time. Oh, and Bug’s favorite skill, taste testing the homemade jerky and dehydrated apples.

First Turkey
Bug and Mom have frequent drills at home. Tornado, earthquake, etc. Bug has witnessed first-hand tornadoes, one earthquake, a wildfire, and severe weather. Bug often comes up with small drills to challenge Mom with. Recently, in anticipation of an ice storm, the challenge was a weekend using only alternative lighting. (Bug loves to use battery operated lanterns in his room as his light source). Bug often wishes for power outages. He swears Mom cooks better over an open fire than on a traditional stove. Open fire is how most of the cooking is done during the warmer months. (Did you know chicken nuggets taste amazing when crisped over a fire! Did you know you can roast Starbursts? Yummy!)
Rocket Stove Practice

This drilling has paid off. One afternoon, where we live had an earthquake. Mom was at her school. Bug had just gotten home from school. He immediately got his lanyard and cell phone. Once he was in his “safe area” he called his mom. The connection was only long enough for him to get out that he was ok. Months later, Mom found out that Bug went through his emergency list until he got ahold of one of his contacts to let them know he was ok.
Bug has basic firearm training, as well as practices regularly with a recurve bow. He currently is learning how to make snares. He is learning several methods of firestarting.

\
Fall & Winter Target Practice 

Fishing is a passion of his. He has helped process game since kindergarten. He is a sensory eater. He is a picky eater. When Bug sees where the food comes from and helps in the process, he tends to eat much better. 


Fishing & the Catch

To Bug, the way of life his mom has chosen, as a single mother surviving a very abusive relationship and starting fresh, is not a life of a prepper. It is a life style. One that has been handed down through generations. Farming, gardening, livestock, hunting, fishing, preserving, are all things that Bug has witnessed and been part of. He has a special bond with nature that is part of who he is and will serve him well. He may have a hard time interacting with other humans, but with nature, he is at home. Mom’s goal through this journey is to teach Bug important life skills so that he can go on to have his own home and eventually have his own family.

Green Water Swimming

One day Mom asked Bug if he would like to meet another prepper. Bug had a meltdown. He hates the word prepper. He always says “It’s just the way we live.” So, please don’t mention the “p” word around Bug.

While Mom has a lot to learn and continue to pass on, Bug has been given the basic start of skills to continue and thrive in a life that will benefit him. Yes, there is still a lot of room for both to grow and improve, but the thirst for the knowledge is there. Bug’s love of nature has encouraged him to look into various careers that he can do in that area. The skill learning gives Mom way to communicate in a positive manner. (Living with a child that has Asperger’s is not easy. Bug has been hospitalized for meltdowns, routines have to be kept, therapy done, stimulants minimalized, etc.) If it can be a Bug’s Life, it can be your life. (187)


Tree Climbing

Saturday, March 1, 2014

Why I chose the Essential Oils and company that I am using...

First I will start with the most recent essential oil blend I have tried. I started the EO journey mostly because I am trying to decrease the amount of OTC pain medication I take. I have had chronic pain in my back, neck, knees and hands for many years.
My most recent product use was Plant Theapy's “Pain Aid” pre-diluted blend roll-on. I have to tell you, I am pretty amazed at how well it works for me. Pain Aid didn't completely remove all the pain; but it drastically reduced the amount of pain & worked so well, that within a few days I had already ordered my second bottle. This is a blend I will be learning how to make soon.
Personally, I chose to use Plant Therapy Essential Oils. 
How did I decide on which company to use? It can be a little overwhelming to get started using essential oils. I actually started out looking at many various companies products. What I was looking for was very high quality, sourcing, purity, cost effective and great customer service. I read a lot of sites and there are some great companies out there.
You know how it is when you go down the rabbit hole of researching things...
I had already sort of locked in on Plant Therapy. It took me a several days to write this post, since I couldn't find two of the sites I read that helped convince me about Plant Therapy.
One site was Nourishing Treasures the other was 
LearningAbout EO's. A page devoted to independent testing of various companies E.O.'s. It is funded by readers and had great information on multiple companies products.
When I am researching I tend to “read deep”. Which for me means trying to read as much as I am able on a specific site.
Specifically, I was reading this report on Tea Tree Oil testing. Plant Therapy's product was found to not be in compliance. What amazed me, instead of arguing, they pulled ALL of the Tea Tree products off their website and from Amazon. When Plant Therapy got their new batch of Tea Tree oil in, they paid for the independent testing themselves. Which was then found to be in compliance. This is the type of customer care that I was looking for. I am not saying other companies wouldn't do the same, I was just impressed by their personal response.
The other incident was a slight mix-up on a personal Amazon order. I ordered the Top 6 Essential Oil Sampler Set (Lavender, Eucalyptus, Sweet Orange, Peppermint, Lemongrass and Tea Tree) from Amazon. I found out that the boxed set I received had Peppermint (mentha arvensis) instead of Peppermint (mentha piperita). I contacted Plant Therapy and they simply sent out the proper bottle to me in no time flat.
You are able to order these items at Plant Therapy's website (free shipping in the United States). If you sign up with your e-mail you will get a $5 off coupon to use on your order. They are linked above.
I now have their products listed on my Perky Prepping Gramma's Store Amazon associate site (free shipping and the same price on products as from the company direct).
 
In addition, I have used essential oils for: Making toothpaste, Two salves: Tea Tree Oil Salve and Peppermint Oil Salve,  and in my DIY shampoo and conditioner.
Now I am going to take my shower and use the Pain Aid Roll-on.