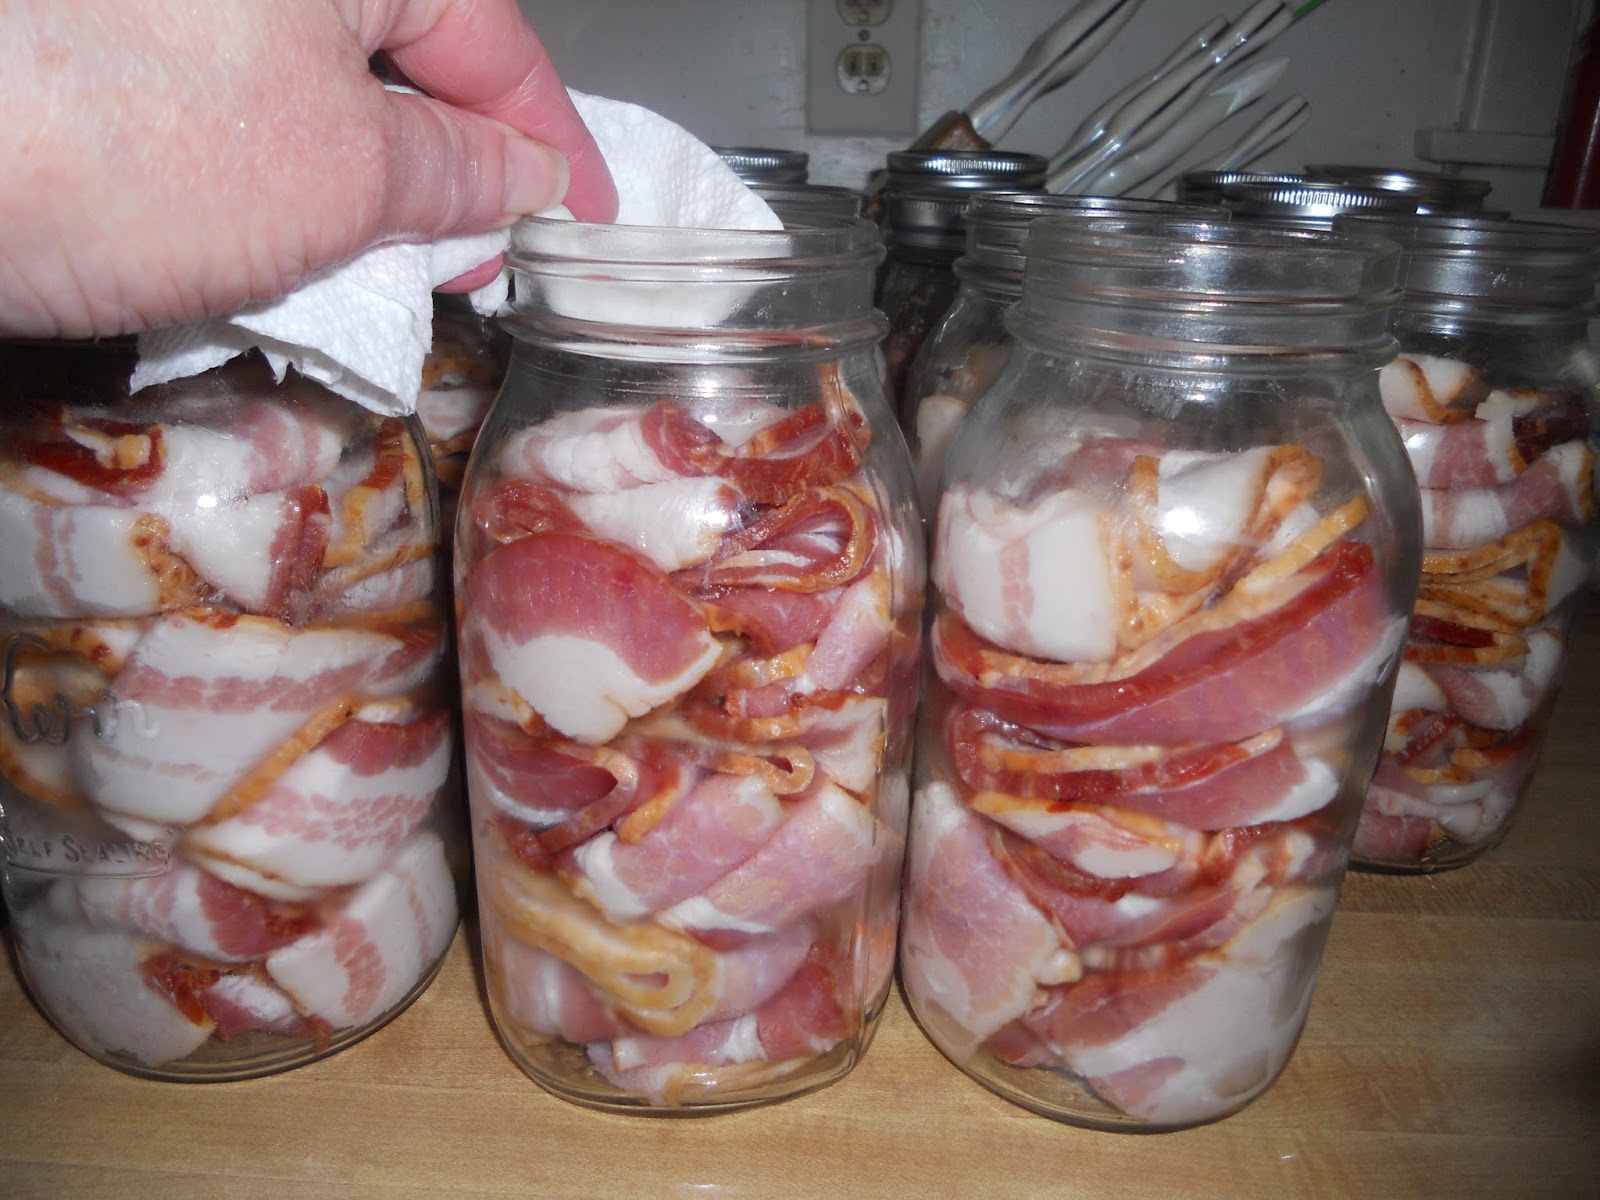
Ah, pressure canning bacon. Another controversial subject.
First,
read your book that came with your pressure canner. It has exact
directions for canning, especially since various canner have
different equipment on them to determine pressure etc.
I
have read the information list at the National Center for Home Food Preservation many times and I recommend that you read it also to
make your own informed decision about various canning guidelines. For
me, I decided that though some PEOPLE don't recommend pressure
canning bacon, I couldn't find any specific prohibition from the
NCHFP.
Now lets talk bacon. I am cautious to sterilize everything along the way and
aware of allowing enough head-space
to keep the fat content from creeping up the jars and disturbing the
sealing process. With that said, did I mention you should read the
guidelines yourself
to make an informed decision?
In February 2013 I did my first
batch of pressure canned bacon. In my opinion, it was a lot of work.
It entails wrapping the bacon slices in parchment paper. It you want
to try that method, I will have a link at the bottom of this post.
I
thought since I recently got a shipment of Zaycon bacon, I would try
another method. I like this process better. I found that a higher quality bacon does better with pressure canning, that why I plan to only use Zaycon bacon from now on.
I
am not
going into every detail of canning since you are going to be reading
your book; I am giving general instructions and I want to define some terminology that I didn't
understand when I began to can.
First
get all of your canning equipment, jars & lids clean, together
and ready to use. I also thoroughly clean and sanitize my counter top
and sink. I normally keep all my canning equipment together in a bag
and inside of my canner when not in use.
That way I don't have to go
looking for everything when I start canning. I also have an “s”
hook, that I hang the bag from off of a shelving unit close to where
I am working. I actually keep two sets of equipment in the bag, in
case I happen to drop a utensil,
I will have the back up already sterilized and available.
Link
to see how I do this: Getting Started and Organized.
I
get a pot of just under boiling water (180 degrees) going on the
stove. I
added my lids and rings. These need to be in the very hot water for
10
minutes.
I
know my Presto canner will hold 7 quarts at a time, so I work with 7
jars at a time.
I
set the clean jars on the counter, then started to add the bacon. I
opened that package and folded the bacon lightly in half, then
quarters & placed that piece in the canning jar.
I laid two one
direction, then stacked the next layer at 90 degrees. I gently tapped
the bacon pieces down, leaving at least an inch of head-space
at the top.
This
diagram from Presto shows what various head-space amounts look
like.
Then
clean the tops of the canning jars with a paper towel (or a clean
cloth) and vinegar.
Add
a lid and ring to each jar from
your hot water.
Tighten the ring on the jar to “finger tight”. Now
what does “finger tight” mean exactly? From
Clemson.edu “A practical way to determine if the lid is fingertip
tight is to place the band on the jar, turn it just until you feel
resistance, then turn the band one-quarter turn more. For beginning
canners, it may help to mark the band and lid with a marker at the
point of first resistance and at the point that represents an
additional quarter turn and to then turn the band to that point.
Place
your jars into your pressure canner and add the appropriate amount of
water, based on your canner. On my Presto there is a line inside the
canner.
Check
your lid to see if you are able to see air through the vent hole, and
then place your lid on your canner
and secure. Set heat to high and continue heating until a steady flow
of steam comes out of the vent.

Set timer for 10 minutes, let the
steam continue to vent for 10 minutes.
After
the timer goes off, add appropriate weight. Check your canning book
for your weight pressure based on the altitude of here you live. Here
is a link to an altitude chart.
FOR WEIGHT ONLY CANNERS:
After adding the weight, keep temperature up until your weight
jiggles. A jiggle is when the weight on top spits, sputters or wiggles a little. After the weight starts to jiggle, reduce your heat until the weight is only jiggling 3-5 times a minute. This take s a little practice. Keep an eye on your pressure gauge and/or weight during the process. You are able to reduce the heat, as long as you are maintaining the proper pressure. With my stove, I am able to reduce the temp. to low during this time.
It all depends upon your stove.
FOR GAUGES: after adding the weight and gauge, bring the
pressure up to the appropriate pressure (again check your book)
Then
reset your timer for the proper time for what you are canning. It
will vary depending on what size jar you are using and what you are
cooking (again check your book)..For this batch we are doing quarts. For my altitude it is 10# of pressure, cooked for 90 minutes.
When
the timer goes off: turn off the heat and gently move the canner from
the heat.
DO
NOT REMOVE WEIGHT, GAUGE OR LID.
Let
rest until the pressure gauge drops down to
zero or
when the little button drops down.
Remove
the lid carefully, turning it away from you when removing the
lid.
Smile
when you start to hear the pings!
Gently
remove the jars from the canner and set on a clean, dry dish
towel.
Let them set for awhile. If a jar does not seal
(ping), say in an hour (?) put that in the fridge and use it.
Let
rest away from drafts. While
not completely necessary, I cover my jars
with a towel to
help protect them from drafts.
You
put a lot of work, time and money into pressure canning food. When
you are done canning, you just put the jars on the shelf, right?
WRONG! I often say "there are questions that newbies don't even
know to ask". I don't believe I have seen a list of the simple,
yet very important steps to take after you finish a batch to optimize
and protect your hard work. In my mind each of these little steps are
to protect the safety of my family & are easy to do. Check
this link for important steps often missed. Testing 1, 2, 3...
Check
the lids periodically over the next few days, weeks to insure the
lids remain
sealed.
There
you have it. Here is the very same bacon cooked up. I simply open the jar, gently unfolded the bacon strips and laid them out in a baking dish and baked at 350 degrees until golden brown and crispy. Lay out on paper towels to absorb the extra grease and it is ready for eating! Soon, I will be sharing a few meals I plan on making from my food storage using bacon.
Here
is the old method I used to pressure can bacon: How to Can Bacon with Parchment Paper.
I
participate in the Amazon Associate program, where I receive a small
% commission for linking products that I recommend. I only recommend
products I personally used and like. Your
support is very appreciated, anything
you choose to purchase through my link, is helping me to be able to
share more things that I do with you. Perky
Gramma Teaches Amazon link.