Various
people are known for different skills or areas of self-sufficiency. Mine is
being a newbie, who is willing to learn and try. That being said, I
am very literal when it comes to storing what I use (and using what I
store).
One,
I think storing chocolate is extremely important. I eat; therefore I
store! I need to add here that I have better results with dark chocolate than milk chocolate.
Two: I store a LOT of coffee, since I get a pound every week for free, I store, therefore I drink. The coffee is for another post. This cache of chocolate is stored in the cabinet under my tv, which happens to sit on 110 gallons of water storage...
Two: I store a LOT of coffee, since I get a pound every week for free, I store, therefore I drink. The coffee is for another post. This cache of chocolate is stored in the cabinet under my tv, which happens to sit on 110 gallons of water storage...

When you purchase your Food Saver you need to insure that it has an “accessory port”. This is the accessory tube. It is hidden in the bottom of the Food Saver.


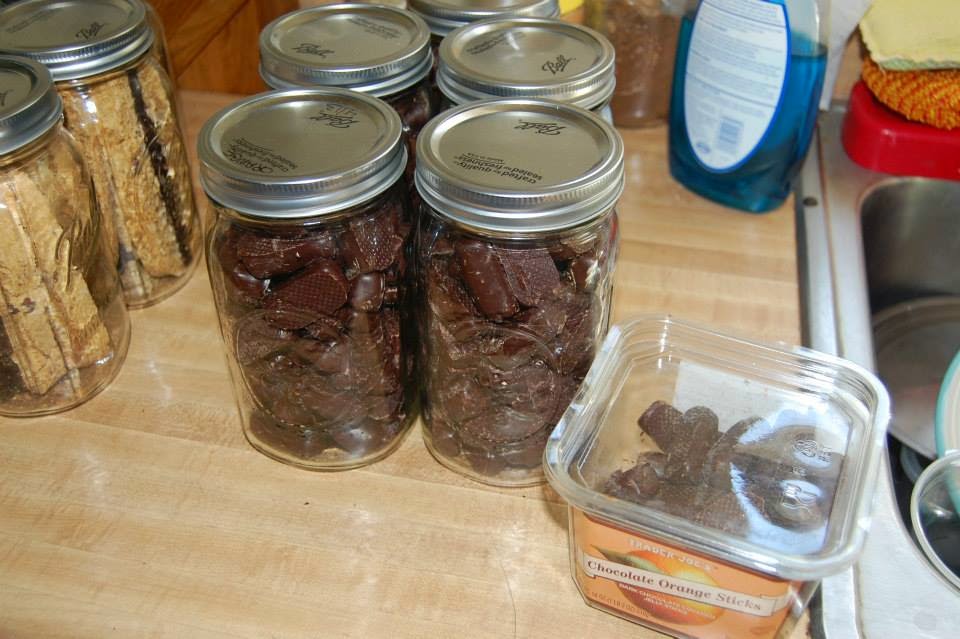
Here are the jars waiting to be sealed...
Now I often will do a large batch of sealing at a time. You simply place the attachment on a jar with a lid (with out the ring), insert the tube into a little hole on the top of the lid attachment & hit the accessory button. When it stops, you remove the attachment. That's it.
Here is an example:

We use our Food Saver Attachments frequently. You can find the attachments for sale on Amazon for under $10 each. I recommend getting both the wide mouth and regular mouth attachment. This is what the boxes look like for the attachments.

Canning
jars are a very cost effective way to store. When vacuum sealed
(which removes the air from the jar) and stored in a dark cool place,
you extend the shelf life for many years.
I recently wrote another post about vacuum sealing jars with with out electricity using a Mityvac Automotive Test and Bleeding Kit
I recently wrote another post about vacuum sealing jars with with out electricity using a Mityvac Automotive Test and Bleeding Kit
TIPS:
Storing powdered cocoa: Hershey Company's FAQ they state "Cocoa is considered a non-
perishable item which should maintain quality if stored at room temperature in a tightly
sealed container." Sounds good to me. I have heard as long as it is kept in a cool, dark,
dry place it lasts a very long time.
I am now getting my Hersey's Dark Cocoa from Amazon.
If you are having difficulty getting a seal, try placing two lids on top, then the attachment. It will only seal the bottom lid.
If you are doing a powder type product, you can either place in individual plastic bags OR add a small coffee filter on the top of the jar to stop the fine powder from being sucked up into the tubing.
Feel free to add our own personal tips here or on Facebook & I will edit this post so we will now have a centralized location to refer people too, who are having questions.
Another tip from Tammy Milasmom: Try taking out the Food Saver attachment's gasket and then reinstalling it. I have to do that constantly to get it to work
.
Storing powdered cocoa: Hershey Company's FAQ they state "Cocoa is considered a non-
perishable item which should maintain quality if stored at room temperature in a tightly
sealed container." Sounds good to me. I have heard as long as it is kept in a cool, dark,
dry place it lasts a very long time.
I am now getting my Hersey's Dark Cocoa from Amazon.
If you are having difficulty getting a seal, try placing two lids on top, then the attachment. It will only seal the bottom lid.
If you are doing a powder type product, you can either place in individual plastic bags OR add a small coffee filter on the top of the jar to stop the fine powder from being sucked up into the tubing.
Feel free to add our own personal tips here or on Facebook & I will edit this post so we will now have a centralized location to refer people too, who are having questions.
Another tip from Tammy Milasmom: Try taking out the Food Saver attachment's gasket and then reinstalling it. I have to do that constantly to get it to work
What I do here is simply share our preparedness journey. If you liked this post we would love it if you joined our Perky Prepping Gramma community on Facebook, comment or share. Plus it would just make my day.
Your
order is so very appreciated, because anything ordered through my
Amazon Associate links helps me to be able to stay home and write for
you.
Perky Prepping Gramma
is a participant in the Amazon Services LLC Associates Program, an
affiliate advertising program designed to provide a means for sites
to earn advertising fees by advertising and linking to Amazon.com.

