Showing posts with label In the beginning.... Show all posts

Wednesday, May 13, 2015

Third Step in Preparing (It's Not What You Think)...

There really is no secret on how to prepare, it just a matter of actually taking the first steps and staying focused.  
Even our government recommends being prepared. They have lists that you can print out or download. Last week I shared what I consider the first steps...
Step 1) 72 Hours of Water
Step 2) 72 Hours of Food

I would recommend after water & food, start gathering the other items listed: 
Starting with cash on hand. 


Now we didn't start with this amount, we had to diligently save. Personally, from the very start we quickly established using 10% each payday to start our purchases, then increasing another 10% of our earnings for saving for our on hand cash & that is after personally tithing. 


While this is a silly video, I think it illustrates how people often think. If you start with disciplining yourself to set aside real money for your purchases, you will be way more prepared than most. A lot of these items are items you should already have because you are using them. I found that I just centrally located all my items we might need for an emergency. Then you are able to start purchasing the other items with cash:


Recommended Items to Include in a Basic Emergency Supply Kit
This first group are items that I actually carry every day and has come in handy several times. 
Prescription medication & extra glasses 3 days worth stashed. 
Matches in water proof container or lighter(s)
Flashlight and extra batteries
Moist towelettes, garbage bags and plastic ties for personal sanitation

Feminine hygiene and personal hygiene supplies
Paper plates, cups, utensils, paper towels, mess kits
Wrench or pliers to turn of utilities
Can Opener for food
First Aid Kit
Whistle to signal for help
Face mask, to help filter contaminated air and plastic sheeting and duct tape to shelter in place
Local Maps (we keep ours in both cars)

Additional Items to Think About:
Sleeping bag, blankets
Battery powered or hand crank radio NOAA Weather Alert Radio. I would highly recommend the hand crank radio, that way you don't have to depend on having fresh batteries.


First Aid book
Documents
Activities
Change of sturdy clothing, shoes. Cold weather clothing

Just take these steps and establish your 72 hour kits. Then you will be able to breath easy as you continue on your journey of being prepared.
Next, it's time to look at tools for preparing.

The first tool I would consider getting is the FoodSaver and here is why:
Why the FoodSaver is the First Tool I would Buy


What you see here, is what I actually do. If you liked this article, please feel free to join our community (Perky Prepping Gramma) on facebook & keep up to date on things posted.  Thank you. ~Perky Prepping Gramma
Also I participate in Amazon's associate program, where I receive a small percentage of recommended purchases. I only recommend things that I have used and like. There is no additional charge to you.


Thursday, May 7, 2015

Second Step for Preparing...

Since we are moving all of our "prepping stuff", I decided I would try to write out posts that will help beginners find a logical plan that works, starting with preparing for a 72 hour emergency situation.


Initially, We made a list and began with the "use one, buy two" concept.
After we first got started we purchased two Mountain House 72 Hour Kits.
Each Mountain House “Just in Case…” 72 Hour Kit contains the following classic Mountain House meals:
 ● Breakfasts:  1) Granola with Milk and Blueberries, 2) 2 Scrambled Eggs with Bacon 

 ● Lunch and Dinner Entrees:  1) 2 Beef Stroganoff with Noodles, 2) 2 Chicken Teriyaki with Rice, 3) 1 Rice & Chicken, 4) 1 Pasta Primavera


Need I mention, that even with purchasing these prepared 72 hour kits, you will still need to have water on hand. But, if you are following the plan here you will already have at least three days supply of water.
Now, you don't have to start with purchasing a 72 hour kit, you can plan out meals for three days for each person. Just think simple, easy...
Food: Tuna, chicken, crackers, mayo. I recommend you actually set this aside so you don't eat through it & not have it for an emergency. 


While you are planning this stage, obviously you want to include infant formula or baby food (do you need to store extra water for your formula?) and diapers if you have a baby.
Don't forget a can opener!  I chose this one because of the incredible guarantee, plus it is made in the U.S.A. Or stock up on your P-38's.


Post: If you need to know How to Use a P-38
Don't forget your furbabies and other animals. Pet food and extra water for them.
For both of these, you might just commit to keep enough extra on hand. Before preparing we would just get dog food when we ran out. Now, we actually have extra stored.

First water...
Second food...
Next the Third Step...

What you see here, is what I actually do. If you liked this article, please feel free to join our community (Perky Prepping Gramma) on facebook & keep up to date on things posted.  Thank you. ~Perky Prepping Gramma
Also I participate in Amazon's associate program, where I receive a small percentage of recommended purchases. I only recommend things that I have used and like. There is no additional charge to you.


Wednesday, May 6, 2015

First, things first...

Imagine the scenario: You have just woken up and you turn on your faucet and there is no water flowing...
What will you do? Do you have water stored? 
I am going out on a limb here. From what I have heard people usually put off getting a supply of water as one of the last things to prepare. You need to really think about this. But, not just think about, actually take the very first step: make the decision to start preparing.
Chances are if you list what you use each day, water is the first thing you use. Know your living situation. Since we started preparing the two times I have had to use my supplies: I needed heat sources (heat pump stopped working over a holiday weekend) & I have used the water during a short term contamination situation.

I will admit it took me over a year to store water. But, we have since made up for that with 6 months of stored water, plus extra for the puppies and for flushing. 

Water The general recommendation is one gallon per person each day. Note that is the bare minimum. I would strongly encourage you to actually store more. Will you need to add water to your food? Will you plan on making coffee? Personally I drink close to a gallon of water a day, I store at least 3 gallons a day for the two of us & additional water specifically for our dogs.

I got these bottles of Deer Park water for $1 each.


Do not get the kind that comes in the milk carton type of container. Too many times I have heard people talk about these containers leaking. 


Don't forget pets. For our puppies I washed out PET containers


This week I purchased another Sawyer Water Filter (left) to add to the one we already own (on the right). 

        
We have already moved our rain barrels and are going to move our in house water storage. That's 170 gallons of water stored.
What you see here, is what I actually do. If you liked this article, please feel free to join our community (Perky Prepping Gramma) on facebook & keep up to date on things posted.  Thank you. ~Perky Prepping Gramma
Also I participate in Amazon's associate program, where I receive a small percentage of recommended purchases. I only recommend things that I have used and like. There is no additional charge to you.
Wait, here is more information on water storage & the next steps in preparing for you to read. 
Here are some other posts on our water storage:
Water Filtration
Water: A Real Conversation
Water Storge Update
Now that you have considered your water storage here are posts for the next simple steps:
Second Step for Preparing
Third Step for Preparing (It's not what you think)

Friday, May 1, 2015

6 Simple Tips for the Beginner Prepper...*

The thing about being a “newbie” is you have a lot of questions. You have questions that you don't even know to ask about. Getting started is deceptively simple.

For us it all started in the fall of 2011, trusted friends gave my husband a book called "Inflation Deception". We had a talk and we then decided to start preparing for the future.
I've always liked to have a “little put back”. Mostly because I hate to run out of something.
So, without even knowing about what “prepping” was, we made a plan. It was a very slow start, because we didn't have a clue.


Our first goal was to be prepared for 6 months here at home. In the beginning, I handled the “home” (beans, band=aids, everyday items, etc.), DH handled the defense (bullets) & the “go” plan. 

TIPS:
1. Make a List: The very first step for me was I simply started by making a list of everything thing we used everyday. Literally, from the time I woke up I wrote down what we used...


Things like: water, meds. (prescription and OTC's), TP, soap, shampoo, conditioner, etc...


This was list “A”. We established that we would set aside 10% of each paycheck for prepping. Slowly, every payday, I added to the “little put back”. I utilized Walmart & Amazon free online shipping. Order it and have it shipped to my home. At this time, also began purchasing items like peanut butter, canned meats (ugh!) and veggies. 

EDITED 040614: The (ugh!) mentioned above is in reference to purchased canned and shelf stable meat products.I tried in the beginning. Since that time I started canning my own meats and it has made a huge difference.
How To Pressure Can Chicken & 12 Nifty Tips I have Learned


2. Start utilizing the "Use one, buy two concept": This is so simple. When you open something, anything i.e. a package of toilet or a new tube of toothpaste, pick up two from the store. If you faithfully use this concept then at the end of our first year you will have at least 1 years supplies of said item stored.


3. Buy large: Toilet paper is something you will use no matter what. I buy the largest package I am able to get.
4. Buy cheap: If there is an item you are not picky about, buy something that doesn't cost a lot. For me, I am not too picky about shampoo and conditioner. So, I buy the least expensive I can tolerate. I didn't go overboard here because I decided early on I was going to develop skills & learn how to make items myself.
5. Buy wisely: Some items I don't compromise with. A lot of deodorants don't work me for or smell to strong for me to use. While I now try to wait for sales/use coupons; here I pay what it takes to get a product that works for me.

6. Think ahead: Now water is one item that I didn't purchase in my normal shopping. Yet, I knew I used it, based on my list. So, I just started added a gallon or two during each shopping trip. The brand I choose cost $1 each and it was in a long term storage container. The ones that are like milk cartons won't hold up for long term storage. Look for the ones that in are PET containers. Just Check the bottom for the code.
The thing about starting your own list is that it insures that you are actually storing items that YOU use everyday. It really works. I have been using this method for several years & I know that I have several years worth of these items stored. If you have questions, ask. There are people who will help you. 


So, this is how our journey began in the beginning. We are currently moving to our new property, which we paid for in cash. I am seeing the fruit of our beginning labors after I am boxing up all our preparations and I feel pretty secure. The hardest part for some is simply taking that first step...
How did you start?

Top Three Picks: What I do here is simply share our preparedness journey. If you liked this post we would love it if you joined our Perky Prepping Gramma community on Facebook, comment or share. Plus it would just make my day.


Your order is so very appreciated, because anything ordered through my Amazon Associate links helps me to be able to stay home and write for you. Perky Prepping Gramma is a participant in the Amazon Services LLC Associates Program, an affiliate advertising program designed to provide a means for sites to earn advertising fees by advertising and linking to Amazon.com.


Friday, October 24, 2014

Taking the First Simple Steps in Prepping

Honestly, I think the first step in preparing is making the decision to start prepping.
I remember so vividly in the beginning not having a clue how to start. I didn't know about prepping or that preppers even existed.
That is the main reason I try to stay very focused on sharing what I am doing. Keeping to the basic principles.

After making the decision to actually start preparing, my next step was I started with a simple list. I got up one morning and wrote down a list of everything I used in that day. Note: I said everything. 
The very first things on my list was toilet paper & water. Water is a very important item to store and often one of the later things that people focus on storing. 

One of the first principles that will help you build up your storage of items your actually use is to "use one, buy two". Now that I have developed the habit, it seems so simple to do. I utilize on-line shopping a lot. While I pulled something from my shelf, i.e. a new bottle of aspirin, I simply go to my on-line shopping cart and add two. I wait until I have the requisite amount to get free shipping (Walmart is $50 of qualified items) and the money (usually on payday) and place my order.


My last Walmart order

Note: I have to tell you I didn't stock Ramen noodles at first, in fact this is the first time I ordered the stuff here. I finally ordered some because Mr. Perky keeps buying them. Obviously he likes to eat them in a pinch, so now I am storing some. 
What else you see here is coconut milk (to round out 144 meals of Thai peanut chicken meals), soap, OTC's and 2 large boxes of baking soda. 

TIP: I signed up for Shop at Home, I link through Shop at Home for my Walmart purchases and receive occasional credits to spend on more preps. Yes, your information is out there, mine is already out there so I try to make my habits work for me.

The bonus of utilizing this principle is that if you have been prepping for a year, you know that you have one years worth or more of supplies. You will find your habits starting to change. 

Do you have a favorite tip to share with a newbie starting to prepare?


I have an online Amazon Associate/store called Perky Prepping Gramma's Store. This allows me to show you the products I have personally own, used and endorse. The cost is the same for you, but I do receive some compensation if you purchase through my store. I always appreciate your shopping.

Tuesday, February 18, 2014

Meals for 12 in a box(es)...

“Meals in a Box” Storage
I tend to store things separately so I will have some flexibility when it comes to making meals later down the road. I don't want to be “boxed in”. 
But, when it is a meal I know we like I “box it in”. I will then store it “12 meals at a time”. The reasoning behind this came from a wonderful post “The Magic Number 12”  on Preparedness Pro's blog. After I hit the goal of one years food supplies stored for DH and me; I am now working on storing meals for 12 people. 
Basically when you have a specific meal you like, work towards buying enough for 12 meals (one meal, once a month for 12 months). Do that 30 times & you have one year of stored food. Simple, huh? Here is one example:
So, if this is one meal, I need to have 48 pints of chicken, 48 cans of coconut milk & 48 packs of the Thai peanut sauce, plus rice.= one meal, 12 times in a year. To expand that:

This is what it looks like on paper:12 (people preparing for) x 12 (once a month for 12 months) x 31 (one month) x 3 (meals a day) = one year of storage.
Note: Currently of the 12 people I am preparing for, 6 are children. When I am storing for the children, I am storing an adult portion for them. While they are young now, if something happens say in five years, they will be teenagers. I want to insure that I have enough to feed them at what ever age.
 I often store these meals in these banana boxes, good movable size for this gramma. I label and date the boxes. 
You may modify it, based on your goals. For example, when I got started I modified it to “6 meals” so I could attain my first goal of 6 months storage goal. Don't forget to add water to your storage as needed.
I will be slowly working on these boxes and will share more as I go along.

Going bananas...

Early on I started using banana boxes for storage. Mostly because it is a handy size for me to lift & I get the boxes for free at work.
Having a portable system was very important to me from the beginning. I knew that if SHTF scenario happened, I would be moving everything possible. It has also come in very handy as I add and move my storage around.Moving 10 boxes compared to 100 jars or cans had been well worth the effort.
These pictures are from November 2012.
My November Goals focused on “Meat & other items that I use at Thanksgiving. So you will see whole cranberry sauce, pineapplemandarin oranges, olives..Various items that are on sale in November & items that I use for the various holiday dishes that my are traditional for our family. I also did a lot of sweet potatoes, since I make at least 10 sweet potato pies for Thanksgiving. I also canned turkey.
Plus I was storing canned soup and Hormel Chili for simple meals. Most of these items were purchased when they were on sale 10 for $10. 
So, I simply put the cans in the box (upside down), mark the “best used by date” on each can. I store them upside down so the tops don't get dusty. I filled each box.


Added a little food grade diatimacious earth (DE) in the box, just in case some little critters think they want to munch on the cardboard.
Write the the appropriate information on the outside of the box. I marked the item, how many cans were in the box and the best by date.Then store it on the shelving unit. Ta! Da!


I am no longer really adding new types of canned food bought from the store, with the exception of “use one, buy two”. Honestly I just don't use a lot of canned food. After I started growing a garden last summer, I am now working more on dehydrating and canning my own home grown veggies.
I saw another tip on using empty soda boxes for storage. i made one up, but that doesn't really work for us, since we don't drink a lot of soda. But, the concept works well.


TIP: Later I went back through and removed all the "pull top" cans. The concern was that those cans had a weaker seal. I dehydrated those fruits and veggies.
Do you have any helpful hints for storing items efficiently? Why not share them back on Facebook?


What I do here is simply share our preparedness journey. We would love it if your joined our Perky Prepping Gramma community on Facebook. I participate in the Amazon Associate program, where I receive a small % commission for linking products that I recommend. I only recommend products I personally used and like. Your support is very appreciated, anything you choose to purchase through my link, is helping me to be able to share more things that I do with you. Perky Gramma Teaches Amazon link.

Friday, January 3, 2014

Getting Started Step 1: Making a list & going beyond

I've always liked to have a “little put back”. Mostly because I hate to run out of something.
So, without even knowing about what “prepping” was, we made a plan. It was a very slow start, because we didn't have a clue.
Our first goal was to be prepared for 6 months here at home. I currently over a year worth of preps. I handle the “home” (food, medical, everyday items, etc.), DH handles the defense & the “go” plan.
I simply started by making a list of everything thing we used everyday. Literally, from the time I woke up I wrote down what we used...
Things like: water, meds. (prescription and OTC's), TP, eye glass cleaner, soap, shampoo, conditioner, toothpaste, toothbrushes, cotton swabs, moisturizer etc...
This is list “A”. We established that we would set aside 10% of each paycheck for prepping. Slowly, every payday, added to the “little put back”.
If I used one, I would buy two. This simple tip is so efficient. Since you are simply adding by what you use, each time you use it; it automatically increases your stores based on your usage. For these items I listed on “list A” I probably have three years worth of these items stored now.
I utilized Walmart & Amazon free online shipping. Order it and have it shipped to my home.
Now Part 2: Simply using this list, I worked at developing alternative back-ups that were more self sufficient. I am still working on that.
Water: Besides having about 6 months of actual water stored in the house, I also have rain barrels to replenish the water supply.
Meds. (prescription and OTC's): Medications are tough. I do what I can. I will note that often (not always) you are able to place your refill order about 10 days early. Utilizing this method will allow you to have some back stock on medications that you need.
TP: While I still keep adding to my toilet paper stores, I do have a back up plan ready. I consider t.p. a luxury that I would really like to have.
I have personal cleaning cloths already prepared. I took some old soft clothes and cut them up into squares. Light colored clothes is for cleaning after urination. Black colored clothes for use after a bowel movement. The black ones could be used by a woman during menstruation.
Each person would have their own set.
There would be two covered, lined pails. This would be a great place to use old plastics grocery bags, if you store them.
Treat the cloths as you would old fashioned diapers.
Eye Glass Cleaner: I kept my last empty bottle and added a tiny bit of vinegar. Now I clean my glasses with that.
Soap: I have about 4 years of soap in my stores. This year I will working on learning to make my own soap.
Shampoo: I no longer store actual shampoo. I now use only baking soda and water to wash my hair.
Conditioner: I no longer store conditioner. I now use apple cider vinegar and water to condition my hair.
For more details: No-Poo How To


I also have learned to make my own natural apple cider vinegar from scratch.

Toothpaste: I have about three years of toothpaste stored. Today I made mt first batch of toothpaste. I read several different recipes and decided to go with 3 T. Coconut Oil, 3 T. Baking soda, a little honey & Cinnamon  Bark Essential Oil to taste. I tried it out and it's not bad. I will give you more updates later.


Toothbrushes: Haven't figured out a back up for this one. I just keep adding toothbrushes to my stores.
Cotton swabs: Again, no back-up. So I keep adding to my supplies.
Moisturizer: I no longer use or store my fancy $17 moisturizer. I now use and store coconut oil. I use coconut oil for so many things. 

Monday, November 11, 2013

In the beginning (part 4)...

There were three things that really helped to establish how I approached my preparations. Budgeting, challenges and goal setting...
These things help me stay very focused on what I am doing. It allows me to be actually be doing stuff, working towards our goals every week. Not haphazardly, doing things here and there.
Very early on, I started working with a specific percentage of my income to be dedicated to my prep's.
My budgeting started out something like this, 10% for my tithe, then 10% for prepping & 10% for savings. The savings would be cash on hand for big purchases (i.e. Zaycon chicken or sales on canning jars, lids). Then I used the other 70% for everyday, monthly expenses. When that runs out, I am done. This extra 10% for saving quickly added up. We also have worked towards having a least two months cash on hand at all times in case there is some type of financial collapse (either the government, banks or loss of our jobs).
NOTE: If you have a belief system that doesn't believe in tithing, I still encourage you to develop the habit of giving to others. It is my opinion that whether it is tzedakah or mitzvah  (I hope I am getting the terms correct, if not please forgive me), or simply giving to charity; I think it changes your outlook in life.
Next, I like challenging myself (and others). I once took a challenge where I was only allowed to spend $250 for one month. It was a very eye opening experience. After pre-paying the monthly bills (which we were allowed to do),
What I learned from this challenge, was that there was a lot of extraneous spending in my life. For example, I ate out several times a week. Since then, I may still get take out or delivery, but it is only maybe once or twice a month max. What changed at that point, was I decided I could truly budget 20% of my income for prepping. I have learned something every time I take a challenge.
Next, I settled in on setting monthly goals.
I quickly decided to establish monthly goals. Each month there is a goal of “Meat (canning) & Something else”. Here are some examples from last year, when I was getting started.
November: “Meats & Thanksgiving items”, this would be all the items I use for our traditional Thanksgiving meal. Like right now, I am buying (and storing) various items like, pineapple, mandarin oranges, marshmallows, nuts, cranberry sauce, etc. Plus, this is my second year doing this, so I will be testing out what I stored last year.
December: “Meat & Christmas items”, this included our traditional Christmas Eve party of special foods. On Christmas Eve we each get to choose a couple items that we just don't get through out the year, either because they are generally too expensive or they don't fit into our lifestyle now.
January: “Meat & Water (storage containers & filtration)”
February: “Meat & canning butter”
March: “Meat (corned beef and cabbage, Zaycon chicken breasts) and waxing cheese”.
I plan based on seasonal sales & what I want to learn next (I have an ongoing list of things to learn).
It has been very helpful for me to post my goals at the beginning of the month & a review at the end of the month. Doing this keeps me accountable. I focus on posting the things that I am actually doing and don't post a lot cutesy stuff or re-posts of things I am not doing.
I think one of the biggest steps is actually deciding to make preparing a priority in your life and then doing something about it.
I am extremely dedicated to helping the newbie get started. Since we are on this journey together, I will throw this challenge out there: Are you ready to get dedicated to your preparations? How do you plan on doing that?

Here are links to the first three parts of how I got started:


Friday, October 4, 2013

Making the decision to start prepping is the first step & the second step...

Let's start at the very beginning, a very good place to start.
When you read you begin with A, B, C.
When you prep you begin with "use 1, buy 2 (or more)".
When I started, I had no idea what I was doing. I didn't know there were other people doing this, I was clueless. I simply started with my goal to "put stuff back in case".
For me,one of the most important things I feel I did was I made a comprehensive list of what I used everyday, starting from the first thing in the morning.
Toilet paper, water, OTC's, soap, toothpaste, shampoo, conditioner, deodorant...
1. The next time I bought toilet paper, I bought two (really big) packages.
2.. I started with getting some gallons of water for $1 and setting them aside.
3. I already utilized Walmart.com for shopping (I don't like to shop at all). So I would put things in my cart online times two (OTCs, soap, etc.). On payday, I would place the order & have them ship the order (over $45, they ship most things for free).
 For the things on the list, I started dating bottles and such with a sharpie to see how long they lasted for us. It helped me estimate how many I would need for a six month supply, 1 years supply, etc.
I found that deodorant last about 6+ weeks for me. So, right now I have about 2 years of deodorant stored.
4. I started to do the same thing with food. Boxes of cereal, cans of tuna, cans of chicken,
If you are completely a newbie & haven't made that decision to get started, please take that first step & make that decision do. There are many here that can attest to how their "preparations have literally saved the day". Don't wait until it is too late.
Come out of the closet & state so on the facebook page; that you are really ready to take the second step...commit to buying two of everything you use as you stock up.
Remember we are all here to help out.

Sunday, September 8, 2013

Newbie reloading...

DH is extremely knowledgeable & I (we) have counted on his expertise to build this area of our (& our team's) preps. It's not something you pick up overnight, he has been doing this for years. But, I am learning there are lots of people out there, like me, that are "newbies" in a lot of the areas of being prepared for all sorts of emergency situations, up to and including when the stuff hits the fan. I also know that there are people out there that are doing this on their own. Plus, I recognize that there may be a time when DH is not around to take care of this for me. So, this week I am continuing my newbie journey & adding "reloading to my list of newbie activities. This weekend I started the journey as a REALLY newbie reloader. Ready to follow?
I believe that everyone needs to have the references and supplies to do this for them self. As with anything, it takes time & practice to learn a new skill. Again, if you wait until a time of emergency, you won't have the skill OR the supplies. 
First, you need books to help you learn, then is a ton of information like charts that help you determine what type of powder, how much powder to use for a specific bullet weight and velocity.
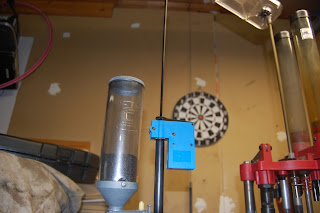
Our Dillon 550 Progressive Press

Added primers...we ran out during practice.


Step 1. put in a shell (brass) into the slot. When I pulled down the handle it deprimed, sized & primed. Then you advance the rotating thingie (rotating shell plate) by hand.. 

2. The next step adds powder when you pull the handle down. Then you advance the rotating shell plate by hand.

3. Add a bullet on top of the brass casing, 

4. Pull the handle and it pushes the bullet in and crimps the bullet in place. 

See, it's a reloaded bullet. Then you advance the rotating shell plate by hand. Which will eject the newly reloaded bullet out & into  collection bin.

Check to insure the primer is there.

That's it for the.38 specials.
This with all stations loaded.
Ta! Da!
This is just the beginning of the journey...