Wednesday, October 21, 2015

For Tammy (Tick Repellent)

Part of our morning routine is getting the dogs really for hanging out in the yard. One of my concerns when we moved to the farm was ticks. Obviously nobody likes ticks, so I did some research.
In my reading I found that the following essential oils were recommended as helpful as a tick repellent: lavender, lemongrass, citronella, eucalyptus, rose geranium and cedar wood. 
Or you could try Insect Shield which contains the Pure Essential Oils of: Citronella, Eucalyptus, Cedarwood, Lemongrass, Lavender, Litsea, Tea Tree, Patchouli & Catnip.
Pretty basic, I filled my bottle with the fractionated coconut carrier oil & because they have sensitive noses added enough drops of oil that I could just smell it. I always add a carrier oil to extend the oils efficacy.  I apply it to the napes of their necks and bum.

All I will attest to is that I was using it for weeks and then got out of the habit. When I was using it, they didn't get any ticks. When I stopped, they got a tick. Now we will use it until the first hard frost.
Yes it is safe for people. 


I participate in the Amazon Associate program, where I receive a small % commission for linking products that I recommend. I only recommend products I personally used and like.
Your support is very appreciated, anything you choose to purchase through my link, is helping me to be able to share more things that I do with you. Perky Gramma Teaches Amazon link.


Monday, October 19, 2015

How To Restore Vintage Linens & Things...

When the "s" hits the fan no matter how much toilet paper, paper plates, napkins and such you manage to store; eventually you will run out of paper products then the "s" could really be a problem. That's why it is important to think about storing cloth items now.
Don't get me wrong, I still store some paper products but I am actually storing a lot less now. I am converting to using cloth for a lot of everyday uses and working on skills like how to clean the stains.
Many of you may already be storing personal bathroom cloth. When I was getting rid of a bunch of clothes, I saved soft items in black, white and grey. I figured each would serve a defined purpose.


Then I happened across a large box of vintage linens.
Antique is mostly defined as more than 100 years old (unless it is a car). Vintage is a loosely used word - so for your edification my definition here, I am cleaning vintage 1940's linens from my MIL. As I transition from less paper to more cloth, I thought now would be great time to start work on cleaning the stains on these treasured linens.
One of the first steps for was determining just how important these napkins, tablecloths and hankies were. The only real value for me was sentimental, they are not antiques & I was planning on using them. So, I was willing to take chances and some losses were acceptable.
Like always I did a lot of reading. One of the most helpful things I read wasn't from a blogger, but from an anonymous comment:

I am a studied archival linen purchaser/collector and do not recommend any hydrogen peroxide or related peroxide products, +bleach, or any man-made definably chemical-based formulations to wash or treat linen and/or related fine cottons.
Use of these products creates irreparable hardship on the fibers and you will notice shortly thereafter that the texture of the article(s) will have changed (first detected to the touch, or ‘feel’ as it is deemed) then over time the fabric in question will begin to break and separate in the form of small holes, frayed/worn edges which often appear at the edge-seams or openings of your fabrics, garments or bedding material.
Vinegar, blueing liquid, buttermilk, lemon juice, salt soaks and mild ph detergent soaks (no extreme hot water temperatures must ever be employed) is best recommended. Wash fabrics on the gentle cycle of your washing machine using only a ph balanced soap like “Zero” or equivalent ph balanced soap.
Sun bleaching and/or hang drying is always best for archival fabrics, including natural linen or cotton. Caution: Never use Sun Bleaching if the fabric has been dyed–vegetable dyes will readily fade with sun exposure. Often antiquated quilts have depreciated in value considerably for oversights such as sun exposure and related sun bleaching.

Basically I started with the least harsh method I could find and worked my way up to soaking in bleach. The entire process took  a long time, but eventually I was able to set up a system.


Buttermilk (Step 1)

1 Gallon Water
1 Quart Buttermilk
1 TBS Fresh Lemon Juice

Soak items in the buttermilk recipe up to 24 hours. I added a plate in the pot to weight down the linens & to keep submerged in the solution. 
Rinse twice, then launder.


Step 2 When that method didn't work, I then used a gallon of water and Oxi-Clean. Soaked for 6 hours, rinsed twice, then laundered.

Step 3 Then I use an all fabric bleach and a gallon of water. Soaked for 6 hours, rinsed twice, then laundered.


By the time I reached this stage, I was all in. There were a lot of tough stains.
Step 4 I graduated to a bleach pen. I let that set for awhile and there wasn't any improvement I went directly to a cup of bleach in about two gallons of water. This was used of course with only the all white linens.


By this time, I manage to salvage almost all the linens. There are a few dots of stain left on a few of the linens and I lost about 4 pieces to deterioration of the fabric. Yet I would still be able to use these pieces. Since I went into this knowing I'd lose a few I was comfortable with the outcome.


Here is why I went to all that trouble. My picture parade of some of the fun and great pieces I am now going to be able to use.


What I do here is simply share our journey. We would love it if your joined our Perky Gramma Teaches community on Facebook.
Some of the items I have used this week.


I participate in the Amazon Associate program, where I receive a small % commission for linking products that I recommend. I only recommend products I personally used and like. Your support is very appreciated, anything you choose to purchase through my link, is helping me to be able to share more things that I do with you. Perky Gramma Teaches Amazon link.


Friday, October 16, 2015

How To Think Like a Prepper

When people are preparing they often look for the "ultimate list for prepping". One of the most valuable lessons I have learned in my prepping is how to develop the thought process of prepping.
First you just need to start preparing. Storing what you use and use what you store. We have all heard that.
Instead of trying to find that ultimate list of what to store, I want to encourage you to create your own list.

I am going to start gearing towards developing how to think like a prepper. I hope you will find that this will be a much better fit for you and your family. Today I am sharing how I determine what spices we store & in what quantity. 


Think Prepping Spices

1) Use: First make a list of what spices you use. Just go through your spice cabinet. Those old spices from 2006, guess what? You probably don't need to store them. What do you buy all the time? 

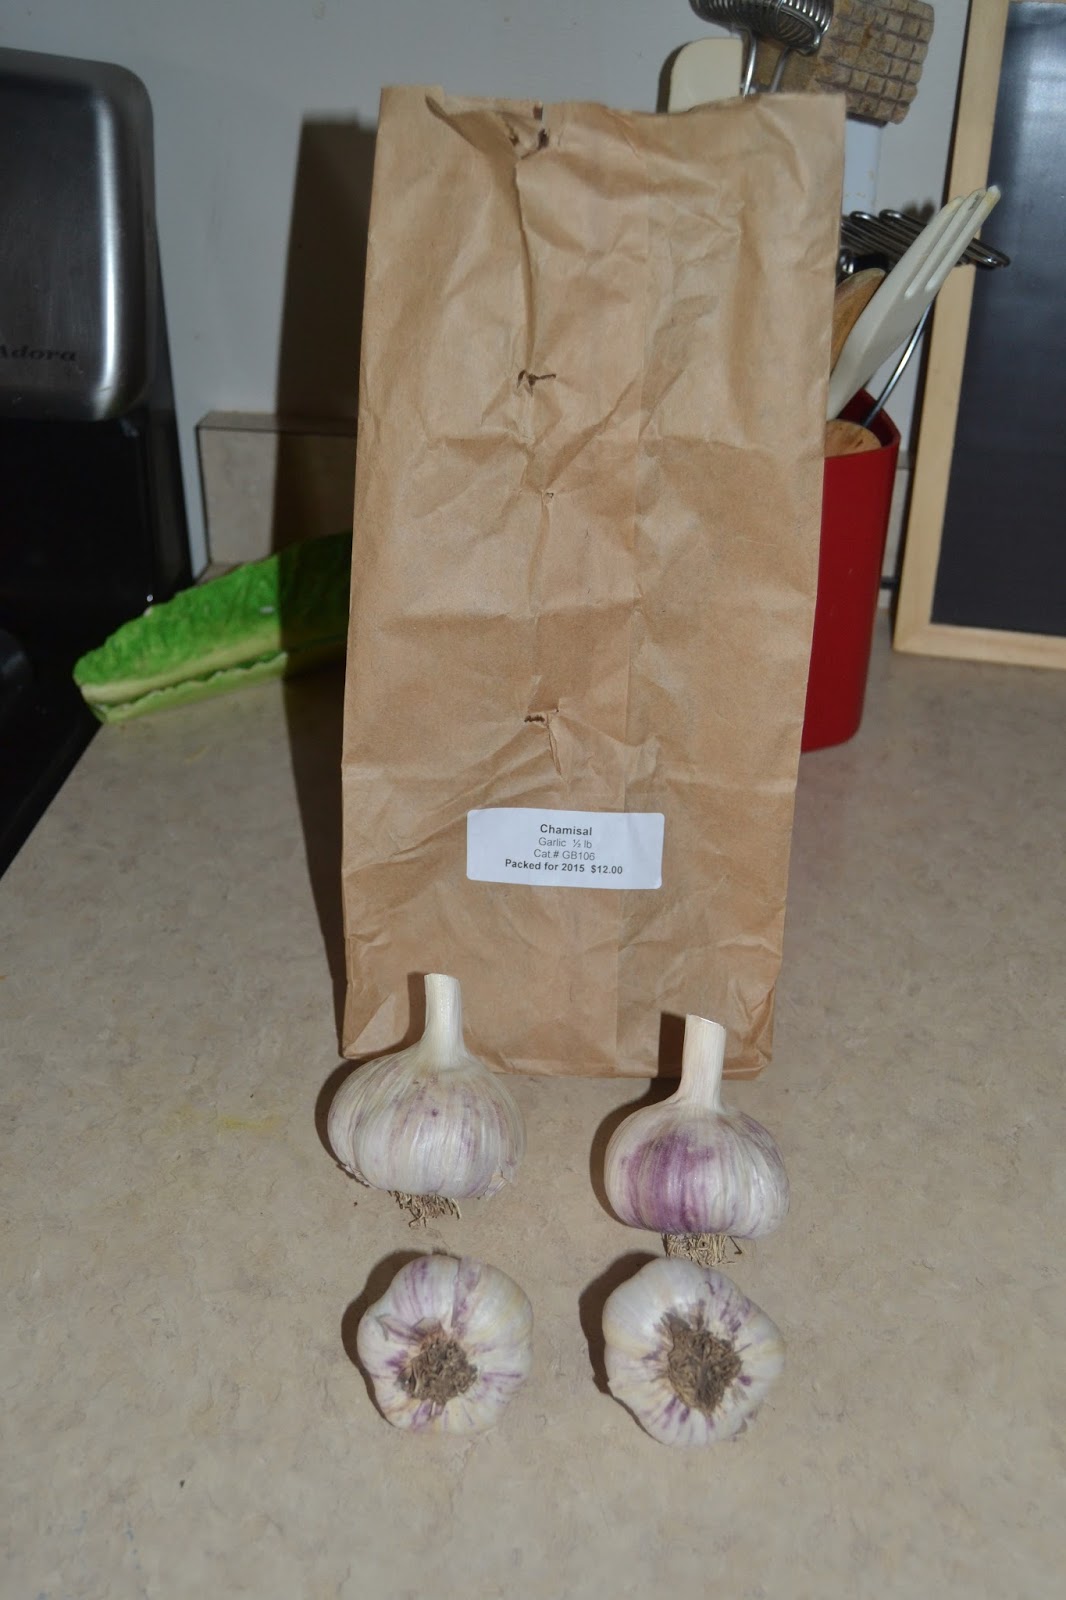
2) Grow: Are you able to grow that particular spice? If you are able to grow it, then get seeds and start growing. Chilies, garlic, thyme, oregano, mint..only you know what you use all the time. For example, I have been getting home grown chilies from a friend. I have been dehydrating them and storing them. I will be growing them next summer. Here are the garlic bulbs I ordered from Baker Creek Heirloom Seeds to plant this month. 


3) Buy: Here is where I have several spices that I am not able to grow based on my location. Some of these are critical & I purchase them based on how much I believe I will use. Some things like salt & pepper, I buy in bulk and store and continue to add more to my preps. Because of the multi purpose use of salt, I will probably continue to add to my preps forever.
For other important but less utilized utilized spices I buy whole in bulk with a focus on organic.  The way I look at it, I might as well get a pound of something and store it properly rather than buy those little bottles. Usually these are more expensive. Here is one example: whole cloves. .62 oz of whole cloves in a small bottle is $2.53. Whereas 16 oz certified organic whole cloves is $24.95. Now I am not great at math, but you can easily see that the 16 oz is way more cost effective. Plus, I have determined that one pound of cloves certainly will last me my lifetime if stored properly. Just a few things on this list for me is cloves, allspice, cinnamon, vanilla beans (to make my own vanilla extract).


4) Store: Then what I store & how much I store is what I have determined from an actual list of items I know works for our family.
Let's start with things I have determined I am able to grow. 

That photo above is an array of various chili peppers I have. This last week I dehydrated some hot peppers.


At this point I simply vacuum sealed them in a small canning jar after they came out of the the dehydrator.
Recently I also added a pound of organic whole cloves to my preps.


Planning to grid your spices. Beside a salt & pepper mill, I also have two mortar and pestles. First as a back up, but I also currently have mine designated: one for baking spice & one for hot spices.


Last but not least, don't forget about plan, prepare for and learning how to vacuum seal when the grid is down.

Hopefully this was helpful. Today I have a big list of the items I have purchased and used. First these are just  few of the spices I have ordered:


Yes, I have two dehydrators, two vacuum sealers and a MityVac


I participate in the Amazon Associate program, where I receive a small % commission for linking products that I recommend. I only recommend products I personally used and like. Your support is very appreciated, anything you choose to purchase through my link, is helping me to be able to share more things that I do with you. Perky Gramma Teaches Amazon link.

Thursday, October 8, 2015

Meeting Andy the Chicken Whisperer...

My girlfriend, two young ladies and I spent the evening listening to the "Chicken Whisperer" chat with his Georgia  charm and wit - about raising chickens. I didn't know what to expect, but I had an absolute blast. Couple of special notes. I LOVED the way he interacted with the young people there. you certainly are able to tell he is family man, he even has his family traveling with him on this tour.
I learned quite a bit, but I also was amazed with how much I had already learned about raising chickens. You know I have had plans for some time to be a self sustaining farm and one of the first things I want is chickens.
He just comes across as a man who loves what he does and also doesn't beat around the bush with his knowledge on a wide range of topics. The event was hosted by one of our local Coops to include a Poultry Workshop, Book Signing, Pictures & Autographs, Q&A, 
Everyone in attendance received a FREE Chicken Whisperer Magazine & Bio-security Booklets from the USDA. The booklet has update to date information of securing your livestock from disease, a hot topic these days.


I really like getting to meet real people and Andy is real. Added bonus,
 he was very respectful of the prepping community. He had recently spoke to a group of preppers. 
I picked up his book "The Chicken Whisperers' Guide to Keeping Chickens: Everything You Need To Know...and Didn't Know You Neded to Know About Bckyard and Urban Chickens" and though I haven't finished it I would recommend his book. He is just full of prctical tips.. I recommend you like him on Facebook (Plese tell him I said "hi")., read his blog, sign up for either his hard copy magazine or FREE digital magazine. He also does a radio show.


I am so grateful I was able to attend this event locally. Check his event schedule, he may be coming to a town near you. I am now  a BIG fan of the Chicken Whisperer.

His book I bought tonight available at a less expensive price on Amazon:


I participate in the Amazon Associate program, where I receive a small % commission for linking products that I recommend. I only recommend products I personally used and like. Your support is very appreciated, anything you choose to purchase through my link, is helping me to be able to share more things that I do with you. Perky Gramma Teaches Amazon link.

Wednesday, October 7, 2015

How To Make Dehydrated Okra Chips

Never in a million years would I have thought I was going to be trying to learn to like vegetables than were an anathema to my taste buds. But, I decided I am a grown up and it is time to start trying things I have always thought I didn't like. I was given some fresh okra and here is how to make dehydrate okra chips.
Vegetable chips are a great way to preserve your harvest through the winter months. Generally speaking most vegetables could be dehydrated in the same manner.
1. First I chose the medium to larger sized okra and sliced them in half length wise. If you will note: while you are beginning to slice the top off, you will feel some are harder to slice through (almost like sawing). I gave those a wide berth since I thought they would be too tough.


you will be able to tell which ones are tougher when you start slicing.

After slicing, I used about 1/4 cup of warmed up coconut oil and tossed that with the spices I decided to use. This time it was adobo and ground Cheyenne pepper. Adobo is a spice blend that I have used for years and use on practically everything. 


Laid the okra on the trays, cut side down and dehydrated them at 135 degrees, mine went for about 20 hours. But, the honest way to learn to dehydrate is just by dehydrating.  I kept them going until the largest one was crispy. For giggles I jut cut up a couple pods in slices to see it the furbabies would like them. They did.


Once they were done, I vacuum sealed them in a canning jar. These types of things are really easy to learn, if you just try.


Items I used today:


I participate in the Amazon Associate program, where I receive a small % commission for linking products that I recommend. I only recommend products I personally used and like. Your support is very appreciated, anything you choose to purchase through my link, is helping me to be able to share more things that I do with you. Perky Gramma Teaches Amazon link.

Saturday, October 3, 2015

"One Year After" more than a book review...

One of my earlier childhood memories was lying on the floor in front of the bookcase, running my fingers a long the beautiful bound pages and wondering what great adventure was inside.
I seem to remember pulling “Atlas Shrugged” off the shelf and trying to read the tome. I was probably about 5 or 6 and didn't get too far...
Needless to say, when I read a book I read from the first page to the last. That includes the forward, acknowledgments through the epilogue. Recently I re-read “One Second After” in preparation for the recent release of “One Year After”, by William R. Forstchen.
Sometimes in apocalyptic fiction you find books that are not well written and filled with pie in the sky prepped situations. Granted we are able to learn from most anything if we put our minds to it. These two books are well written, easy to read and extremely well thought out.
What sets these two books apart for me is first the characters were not prepared. For me, I think I learn more from fiction books where the people are not prepared for what ever catastrophic event occurs. Not only do you see the dire situation of not having food, water or any type of plan in place and the collapse that could ensue; but in the more realistic books you will see the importance of medical preparations as people start dying off as they go off their life saving modern medicines & devices.
You will find my reviews have less with retelling you the actual story line, but why I recommend a certain book.
One of the first things that grabbed my attention with “One Year After” was reading the forward. Mr. Forstchen intended to write a book to expose the real possibility of an EMP event and how our nation as a whole doesn't see the reality and how we are not prepared. His point of view comes from being involved with people in the real world who are involved in the decision making process of being more prepared for an EMP attack on our nation. What he didn't foresee with his first book was he would be be introduced to the prepper community. He started to glimpse into our world, so much so that he eventually married a women from the prepping community (I believe I have that right). He addresses the fact most of the prepping community are just normal people, not like those crazed idiots often portrayed on popular “reality t.v.”.
Now, specifically “One Year After” starts after people have started to work together and the “government” is injected back into the scene. There is a lot of struggle with the concept of being a loyalist vs. a patriot. For me, it caused me to again reevaluate the lines that I would draw in the sand.
Overall it is scientifically on point and based on his research something our nation is ill equipped to handle. For me, I particularly like that he has a background in history that he weaves into the story. At times it is straight up referencing historical battle and at other times it has more oblique references that made me smile. That is why I started posting the hash tag comments like ‪#‎ByTheWatersOfBabylon‬. In the book BBC radio was sending out coded messages to the people resisting the EPTB (Evil Powers That Be - my terminology) that were seeking to control various nations with nefarious intent.
I highly recommend this book because eventually we have to think beyond beans, bullets and band-aids. Again, we could do our thinking when the “s” hits the fan or start building community now. In my opinion, we have to part of the solution. A catalyst for change. We really need to practice the skills of dealing with people in our life now. Dealing with that friend that says they are “coming to our house”. Trying to establish relationships with our neighbors if we plan on bugging in. These are concepts I hope to be exploring more with you soon.

You may be interested in this post on books I recommend: 43 Good Books for Your Library: Reading Can Seriously Damage Your Ignorance

Links for these books and a few others I highly recommend owning. Buy the real book.


I participate in the Amazon Associate program, where I receive a small % commission for linking products that I recommend. I only recommend products I personally used and like. Your support is very appreciated, anything you choose to purchase through my link, is helping me to be able to share more things that I do with you. Perky Gramma Teaches Amazon link.

Monday, September 28, 2015

Autumn Olive Thumbprint Cookies

It is a little hard to explain my strange thing about jam and jelly. If asked I say I don't eat them. It's not that I don't like jam or jelly, it's just I only eat jam or jelly in one item: Thumbprint Cookies. Last year I made some with muscadine grape jelly, which I received as a gift.

Very recently I was given some Autumn Olive Jam, so after a taste test, I was off on another cookie making adventure.
Now, I have only recently heard of autumn olives and in fact it was just over a week ago that I receive that jam. What a difference a week makes. It seems to be a forager's secret, for these tasty treats seem to be a very common wild fruit. I particularly like that they have just a little bit to the taste.
While it is considered an invasive plant, the berries have some very high impact nutritional value, particularly they are high in lycopene.
Then Sunday morning, I was sitting on my back stoop and I spied what I thought may be a bush of this new delightful treasure. I snapped a pic and threw it up on a plant identification site and BAM! After I got back from church they had i.d.'d my bush as autumn olive. I had already tasted them.
Later my grand babies came to visit and we were walking the property and what to my wondering eyes did appear, an entire wall of autumn olive bushes. They enjoyed tasting the olives, particularly my brave youngest who tends to like tart things.


Now I know the secret...

Autumn Olive Thumbprint Cookies

Ingredients
1 3/4 cups all-purpose flour
1/2 teaspoon baking powder
1/2 teaspoon fine salt

3/4 cup unsalted butter, softened
2/3 cup sugar
1 large egg (How To Store Eggs With Coconut Oil)
1 teaspoon pure vanilla extract (How to Make Your Own Vanilla Extract)

1/3 cup jam


Directions
Preheat oven to 350 degrees F. Prepare baking sheets with parchment paper or silicone mats.

Sift the flour, baking powder and salt together in a bowl.

In another bowl, whip the butter and the sugar with a hand-held mixer until fluffy. Beat in the egg and vanilla until combined. Slowly beat in the dry ingredients in sections, mixing until combined..

Roll the dough into 1-inch balls. Place 2-inches apart on the prepared baking sheets. Press your thumb into the center of each ball, about 1/2-inch deep (the thumbprint). Fill each thumbprint with about 3/4 teaspoon of the jam.


Bake cookies for about 15 minutes, until the edges are golden brown, about 15 minutes.
By the end of the day I had picked a large container of these little berries, which I didn't even know about last week ready to learn about making them into jam. That is how I like life - a learning adventure.

What you see here are things I try. If you like this article, please feel free to join our community on Facebook (Perky Gramma Teaches).

Items I have used in some way today:


I participate in the Amazon Associates program, where I receive a small recent commission for my recommendations and there is no extra cost to you. Personally, I only share items I have used and like. Each time you use my store for any purchase it helps make a dream possible. Thank you.