Showing posts with label canning. Show all posts

Sunday, June 14, 2015

Testing 1, 2, 3...

You put a lot of work, time and money into pressure canning food. When you are done canning, you just put the jars on the shelf, right? WRONG! I often say "there are questions that newbies don't even know to ask". I don't believe I have seen a list of the simple, yet very important steps to take AFTER you finish a canning batch to optimize and protect your hard work. In my mind each of these little steps are to protect the safety of my family & are so easy to do.
1. When you are finished canning a batch, gently set them out on a dish towel. Allow them to cool down.
2. Listen for the "pings". Though if you are using Tattler lids, they don't ping.


I tend to tap the lids periodically during this time, just in case there is a jar that doesn't seal. Recently, while I was pressure canning green beans, I found one jar that hadn't sealed. If you do this early enough, you are able to pop that jar in the fridge and still be able to use it. 


3. Let the jars cool down completely. Personally, I nestle the jars and cover with another clean dish towel. This will keep drafts off of the jars. I call this tucking them in and letting them sleep overnight. 

4. The next day, remove the rings & wash the jars. When I am washing the jars I actually fiddle with the lids to see if I am able to pop the lid off. Once, I had entire batch of pork where the lids popped off during this stage. This was the day my DH decided to check our the pressure canner in the middle of the canning process. I was sitting in the living room and heard a distinct change in the pressure! I sprang out of my seat and ran into the kitchen and there was DH holding the pressure gauge in his hand. You can imagine my dismay. This was early on in my canning. The entire batch had to be disposed off. If I had just stored this batch, I may have never known the batch hadn't sealed.

5. Leave those rings off.
For me there could be a chance that a jar contents could spoil, while rare - it does happen. If that happens pressure builds up and the seal will break on the lid.
The broken seal on the lid is the indicator, particularly if it doesn't start smelling, that you need to throw that container away.


6. Then I set them out on the counter for a few days and label the lids with a sharpie. 
At this point in my house, my jars go to a staging area. They stay there for a couple weeks. I periodically check them to insure they are still sealed. The jars are then rotated into storage area. 

7. THIS IS IMPORTANT: Stored in a cool, dark, dry place.
Optimal storage temperature is 50-70 degrees. The cooler the storage area is, the longer the food will last. 
"Do not store jars above 95° F or near hot pipes, a range, a furnace, in an insulated attic, or in direct sunlight. Under these conditions, food will lose quality in a few weeks or months and may spoil. Dampness may corrode metal lids, break seals, and allow contamination and spoilage."
(NCHFP Storing Home Canned Food)
8. Inspect all your jars once a year. 

Just to clarify, for safety's sake you ALWAYS use a new lid when canning. Once I have used a lid for pressure canning & it is in decent condition, it goes into a special jar. I will use those lids for vacuum sealing dry goods.
Last, but not least, did you know that you can actually wash sharpie off of the lids? It takes a little elbow grease, but I do it all the time. 

We are so glad you dropped by to visit today and would love to have you visit our Facebook community at Perky Prepping Gramma


I participate in the Amazon Associate program, where I receive a small % commission for linking products that i recommend. I only recommend products I personally used and like. Your support is very appreciated, Anything you choose to purchase through my link, is helping me to be able to share more things that I do with you. Perky Gramma Teaches Amazon link,
Featured at the Homestead Bloggers Network

Thursday, March 26, 2015

Tattling Great Things about Tattlers...

As in all things, I tend to prepared for a time without electricity. Imagine say a year into an age without power & you have run out of normal canning lids. You are able to still do your pressure canning AND you happened to have Tattler Reusable Lids.
Finished off pressure canning the last of my Zaycon bacon order. This time I remembered to use my Tattler lids. Tattlers are a great reusable canning lid! You read that correctly, the Tattler Lids are specifically designed to be reusable, because they utilize a two part lid system.

Perky Gramma's associates store on Amazon)

Even if you are buying the lids at the regular price, I believe you will recoup your purchase after using them 5 times, then it is like having FREE canning lids!. But I also like to save money. Tattler usually has a good sale on their website around October. That is when I purchased a entire gross of lids & rings. I will announce it as soon as I see the sale. So save up your money.

The method used for canning with Tattler lids is a little different than normal canning lids. Here are the directions from their site.

EDITED: With the Tattlers, I did have a couple failures; but I determined that I got the rubber gasket askew on top which then didn't create a proper seal. So take care when placing the rubber gasket on the jar. ~Perky~


So here is my batch: the lids, holding the hot lids down, tightening the lids down.


Tightening the lids down AFTER canning...


Here is the batch all done!


Saturday, July 19, 2014

How To Dry Can Hamburger

Since it was our first time getting hamburger in our area & I had heard such great things, when DH got home we left one (10lb.) chub out and froze the other three.
We had delicious hamburgers for dinner that evening. I think this will be a tradition now.

On to canning...
I got everything sterilized and ready to go. 
Ground meats need to be pre-cooked. Too many surfaces, nooks and crannies. 

EDIT: Ground meats are a little different. Because of the texture the NCHFP states it needs to be pre-cooked. There are just too many nooks and crevices in ground meat, that COULD harbor harmful bacteria. It doesn't have to be completely cooked. On a more practical note, the other reasons are you want to eliminate as much fat as possible. Pressure cooking with all that fat, creates a very mealy texture in the end product. And lastly, you will be able to add more meat to your jars when it is cooked down some. Hopefully that helps.

So, I took the Zaycon 93/7 hamburger and cooked it up to about medium, since it will cook more in the processing.


There was very little fat, so using the canning funnel I just starting putting the hamburger into the jars. EDIT: Make sure you drain all the fat off that you are able to before you pack. Next time I will be using paper towels to drain off more fat. Lightly packed it in and left about 1” of head-space. Salt is optional.


Then I cleaned the rims with vinegar on a paper towel to get rid of any random fat that may be there.


Added the new cleaned lids and rings and put them in the pressure canner.


Canned them at 10# pressure for 60 minutes (for pints).
After the pressure had dropped I took the lid off.
TIP: I use a dishtowel to help prevent the steam from from getting on me as I open the lid, tilting it away from my body.


Man, they look good. I am going to have tacos later this week and I will let you know what I think of the taste.


If you are a newbie (or not), please feel fee to ask any question on facebook. Or maybe this post will help you out. Calling All Newbie Canners & Ye Who Haven't Canned Yet. There is multiply posts here on canning in general. Just start reading, I promise it is easier than you think. Then share a picture with us on facebook. Happy Canning!

Did you know you could easily can hamburger patties? 
Cool side note: When I checked my Zaycon account today, I found they had credited me a small amount of money. Evidently when your order isn't 40 lbs., they credit your account. Pretty cool customer service in my opinion!


Saturday, July 12, 2014

Calling all newbie canners & ye who haven't canned yet...

When I first started canning, I would get so confused. There were terms I had no clue as to what they meant. Finger tight, head-space, “jiggle”
You would think that the word “jiggle” would be self explanatory. Nope, not so much. Keep reading...
This last weekend I pressure canned some green beans and squash & thought I'd share some general canning information as I went along.
*Disclaimer: Recommendations for canning summer squashes, including zucchini, that appeared in former editions of So Easy to Preserve or USDA bulletins have been withdrawn due to uncertainty about the determination of processing times. Squashes are low-acid vegetables and require pressure canning for a known period of time that will destroy the bacteria that cause botulism. Documentation for the previous processing times cannot be found, and reports that are available do not support the old process. Slices or cubes of cooked summer squash will get quite soft and pack tightly into the jars. The amount of squash filled into a jar will affect the heating pattern in that jar.
Note: This wasn't based on outbreaks of botulism cases, but that they couldn't find the documentation of processing times.

Important lesson here: these are “low acid foods” Low acid food needs to be pressure canned. Let me repeat that...low acid food needs to be pressure canned. 
First, read your book that came with your pressure canner. It has exact directions for canning, especially since various canners have different equipment on them to determine pressure etc.
I am cautious to sterilize everything along the way and aware of allowing enough head-space to keep the contents from creeping up the jars and disturbing the sealing process.
I am not going into every detail of canning since you are going to be reading your book; I am giving general instructions and I want to define some terminology that I didn't understand when I began to can.
First get all of your canning equipment, jars & lids clean, sterilized together and ready to use. I also thoroughly clean and sanitize my counter top and sink. I normally keep all my canning equipment together in a bag and inside of my canner when not in use.

(there is a link at the end of a handy glossary)

That way I don't have to go looking for everything when I start canning. I also have an “s” hook, that I hang the bag from off of a shelving unit close to where I am working. I actually keep two sets of equipment in the bag, in case I happen to drop a utensil, I will have the back up already sterilized and available. Link to see how I do this: Getting Started and Organized.
EDITED (083014) From the Ball fb page: "After extensive testing by our Quality Assurance Team we have determined that it is no longer necessary to to pre-warm lids before use. If you desire, it is still safe to “simmer” your lids before use however, you should never boil them. To prep lids we recommend simply hand washing them in hot soapy water. "


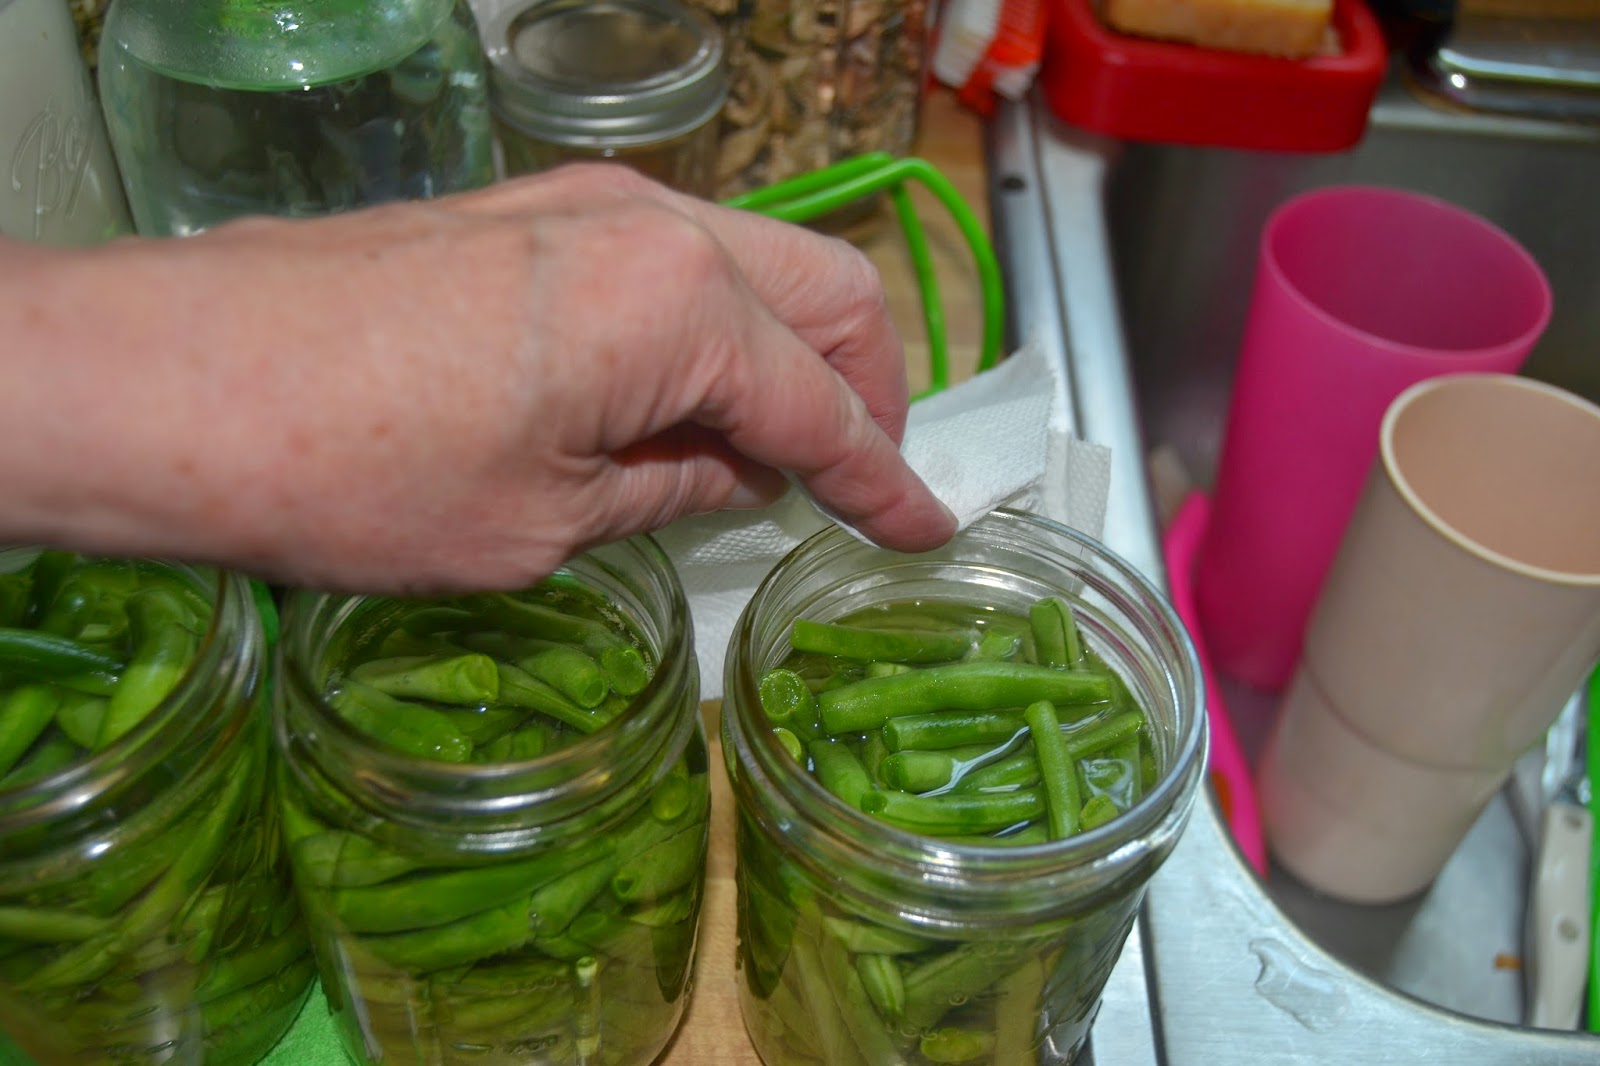
While this is going on I clean my vegetables and prepared them for putting in the jar. This time I used the cold-pack method. Put the veggies in, with the recommended head-space.
This diagram from Presto shows what various head-space amounts look like.


Then clean the tops of the canning jars with a paper towel (or a clean cloth) and vinegar.
Add water, use the bubble popper to release any air bubbles trapped in the jar, and add more water if needed.


Clean the rims of the jars with a towel & vinegar.


Add a lid and ring to each jar from your hot water.


Tighten the ring on the jar to “finger tight”. Now what does “finger tight” mean exactly? From Clemson.edu “A practical way to determine if the lid is fingertip tight is to place the band on the jar, turn it just until you feel resistance, then turn the band one-quarter turn more. For beginning canners, it may help to mark the band and lid with a marker at the point of first resistance and at the point that represents an additional quarter turn and to then turn the band to that point.”

Place your jars into your pressure canner and add the appropriate amount of water, based on your canner. On my Presto there is a line inside the canner.


Check your lid to see if you are able to see air through the vent hole, and then place your lid on your canner and secure. Set heat to high and continue heating until a steady flow of steam comes out of the vent.

Set timer for 10 minutes, let the steam continue to vent for 10 minutes.
After the timer goes off, add appropriate weight. Check your canning book for your weight pressure based on the altitude of here you live. Here is a link to an altitude chart.
FOR WEIGHT ONLY CANNERS: After adding the weight, keep temperature up until your weight “jiggles”. A jiggle is when the weight on top spits, sputters or wiggles a little. After the weight starts to jiggle, reduce your heat until the weight is only jiggling 3-5 times a minute. This takes a little practice.
Keep an eye on your pressure gauge and/or weight during the process. You are able to reduce the heat, as long as you are maintaining the proper pressure. With my stove, I am able to reduce the temp. to low during this time.
It all depends upon your stove.
FOR GAUGES: after adding the weight and gauge, bring the pressure up to the appropriate pressure (again check your book)
Then reset your timer for the proper time for what you are canning. It will vary depending on what size jar you are using and what you are cooking (again check your book).
For my altitude it is 10# of pressure, cooked for 25 minutes.
When the timer goes off: turn off the heat and gently move the canner from the heat.
DO NOT REMOVE WEIGHT, GAUGE OR LID.
Let rest until the pressure gauge drops down to zero or when the little button drops down.
Remove the lid carefully, turning it away from you when removing the lid.
Smile when you start to hear the pings!
Gently remove the jars from the canner and set on a clean, dry dish towel.


Let them set for awhile. If a jar does not seal (ping), say in an hour (?) put that in the fridge and use it.
Let rest away from drafts. While not completely necessary, I cover my jars with a towel to help protect them from drafts. Just so you know, these may be a little mushy in consistency after pressure canning.


You put a lot of work, time and money into pressure canning food. When you are done canning, you just put the jars on the shelf, right? WRONG! I often say "there are questions that newbies don't even know to ask". I don't believe I have seen a list of the simple, yet very important steps to take after you finish a batch to optimize and protect your hard work. Check this link for important steps often missed.
Testing 1, 2, 3...
Check the lids periodically over the next few days, weeks to insure the lids remain sealed.
There you have it. I have used just a few of the terms we use in the canning process. For a more complete list check out the Canning Glossary from the BallCanning website. I read through the entire list, once I found it. Fun to learn things like the name of the “bubble popper”.

If you liked this article, please feel free to like me (Perky Prepping Gramma) on facebook & keep up to date on things I post. Thank you.
_________________________________________________________________________


Disclaimer: The following link is to my personal Amazon Store. I have listed many categories of items used here in this post and for other storage preparations. I do receive a small commission, if you purchase items through my store. BUT there is no additional cost to you. I only recommend items that I use, have purchased & usually include free shipping (for the standard purchase). I do not receive any commission from other stores. Perky Prepping Gramma's Store Thank you for considering shopping with me. ~Perky~

Thursday, May 29, 2014

Step by Step: How to Pressure Can Butter for Storage

Here you go. Canning butter with pictures (March 2013).
This is one of those “controversial” topics. I used an amalgamation of sites, blogs and videos. All experienced canners, to figure out how I was going to can the butter.  
If you are interested, this is a link to my blog on what the USDA says about canning butter. 

First things first. I am a bit of a canning rebel. But, I try to be the safest rebel! Personally, I am not a fan of oven canning butter or just adding lids to hot jars and letting them seal. My reason is that butter is a protein. especially after reading up on what the NCHFP states.
Washed & sterilized jars, the NEW lids, rings etc. We worked with pint jars. We had purchased 15 lbs. of butter. 1 Pint = about 1 lb. of butter.
This time we used salted butter, next time I probably will use unsalted butter.

 
Prepped the center island with our utensils.
Nifty little rubber map I got at Walmart. Came in a roll. Heat resistant. 


Note, all photos are my original photos~Perky Prepping Gramma~ 
Then we prepped the marbles: used to mix up the fats back into the clarified butter after canning. Evidently we did not all use the marbles.
We unwrapped the butter, then melted it down, then simmered for 20 mins. 
Skimming the foam off the top as it cooked and put that into jars to put in the fridge. If you can see to the right...those are the jars with the foam. We didn't pressure can those jars. We put them in the fridge to use immediately. It's very salty, for my taste. I used the foam on veggies over the next week or two.
At the same time we were sterilizing the jars, lids & marbles.

NEAT TIP: Use a saucer to contain the drips as you are transferring the butter from the pot to the jars. Brilliant (from Katzcradul)


First put a marble in the jar, then add butter to the bottom fill line. That would be the lowest line on the top.
Wipe off the rims of the jars with a clean paper towel with vinegar. Add sterilized lids and rims.
 

Double stacked in my new All-American pressure canner.
This is the first time
I used my AA!
Added water to the bottom.
Canning rack on the bottom.
One row of jars on the bottom, another canning rack and yet another layer of jars.
Lid on, battened down. Timer set. This is a protein, so the pints were done at 10# for 75 minutes.


Edited: Probably after about an hour of taking the jars out of the canner, I started gently shaking them every half hour or so. DONE! We got 15 jars canned. Plus two+ pints of the foam that was skimmed off.
Through out the cooling stage, we would shake up the bottles. The marble we added mixed up the fats & clarified butter.


There you have it. The end result (below).
Left-butte
r
Right-foam

I used some of the foam on french toast the next day. Yummy!
As with everything your store, how you store your canned goods is important. Cool (the cooler the better) & dark locations help lengthen the shelf life of any stored products.
Update May 29, 2014: I am still using the canned butter & it is a wonderful addition to my storage. Since I tend to use a lot of butter in my cooking, it is one item I am glad I learned how to store.

Edited 02/07/15: What does the USDA (NCHFP) really say about Pressure Canning Butter?

Edited 06/07/14: Controversy, education and wise choices for your family...

I saved up my money to purchase my All-American Pressure Canner, it was worth every penny saved. I still use my Presto, it particularly great when I am doing big canning days like 40 pounds of chicken.  I participate in the Amazon Associate Program. I receive a small commission on any purchase made through my referral site, which helps me have the time to write the blog. Your support is appreciated!

                 
I really appreciate you visiting and reading my blog posts. Feel free to follow me on Facebook at Perky Prepping Gramma. Please feel free to share with credit to Perky Prepping Gramma, that would include all my original photos. Thanks. (763)

Saturday, May 10, 2014

April Review

I am a little late in showing you what I accomplished in April. But, here it is:
Canned bacon (36 pounds of Zaycon bacon in quart jars) and corned beef (9 quarts)

 
Dehydrated mushrooms & blueberries (got some more free ones from work), vacuum sealed these items.


Always more coffee to store
Added more chocolate &stored more eggs


Plus, I gave away several days of food to a local homeless shelter that takes care of and helps reestablish families in our community. I love that when there is a need, I just go “shopping” in my store!
You are able to find more details on any of these pictures by scrolling back through this months photos on my facebook page.
I am pretty amazed considering this month I injured my back, had to deal with the heart stuff again (currently wearing an event monitor) and spent three days in the hospital for a kidney infection and kidney stones. 
My May goals are Meat & BOB again. I am still working on getting my freezer completely empty of meat, that will take me awhile. Plus, we are still working on revamping our BOB's.
Actually we are revamping our supplies into "get home bags" and "bug out bags". 
Care to share what you have been doing?