Showing posts with label Food Storage. Show all posts

Wednesday, June 10, 2015

Jar Box (TM) Review (Part Two)

I am not obsessed with Jar Boxes, it is just where I am in the process of moving stuff from one house to the other. Packing up canning jars...
First I did random recent jars in my kitchen.


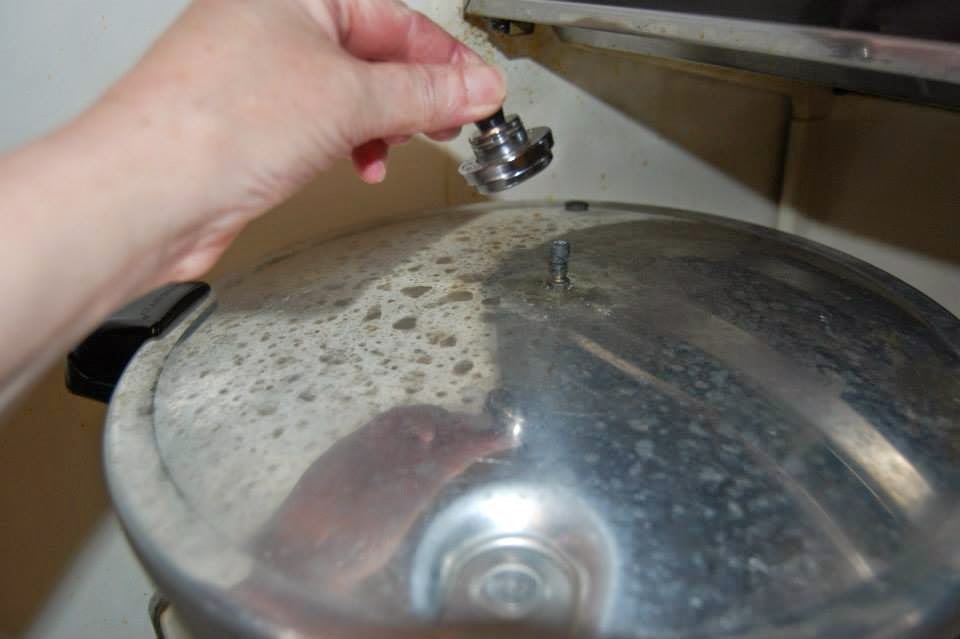
Next I filled up the boxes with my canned chicken. I am glad I have a Zaycon chicken pickup coming soon. I am low on chicken. This has been transported already.


Mostly chicken here.
Next, I unloaded my storage area of snacks, which has loads of chocolate.
Filling more jar box containers:
Various dark chocolate covered candy & biscotti's, chocolate bars (both milk & dark), some cookies, orange slices, m & m's, a few chips & crackers, mocha powder & vanilla bean powder and some dehydrated sliced oranges. Plus, I try to keep specialty holiday items we use like walnuts & dried dates. Same principle applies here of “use one, buy two”. Here they are packed and stacked. 


Here they are heading to the truck for transport.


When I was growing this snack portion of our stores, I made sure we had a least one years worth. This doesn't include store box cake and brownie mixes, plus a lot of cocoa powder.


These are all completely filled now

Here is a link to my initial review post on why I chose to finally get the Jar Boxes: Jar Box (TM) Review (Part One)

Thursday, May 7, 2015

Second Step for Preparing...

Since we are moving all of our "prepping stuff", I decided I would try to write out posts that will help beginners find a logical plan that works, starting with preparing for a 72 hour emergency situation.


Initially, We made a list and began with the "use one, buy two" concept.
After we first got started we purchased two Mountain House 72 Hour Kits.
Each Mountain House “Just in Case…” 72 Hour Kit contains the following classic Mountain House meals:
 ● Breakfasts:  1) Granola with Milk and Blueberries, 2) 2 Scrambled Eggs with Bacon 

 ● Lunch and Dinner Entrees:  1) 2 Beef Stroganoff with Noodles, 2) 2 Chicken Teriyaki with Rice, 3) 1 Rice & Chicken, 4) 1 Pasta Primavera


Need I mention, that even with purchasing these prepared 72 hour kits, you will still need to have water on hand. But, if you are following the plan here you will already have at least three days supply of water.
Now, you don't have to start with purchasing a 72 hour kit, you can plan out meals for three days for each person. Just think simple, easy...
Food: Tuna, chicken, crackers, mayo. I recommend you actually set this aside so you don't eat through it & not have it for an emergency. 


While you are planning this stage, obviously you want to include infant formula or baby food (do you need to store extra water for your formula?) and diapers if you have a baby.
Don't forget a can opener!  I chose this one because of the incredible guarantee, plus it is made in the U.S.A. Or stock up on your P-38's.


Post: If you need to know How to Use a P-38
Don't forget your furbabies and other animals. Pet food and extra water for them.
For both of these, you might just commit to keep enough extra on hand. Before preparing we would just get dog food when we ran out. Now, we actually have extra stored.

First water...
Second food...
Next the Third Step...

What you see here, is what I actually do. If you liked this article, please feel free to join our community (Perky Prepping Gramma) on facebook & keep up to date on things posted.  Thank you. ~Perky Prepping Gramma
Also I participate in Amazon's associate program, where I receive a small percentage of recommended purchases. I only recommend things that I have used and like. There is no additional charge to you.


Monday, April 27, 2015

Storage to the Rescue...

I excel at not remembering things. LOL. While I responded to an e-vite, got a reminder notice and we have talked about for at least 4 weeks I forgot that we were gathering last evening. 
On my way home from church, I ran through the list of desserts I had in storage to make. Luckily, I hadn't packed everything and shipped it to the new house.
I pulled out a Ghirardelli double dark chocolate brownie mix Mylar bag & the recipe. 
Then I assembled:
1/2 C. Melted Coconut Oil (which I use as a substitute for vegetable oil)

1 egg (from a new batch I am testing storing with coconut oil) 
1/4 C. Water 
8 T. Peanut Butter


I just made the brownies according to the directions which I had cut out from the boxes.
Then our favorite is peanut butter brownie. I just plopped heaping tablespoons of peanut butter on top of the mix and swirled it around on top of the mix.

 
Baked it and after I tested one for quality assurance, wrapped it up and took it with me to the dinner.

I have about two years worth of stored desserts, some in Mylar bags. 

Friday, March 20, 2015

Why I Didn't Buy Pre-Packaged Emergency Food Kits

When I first started storing food, our friends purchased a complete years supply of emergency foods. Since I was responsible for our food storage I seriously contemplated doing the same. I did a LOT of research, pricing and came to the final conclusion that instead of the convenience, I would work at storing what we actually eat. 
The main issue was that whatever pre-packaged set I checked out, there was the strong possibility that I wouldn't actually eat/use probably 70% - 80% of any pre-package kit except in an extreme case.  
For the record, I do have several individual cans of Augason Farms products. They are foods I actually use. I also use their water storage containers, since they are a really good buy.

I will remind you that this is before I knew what prepping was. Instead I embarked on a journey of figuring out what we actually ate, and built our food storage and my skills based on our real preferences. 

Pretty early on I decided I needed to learn about dehydrating and pressure canning. Also building our stores around recipes that we already ate. Basically I would take a recipe and store the foods needed to make that meals. 

Then I discovered the LDS org site for cases of basics like wheat, flour, sugar, beans, oats, plus Mylar bags and oxygen absorbers. This best kept secret, really changed things for me. 


Today's post is really more about encouraging you to think about what you store & why. Don't just blindly follow what others tell you to store. Build on your skills, pick a skill and try it out. I think because I started out not being a "prepper", I was able to create the solution that worked best for us and I encourage you to do the same. 

What others have been purchasing this month:


I participate in the Amazon Associate program, where I receive a small % commission for linking products that I recommend. I only recommend products I personally used and like. Your support is very appreciated, anything you choose to purchase through my link, is helping me to be able to share more things that I do with you. Perky Gramma Teaches Amazon link.
___________________________________________________________________________

The breakdown of the one month kit shown above:
$174.00 @ Walmart $213.77 @ Amazon, just for comparison:
  • 543 total servings
  • Up to 30 year shelf life*
  • Recipe booklet included
  • 21 different food varieties
  • Recipe included on each can
The Augason Farms One Month Food Storage Pack Contains 48 Everyday Size (quart) cans, including:
Bakery
  • 3 Buttermilk Pancake Mix
Cereals & Grains
  • 4 Long Grain White Rice
  • 6 Creamy Wheat Cereal
Drinks
  • 2 Orange Delight Drink Mix
  • 2 Chocolate Morning Moo's Milk Alternative
Eggs & Dairy
  • 1 Dried Whole Eggs
  • 2 Country Fresh 100% Real Instant Nonfat Dry Milk
Fruits
  • 4 Honey Coated Banana Slices
  • 1 Freeze Dried Sliced Strawberries
Meats
  • 1 Beef Flavored Vegetarian Meat Substitute
  • 1 Bacon Bits Flavored Vegetarian Meat Substitute
  • 1 Chicken Flavored Vegetarian Meat Substitute
Soups & Sauces
  • 2 Cheesy Broccoli Soup Mix
  • 3 Creamy Potato Soup Mix
  • 3 Chicken Noodle Soup Mix
  • 3 Southwest Chili Mix
Vegetables
  • 1 Dehydrated Chopped Onions
  • 2 Potato Gems
  • 2 Freeze Dried Sweet Corn
  • 2 Dehydrated Potato Dices
  • 2 Freeze Dried Broccoli Florets & Stems

Saturday, March 14, 2015

How To Properly Store Sugar(s): Tips, Tricks & DIY Brown Sugar

I vividly remember when I started preparing, trying to find specifics on all the various items I was storing. Specifically, how to store and what measures to employ to insure the best storage method. 
Although refined sugar is prone to absorbing moisture, it is one of those items that you are able to store indefinitely.

Elena Clark recently shared with the community on our Facebook page: "To say sugar stores well is an understatement! My mama gave me 3 buckets of sugar she had stored almost 40 years ago! It's sooo sweet and I've used some canning blueberry syrup."


This picture is sugar I stored 3 1/2 years ago. One of the simplest items to store, if you do it properly.


The keys to remember for sugar storage is cool, dark, DRY. Moisture is the one element that will impact stored sugar the most, causing it to clump up or turn into a brick. Also, you need to store your containers away from concrete/brick walls and don't store on a concrete floor where moisture can accumulate.
Do NOT use oxygen absorbers. They tend to make the sugar clump more. But, instead you could use a moisture absorbing element such as rice, which is what you see in the photo above. I wrapped some rice in a coffee filter and placed it on top of the sugar I stored.

I found these helpful tips on the C & H Sugar website:
Sugar, properly stored, has an indefinite shelf life because it does not support microbial growth.
Storage
Moisture makes granulated sugar hard and lumpy. Once this happens, there is no way to adequately restore it. Always store granulated sugar in a covered container in a cool, dry area.
Store powdered sugar in a cool, dry location (not the refrigerator). When it gets moist, it develops lumps. And because of its physical properties, it tends to absorb strong odors – it can even absorb odors through the package.”
So be mindful of the storage containers.

If you have sugar that has become hard & lumpy don't be dismayed. It is still edible. You could use those lumps when making any recipe where the sugar will be dissolved, such as candy, syrups or jam/jelly.

Bigger isn't always better. Do your price comparisons. I recently found that a 10 lb. Bag of sugar was more economical to purchase than the 50 lb. Bag.

I can attest to the fact that brown sugar doesn't store well since it has a natural moisture content, it hardens into a solid brick. Instead store molasses and add it to sugar to make your own brown sugar.


Brown sugar is simple to make. Add 1 T. molasses to 1 C.of refined sugar to make light brown sugar. 2 T. of molasses added to 1 C. of refined sugar will make dark brown sugar. I actually write the "recipe" on the lid of the canning jar that i store my brown sugar in for easy reference.

Raw sugar has a shorter shelf life.

Might as well talk about honey while we are at it. I store lots of raw, organic honey. Honey also stores for a very long time. Remember pure honey crystallizes and is much easier to melt in smaller containers. If honey is purchased in bulk, simply transfer it to pint canning jars or empty jam jars. Crystallized honey should be melted at lower temperatures. If overheated it could become too thick when cooled.
Hoping to get a beehive this coming year.


Thursday, February 12, 2015

How To Pressure Can Chicken + 12 Nifty Tips I Have Learned

After about 6 months of preparing, I realized I needed to learn about canning. Being a newbie, I fast realized there were so many things I didn't know to ask. Like, what is finger tight, what is a jiggle...
With that in mind, I want to share some of those "secrets" with you.


GETTING READY
If I am able, I try to get as much clean and ready ahead of time. 


Washing my jars. 
TIP: I often put my rings in a mesh zippered bag so they don't fly all over the place in the dish washer. I don't put my new lids in the dishwasher.
To find the mesh bags:
 (associates link)


I always hand wash
 my lids with warm water and soap, then rinse well.
TIP: ALWAYS use new lids for pressure canning. You may use those "used" lids for everyday purposes like vacuum sealing, storing in fridge & opened jars.


Start gathering the equipment for canning.
Vinegar, my paper towels are close by, clean rings.
My timer, the weight for my canner, which is kept in this red bag in the following picture.

TIPS: I have this little bag, that I keep all my canning utensils, manual, etc., during canning. Things that I use for canning. I have a little "S" hook to hang it on my metal shelf in my kitchen. I also have extra sets of the utensils in here. Remember "two is one, one is none".
When it is not in use, I store it inside my pressure canner.
Also Mr. Perky came up with the idea of putting clean rings on an old paper towel holder. It is very convenient.


I grab several clean dishtowels & a new dish cloth. I have my washed & sterilized utensils out and my canning manual.
I also have started using these simple dark colored placements to sit my hot jars on when processing. There were about a dollar (I think I got them at Walmart). New dishcloths are not cheap, so this was a good alternative.
For people who are preparing, I have three sets of canning utensils.
1) In case they break or wear out. (two is one and one is none)
2) I also have found it handy if I drop a utensil or it gets contaminated, I don't have to stop everything and wash and sterilize them again.
You can get the utensil sets on Amazon


Gather everything & get set up. You should have your pressure canner, utensils, vinegar, paper towels (or clean cloth), clean dish towels, wash cloth, timer, jars, lids and rings. Oh & your chicken...
I talk often about Zaycon chicken, I honestly believe it is the best deal going. you may find  better price, BUT, their quality is beyond belief. I mean, look at the size of this chicken breast.
I have other posts about Zaycon here, if you want to learn. Or just click here on the referral link (no obligation to buy) Referral Link for Zaycon Chicken


Get your pots ready.

Interesting the National Center for HomeFood Preservation statesEmpty jars used for vegetables, meats, and fruits to be processed in a pressure canner need not be presterilized. It is also unnecessary to presterilize jars for fruits, tomatoes, and pickled or fermented foods that will be processed 10 minutes or longer in a boiling-water canner."  I started implementing this recently. 

Pressure Canner: Please NOTE you MUST use a pressure canner when canning meat.
Check the vent hole on the lid of your canner. Make sure you can actually see light through it. If not, you can clean it with a pipe cleaner, or simply blow air through it.


TIP: Run your finger gently around the rim of the jar checking for nicks. It it is nicked, throw that jar away.


The sink...I wash my sink, then clean it with vinegar.


Wash your hands, well & often! This is raw chicken we are dealing with.


TIP: You actually are able to write on the lids with sharpie, before or after you wash them and the writing will stay on.


The Ball canning Jar Company has recently been talking about changes in processing their lids by NOT simmering you lids

EDITED: With all new Ball canning lids, you no longer have to boil them & sterilize them. Just wash them well with soap and water. I personally still keep a small pan going with simmering water in case I accidentally drop a lid or it touches the meat when I am putting the lid on. It does happen. This way I don't have to stop and rewash what has been contaminated. 


Wash your chicken and start cutting.
First you trip off the excess fat, then cut into 6" chunks. 

TIP: Note the lines on the edge of the cutting board. I have marked it with a sharpie at 6” increments. I use that as a guide to cut my meat into chucks that will easily fit in the pint sized jars.


Reserve the fat scraps.


Then start adding the meat to the canning jars. Add a big chunk first. Then smaller pieces.
I also have smaller pieces (on the left) that I am able to slice up into slices to fill in extra spaces at the top.
You can either add salt to the bottom of the jar, or not. I prefer not to, since it turns out to salty for my taste.


While it is not needed; when processing chicken I prefer to add boiling water at this point, It helps create a little broth, which I like. I never have enough broth it seems.


Use a spatula or the green magnet/bubble popper, to release trapped air bubbles & allow the water to get inside the jar completely. Add more water if needed.


Do not fill over this line on the jar. (Last thread on the screw top) This is called "headspace".
What is headspace?
The unfilled space in a canning jar between the top of the food or liquid and the underside of the lid. The corrrect amount of headspace is essential to allow for food expansion as the jars are heated and for the formation of a strong vacuum seal as the jars cool.


If you fill it too full, use a spoon to scoop out the excess.


Wipe the rims of the jars with a towel and white vinegar. The rims of the jars must be VERY clean.


Place a lid and then a ring on each jar. If your lid touches the meat, wash that one again, or use a spare.


Tighten the ring to "finger tight". It just barely tight.
How tight is finger(tip) tight?
Use your fingers to screw band (ring) down until resistance is met, then increase to fingertip tight.
Do not use utensil or the full force of your hand to over-tighten bands (rings).
Tightening a lid beyond this point could cause the lid or band to buckle during processing, and is therefore undesirable.


Back to those fat scraps. I save them up and fill a another jar about half way full with scraps and then add water. This gives me a few jars of nice broth (did I mention I never have enough both) to open up when I want to make chicken and dumplings. This last weekend I made 3 quart jars of broth.


Next, fill your canner with the required amount of water. My Presto, actually has a fill line, which is helpful.


Add your jars to the canner.
Yes, 8 wide mouth jars will fit.


Pressure Canning the chicken. O.k. Here is the part some people find scary. It will be o.k. Just follow the instructions.
Now, put your pressure canner lid on & turn up the heat to high. Stay with me here...


I set my timer to 10 minutes...


WHEN there is a steady stream of steam coming out of the vent hole on top (see the steam?)...


Then you start the timer. You want that steady stream of steam venting for 10 minutes.


If it sounds like it is going crazy inside the canner, you may reduce the heat. But DO NOT let that steady stream stop. This isn't dangerous, just if the stream of steam stops, you will need to start the timer over. Steady stream of steam for 10 minutes. Got it?
Make sure you are monitoring these stages,

When the 10 minutes are up, then you add the weighted gauge. Bring the temperature back up, until the weight starts to jiggle, spew or spit.


When that happens, set your timer for 75 minutes for pints (90 minutes for quarts) & start the timer. Then you reduce your heat, until the weight only spits, spews or jiggles 3-5 times a minute. This takes practice. But just sit there and lower your heat until this happens.
If you are using just a pressure gauge, you want to continuously maintain 10 or 11 lbs. of pressure through out the 75 minutes.


After you have done this awhile and you get to know our canner and stove; you will know just where to drop the temperature on your stove to maintain the proper pressure.


What to do while you are waiting for 75 minutes. Read a book, do a little dance, wash dishes, unload the dishwasher (mine is always full it seems)


Clean your counter really well. Remember you have just had chicken juice all over it.


When the timer goes off: turn off the heat and gently move the canner from the heat.
DO NOT REMOVE WEIGHT, GAUGE OR LID.


Let rest until the pressure gauge drops down or when the little button drops down. That tells you that all the pressure has been release and it is safe to remove the lid. Only then can you remove the weight.
I pay attention, because as soon as the button drops
I want to remove the jars to keep them from cooking even more.


Remove the weight & then remove the lid carefully, turning it away from you when removing the lid to avoid the steam burning you. It will still be very hot. TIP: I use a dish towel to better protect me from the steam escaping.


Then gently remove your jars with your jar lifter...


And set them on a dish towel or place mat to cool.
Then SMILE! when you hear those lovely "pings" as your jars start to seal.
Most canners will tell you that this is their favorite part.


I pour out the water from my canner and allow it too cool down. Then wash it to have it ready for the next time.


For some reason, this is my second favorite part of canning. You place a clean dish towel(s) around the jars to protect them from drafts. Some may not need to do this step, but it was what I learned and I feel sometimes my house is a little drafty.
I feel like I am tucking babies in for the night.
Check them every now and then to insure all the jars have sealed, by seeing the the button has popped in. If a jar hasn't sealed, then let it cool down and put it in your fridge and use it sometime this week.
That is it for today. Unless you have several loads to can. Now you let them cool down and rest for the night.


But, this isn't the last step. 
You put a lot of work, time and money into pressure canning food. When you are done canning, you just put the jars on the shelf, right? WRONG! I often say "there are questions that newbies don't even know to ask". I don't believe I have seen a list of the simple, yet very important steps to take AFTER you finish a batch to optimize and protect your hard work.  This post tells you what to do next: 
Testing 1, 2, 3...


  Proud new member of the Homestead Bloggers Network.
Featured at the Homestead Bloggers Network
If you enjoyed this post, feel free to join our community Perky Prepping 
Gramma on FaceBook


This allows me to show you the products I have personally used and endorse, while monetizing my work. What I found early on was people would ask me where I got such & such an item and I would simply share a link. 
Even on regular Amazon (not prime), on specific items, when your order reaches a certain point, I believe it's $35 the shipping to home is free. So, i created a store of these items I use frequently or recommend. It doesn't cost you anything extra, but I do receive a small percentage as an advertising bonus, if you purchase from my store. You are even able to just link in and do any of your regular Amazon shopping. I really appreciate the support. (425)