Showing posts with label journey. Show all posts

Sunday, June 14, 2015

Testing 1, 2, 3...

You put a lot of work, time and money into pressure canning food. When you are done canning, you just put the jars on the shelf, right? WRONG! I often say "there are questions that newbies don't even know to ask". I don't believe I have seen a list of the simple, yet very important steps to take AFTER you finish a canning batch to optimize and protect your hard work. In my mind each of these little steps are to protect the safety of my family & are so easy to do.
1. When you are finished canning a batch, gently set them out on a dish towel. Allow them to cool down.
2. Listen for the "pings". Though if you are using Tattler lids, they don't ping.


I tend to tap the lids periodically during this time, just in case there is a jar that doesn't seal. Recently, while I was pressure canning green beans, I found one jar that hadn't sealed. If you do this early enough, you are able to pop that jar in the fridge and still be able to use it. 


3. Let the jars cool down completely. Personally, I nestle the jars and cover with another clean dish towel. This will keep drafts off of the jars. I call this tucking them in and letting them sleep overnight. 

4. The next day, remove the rings & wash the jars. When I am washing the jars I actually fiddle with the lids to see if I am able to pop the lid off. Once, I had entire batch of pork where the lids popped off during this stage. This was the day my DH decided to check our the pressure canner in the middle of the canning process. I was sitting in the living room and heard a distinct change in the pressure! I sprang out of my seat and ran into the kitchen and there was DH holding the pressure gauge in his hand. You can imagine my dismay. This was early on in my canning. The entire batch had to be disposed off. If I had just stored this batch, I may have never known the batch hadn't sealed.

5. Leave those rings off.
For me there could be a chance that a jar contents could spoil, while rare - it does happen. If that happens pressure builds up and the seal will break on the lid.
The broken seal on the lid is the indicator, particularly if it doesn't start smelling, that you need to throw that container away.


6. Then I set them out on the counter for a few days and label the lids with a sharpie. 
At this point in my house, my jars go to a staging area. They stay there for a couple weeks. I periodically check them to insure they are still sealed. The jars are then rotated into storage area. 

7. THIS IS IMPORTANT: Stored in a cool, dark, dry place.
Optimal storage temperature is 50-70 degrees. The cooler the storage area is, the longer the food will last. 
"Do not store jars above 95° F or near hot pipes, a range, a furnace, in an insulated attic, or in direct sunlight. Under these conditions, food will lose quality in a few weeks or months and may spoil. Dampness may corrode metal lids, break seals, and allow contamination and spoilage."
(NCHFP Storing Home Canned Food)
8. Inspect all your jars once a year. 

Just to clarify, for safety's sake you ALWAYS use a new lid when canning. Once I have used a lid for pressure canning & it is in decent condition, it goes into a special jar. I will use those lids for vacuum sealing dry goods.
Last, but not least, did you know that you can actually wash sharpie off of the lids? It takes a little elbow grease, but I do it all the time. 

We are so glad you dropped by to visit today and would love to have you visit our Facebook community at Perky Prepping Gramma


I participate in the Amazon Associate program, where I receive a small % commission for linking products that i recommend. I only recommend products I personally used and like. Your support is very appreciated, Anything you choose to purchase through my link, is helping me to be able to share more things that I do with you. Perky Gramma Teaches Amazon link,
Featured at the Homestead Bloggers Network

Friday, December 12, 2014

Budgeting, paying cash....

Know your needs when looking for your next property. We had a specific list of basic amenities that we considered a necessity in our new home location.
When we purchased, we were very aware that we would need to add a new roof (still has the original roof from the 70's) & we need a garage.
Mr. Perky does car repairs and has a huge amount of tools of the trade. We have multiple vehicles (very typical for a mechanic), plus he wanted to have an extended garage so he could wall off a portion for teaching classes (he teaches Utah Concealed Carry).


He did all the research and opted for a company out of North Carolina to save us about $4,000. Again we paid cash.


They made the trip up to Virginia twice. Once to pour the concrete slab and the second time to build the structure. 


Another step completed on our journey. Mr. Perky is pleased.

For more information...
I am currently adding more blogs posts to explain a little more in detail about how we got to this point in our journey. These posts are listed here under"Financial".

Romans 13: 8 Let no debt remain outstanding, except the continuing debt to love one another, for whoever loves others has fulfilled the law. (NIV) Note that the previous chapter is talking about actually paying what our owe.

Friday, October 24, 2014

We received our clear title Deed in the mail!

One of the most interesting comments made when I posted about paying cash for our property was “don't know how anyone but the rich can do this “. Actually, I just smiled.
As you now know from reading the financial posts, we are both blue collar workers by choice. We work multiple jobs between us. We just got very serious, stayed focused and made some uncommon choices.

Below is Forbes' 2014 list of the richest counties in America:
  1. Falls Church City, Va.
  2. Loudoun County, Va.
  3. Los Alamos County, N.M.
  4. Howard County, Md.
  5. Fairfax County, Va.
  6. Hunterdon County, N.J.
  7. Arlington County, Va.
  8. Douglas County, Colo.
  9. Stafford County, Va.
  10. Somerset County, N.J.
While we do live in one of these counties, that doesn't mean that we are rich. What that means for us is the cost of living is higher, especially properties. We chose to move out of this area to find a more affordable property and we looked religiously for over year. While this property was really nice, it still needs a lot of work. We are adding an entire new roof, building a garage and fixing it up.
One thing that worked in our favor was standard bank financing was unavailable for this property. Having the ability to pay cash gave us a slight advantage.

What worked for us was we were willing to change our habits, stopped making excuses and recognized that debt was not working for us. This isn't easy, but it is a choice. I have also shared stories of others that are in the process and some even working with far less than we had.

The biggest moment happened yesterday (Oct. 23, 2014) when we received our clear title Deed in the mail. Mr. Perky & I looked at each other and smiled. We accomplished something really big!


To round this out, these are many related posts linked below that show other steps we used to get where we are on our journey. Know that we continue to tithe, still maintain several months of living expenses/emergency fund and we continue to use a certain percentage of all money we earn to keep preparing. Next step - to sell our current home. We still are on a journey...

For more information...
10/10/14 More blogs posts to explain a little more in detail about how we got to this point in our journey. These posts are listed here under"Financial". This will take some time to read.


Romans 13: 8 Let no debt remain outstanding, except the continuing debt to love one another, for whoever loves others has fulfilled the law. (NIV) note that the previous chapter is talking about actually paying what you owe.

Wednesday, October 1, 2014

Purchasing a home without debt...

This is what it looks like to purchase a house and land for cash. Yes, cash.
We got up early this morning and are traveling for about two hours to do our final walk through & purchase our new home. We have cashiers checks ready for the settlement. Some cash wired into the escrow account and cold cash. We will own this house immediately. What I want to tell you is that it is possible. Really.
About four years ago we started on the journey of getting out of debt. Started preparing about three years ago. Our main reason for preparing is we are concerned about economic collapse, so shortly after we started preparing, we pulled money out of our 401 accounts. We socked it away...
First I must say I am grateful that both DH and I have jobs. DH also has several side jobs. He does car work for others and he teaches a monthly Utah Concealed Carry Class with friends. I am grateful that DH has mad skills and I am very proud of him! We add any extra to our “sock”.
We have slowly been adding it up and here we are today we are able to buy our property.
We are not a financial planners, we just applied common sense. While I haven't specifically used it, what we do is similar to Dave Ramsey's approach, including the envelope system as you can see from this house envelope.
Got out of debt
STOPPED using credit cards
Paid off credit cards (car were already paid off)
Live with our means, cut back on our living expenses.
Start using cash.
Basically if we don't have the cash, we don't buy it.
NOTE: We each have one credit card for online purchases. But, we are extremely strict about usage and as soon as we pay for something with the card, we immediately pay the card off. And I mean immediately. For example, when I make an Amazon purchase, as soon as I get the confirmation and total I open up my online banking account and pay that amount on the credit card. O.k. I guess in reality, it takes two business days for the transaction to complete.
For more information...
10/10/14 I am currently adding more blogs posts to explain a little more in detail about how we got to this point in our journey. These posts are listed here under "Financial"

Sunday, October 27, 2013

Tools & getting started and organized

After about six months of prepping, I decided it was time to learn about pressure canning. I wanted to learn the skill before the SHTF & thought it would save me time & money in preparations. 
First, you need to know there is a great difference between pressure canning and pressure cooking. Seriously, you must learn that you can cook in a pressure canner, but you CAN NOT can in a pressure cooker. So I started with a Presto 16 qrt. (for the cost) with a weighted gauge. When prepping you also need to consider that you will also need replacement parts stored for the future. An extra rubber gasket, an extra weight, etc. This pressure canner does 7-8 jars at a time, a great starting place.
IMPORTANT TIP: When you are getting ready to purchase your canner, measure your stove CAREFULLY. You want to insure that the entire canner will fit on your stove & not hit any appliance that may be OVER the top of your stove.


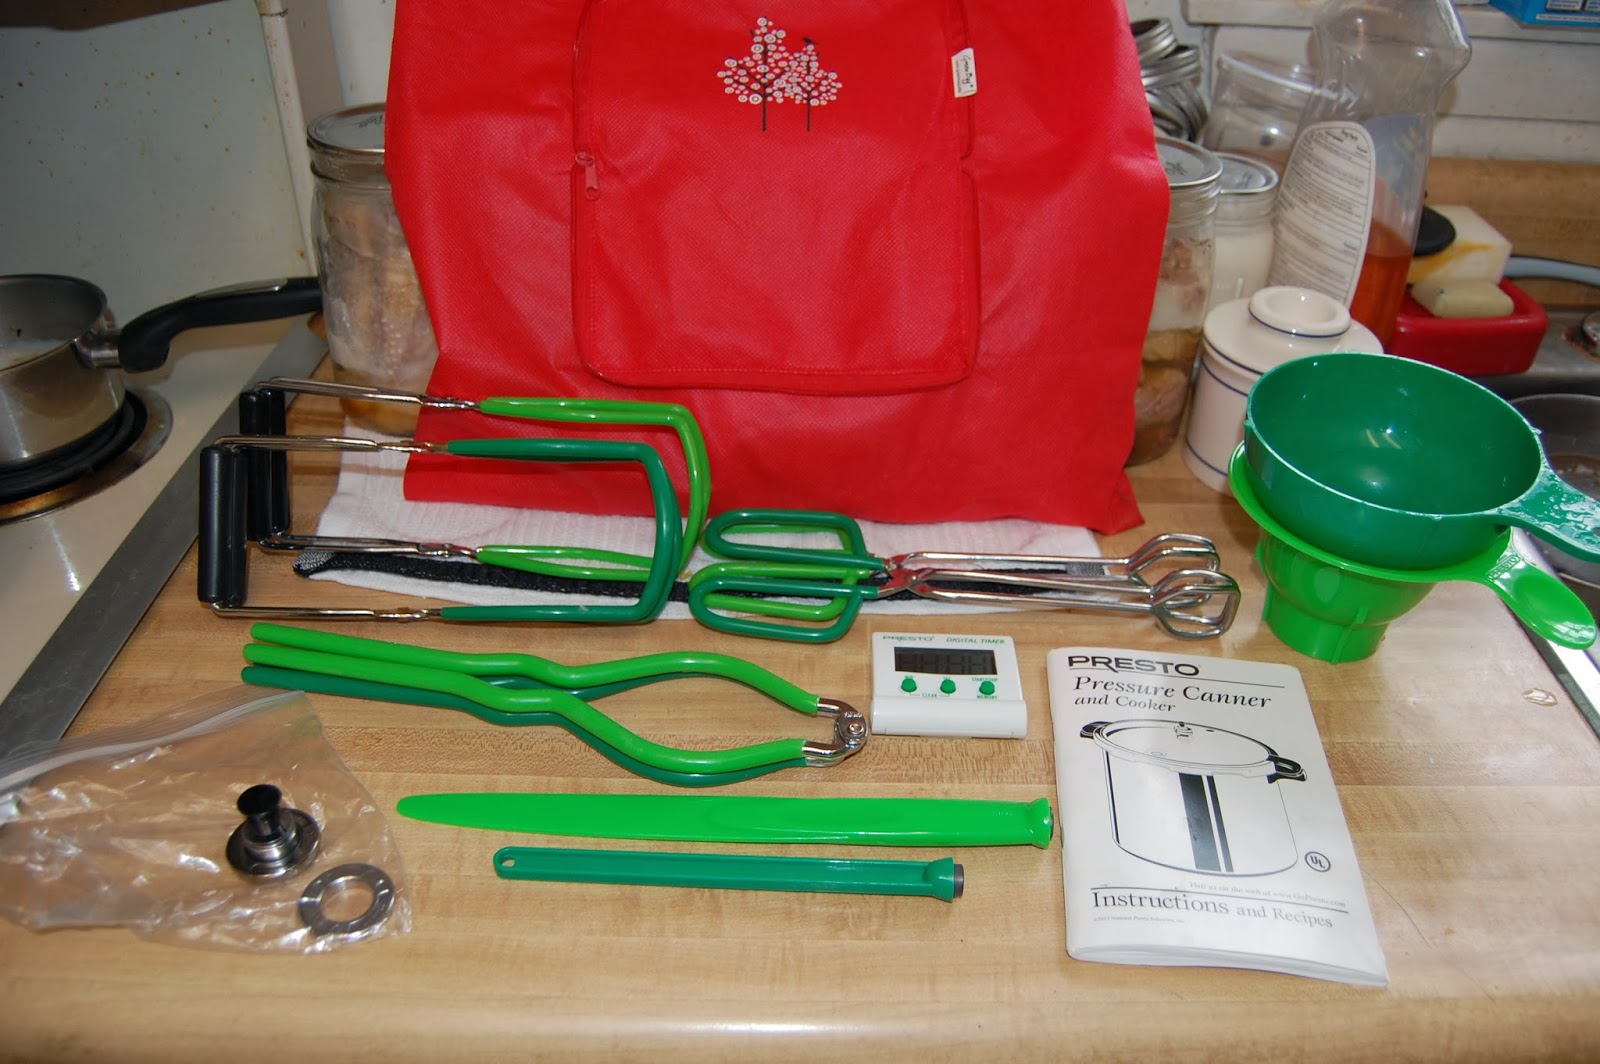
You also need a set of canning utensils. I now have three sets currently. Plus timers (I have three) & clean dishtowels. I store them in a bag, which I keep inside my canner when not in use. That way I don't have to search for my tools, when I start canning.


I also have a little “S” hook that I use to hang my bag close to my stove during canning. That away I am able to access everything, yet it is out of the way.


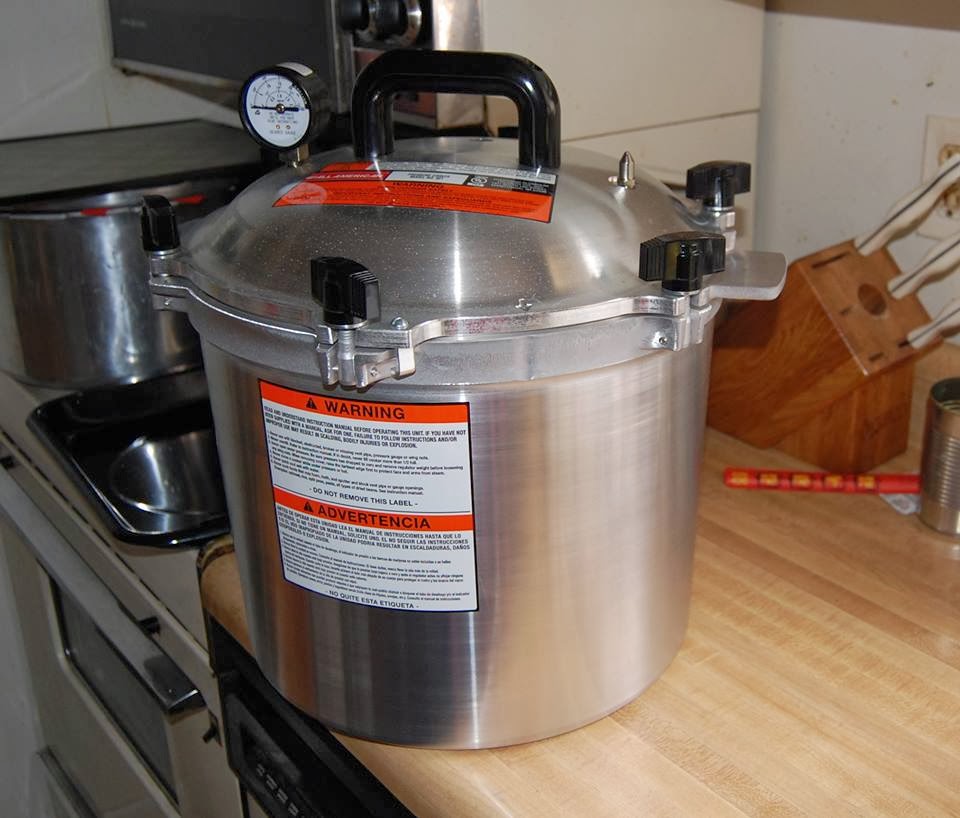
All along my intent was to save for my All-American, which is top of the line & doesn't need replacement parts. Trust me it is well worth the cost. it does two layers of jars, increasing the amount of canning I am able to do at one time. So I now have two canners. 
Again: IMPORTANT TIP: When you are getting ready to purchase your canner, measure your stove CAREFULLY. You want to insure that the entire canner will fit on your stove & not hit any appliance that may be OVER the top of your stove. If you will note, even AFTER measuring, my All-American didn't fit on my stove top. UGH! It's o.k., now that I have moved one important thing I did was measure my new stove to insure my canner would fit. .

Prepper dogs...
Ever vigilant...


_________________________

What I do here is simply share our preparedness journey. If you liked this post we would love it if you joined our Perky Prepping Gramma community on Facebook, comment or share. Plus it would just make my day.


Your order is so very appreciated, because anything ordered through my Amazon Associate links helps me to be able to stay home and write for you.Perky Prepping Gramma is a participant in the Amazon Services LLC Associates Program, an affiliate advertising program designed to provide a means for sites to earn advertising fees by advertising and linking to Amazon.com.