Wednesday, August 12, 2015

5 Fab Fav Prepping Kitchen Tools

Frequently people put off purchasing tools in the community of prepping. When in reality I am learning that these are essential and critical prepping tools. 
High-quality tools make prepping an effortless process now and if the 
S should HTF in the near future, these 5 Fab Fav Prepping Kitchen Tools will make your life incredibly easier & in some cases it could mean the difference between surviving through the winter.
The longer I prep the more I find that the pressure canner, food dehydrator, vacuum sealer and water bath canner are indispensable equipment. I am also adding a steamer/juicer to my Fab Fav list, since I have learned how simple it is to make various types of juices for jelly & drinking.

1. Why You Really Need a Pressure Canner for Prepping. Tips & Tricks to buying the correct pressure canner for your needs. Learn from my mistakes.
The most important kitchen tool on my list would be a good quality pressure canner. Pressure canning is easier than you think. From meats to milk, all protein based, non-acidic foods NEED to be pressure canned.


Instructions here.

2. Dehydrator: Little or Big?
When you start dehydrating food for long term storage, you eventually be decide you need a dehydrator. Find out how I decided which to get. In the end the answer will probably surprise you.


Instructions here.

3. Vacuum Sealer to the Rescue
Using a vacuum sealer if one of the best ways to prep & store dry foods long term. From grains & beans to chocolate! The possibilities are endless. Learn how to use this simple tool. Bonus: Have an electric one for prepping now & a non-electric option for when the grid is down.


Instructions here.

4. Water Bath Canner
While you are able to water bath in a pressure canner, there are still benefits to having a water bath canner. Whether it is making jams & jellies or putting back your acidic produce for the winter, here you will learn a few tips and tricks. Plus I show canning tomatoes from this week.


Instructions here.

5. Love Juice? Make Your Own
Last, but not as critical I would recommend having a non-electric steamer/juicer on hand for high quality juice which you may drink or turn into jelly.


BONUS: Canning Utensils: Why would you want to read a review of canning utensils? Well some brands are actually better than others and I will tell you what to look for and why. Plus, I am sharing my favorite super storage tip for canning utensils.


Read the reviews and tip here.

Well my fellow preppers, I hope this list of prepping tools for the kitchen was helpful & that you enjoyed the article. You will find that I simply share what I am actually doing as I have learned to become a prepper. We would love to have you join our community on Facebook at Perky Prepping Gramma, where simply share what we are doing to be prepared.
I participate in the Amazon Associate program, where I receive a small % commission for linking products that I recommend. I only recommend products I personally used and like. Your support is very appreciated, anything you choose to purchase through my link, is helping me to be able to share more things that I do with you. Perky Gramma Teaches Amazon link.


Tuesday, August 11, 2015

Dehydrator: Little or Big?

From the very beginning I have learned by doing. 
My first adventure in dehydrating was bananas on my Oster DehydratorOne banana on each tray. Mr. Perky loved the bananas. The smaller units work well and I don't have complaints. Initially I focused on fruits I wouldn't be able to produce myself, so that I would have options. Particularly items like mangoes, bananas, pineapple, you know more tropical fruits.
It didn't take me too long to figure out for me I needed a much larger dehydrator with temperature control. Within a month I was saving my money for another dehydrator. My general rule of thumb in is to buy larger than I think I need and choose a higher quality product. We want these tools to last. 

I did the research and decided on the Excalibur, 9 tray dehydrator.
The Excalibur Dehydrator is a true work horse. I use it constantly. Besides being able to dry 15 square feet of food at a time, the adjustable temperature is extremely handy.

I purchased the Excalibur in 2012. While I have mostly done fruits and veggies I have also dehydrated some cabbageelderberries,
ginger chipped beef, milklattessweet potato treats  and dog food for my furbabies. For the dog food I even added some leftover (spicy) Chinese food. Mixed up the veggies and leftover rice, dehydrated it and added it to their jug. They love it!


I probably have every vegetable imaginable dehydrated. When the cold weather sets in, it's time to make soup I just pick what veggies I want and toss them in the pot. 
Even if you don't have a garden, you may even dehydrated packages of frozen vegetables from the store. 


Using the Excalibur: 
This week I did a boat load of blueberries and a plethora of pineapple. The blueberries I was using were grown without chemicals, but they were the end of season gleanings were frozen. Roll them out in a single layer before you dehydrate them. The temperature was set at the fruit/fruit roll setting (135-145 degrees). The blueberries took approximately 12 hours. 
Some people will prick a hole in larger berries. I haven't had to do that yet. 
Since mine are from the farm, they all tend to be larger. I don't take the time to poke them, since I am doing at least a gallon at a time.


When done the blueberries are crisp and will bounce on the counter top, or floor as my dog knows. This dog, Snooker is ALWAYS in the kitchen when I am working. 

I was also doing canned pineapple, since I found some cans with the newer pop tops. I am trying to get rid of those cans since I have heard that those type of cans don't tend to last as long in storage. I just drained the juice from the slices and put them on the trays. Again the temperature was set at the fruit/fruit roll setting (135-145 degrees). The pineapple took almost 20 hours, because they were thicker slices from a can.


The pineapple is leathery in consistency.
While you are able to store fruit in Mylar bags, I choose to vacuum seal my fruits in canning jars. Honestly we use/eat the fruit fairly quickly, so I haven't determined the shelf life. 

I just replaced my small dehydrator with a Presto electric dehydrator to replace my smaller dehydrator (I burned the motor out). This will be used in the garage to dehydrate the very smelly stuff like garlic, onions, etc. The scent of certain items are very overpowering for my nose. 

In the end if the power does go out, I will simple use the trays outside on sunny days to dehydrate my foods. Until then I have two excellent tools to help me store up for in the present.

To answer the question "little or big?" I think that depends on how much you plan to dehydrate for storage. Maybe like me you will wind up with both.


I participate in the Amazon Associate program, where I receive a small % commission for linking products that I recommend. I only recommend products I personally used and like. Your support is very appreciated, anything you choose to purchase through my link, is helping me to be able to share more things that I do with you. Perky Gramma Teaches Amazon link.

Monday, August 10, 2015

Tips & Mistakes to Avoid: Buying a Pressure Canner

I pretty much knew that I want to purchase an All-American Pressure Canner from the beginning. But at the point I decided to start canning I didn't have enough money saved up. So I first bought a Presto Pressure Pressure Canner. Both are excellent products.  
First things first, do you need a pressure canner? The answer would be YES! My goal was to start learning and practicing my self-sufficiency skills as quickly as possible, instead of running around not knowing what to do in an emergency situation.
For the health and safety of your family you need to memorized this...


You can cook in a pressure canner,
but you can not can in a pressure cooker!


Please make sure it actually says "Pressure Canner" on the box or ad.

First, I would recommend buying the largest capacity pressure canner that will fit on your stove. I have found personally as I learned how easy it was to can, that being able to double stack (two layers of canning jars in the canner) really deceased the amount of time I spent in the kitchen. I highly recommend a pressure canner that you are able to double stack when canning.

Measure Carefully: One of the biggest mistakes I made when purchasing my All-American was not measuring accurately. Sadly I am not the only person who has made this mistake. Imagine how disappointed I was when my brand spanking new All-American canner came and it wouldn't fit between my stove top and the mini-oven that was above my range.


Needless to say, when we were purchasing our new home, I carried a tape measure with me to measure every stove.

Since I made my initial purchase without knowing what to ask; I started with a 16 qt. Presto Pressure Canner, which I wasn't able to double stack. 
There are advantages and disadvantages to The Presto brand. One big advantage is it is lighter weight and easier to move back and forth. Also the Presto is less expensive. The big disadvantage from a prepper's point of view is that you will need to store more spare parts like a sealing ring/rubber gasket and a regulator/weight. But, Presto doesn't even recommend storing the rubber seal and the pressure plug. Hmmm...now that is something to really think about.

You may want to opt for buying the 23 qt. Presto Pressure Canner. if it fits on your stove. All in all, I have been very pleased with my Presto Pressure Canner. I still use it frequently.

BUT, I quickly made it a priority to purchased a double stack pressure canner, saved up my money and purchased my All-American within 4 months. Remember to measure carefully before you purchase.

Recently I was canning a large batch of green beans using my All-American at my new house. You know, where it fits on my stove.
I loved that I was able to get some much done because of being able to double stack. In my opinion, the All-American is a much sturdier appliance & really worth the extra cost. I think as a prepper, the fact it doesn't have parts that need replacing it a huge bonus. Instead of a rubber gasket, the AA has meal to metal construction. Which if maintained properly will last forever.
For example if you read your instruction manual, every now and then you simply need to apply a little oil to the rim of the canner and lid. I used coconut oil, since that is the only oil I have at home now.


Would you like to see the All-American in action? How To Pressure Can Green Beans Tips & more...

Having two canners certainly has it's advantages. If I have a big canning day, like when I get 40-80 lbs of Zaycon chicken to can, I am able to run two canners at a time and knock out my canning three times as fast.

Don't forget other items you will need to can. You definitely will need some canning utensils. If you are a prepper remember the "two is one and one is none" principle. 


I also recommend a having a good canning book. Most people get the "Ball Complete Book on Home Preserving".

Last point is to sit down and read your instruction manual that come with your canner. It has a wealth of information. I actually still read mine often to keep the safety measures and canner maintenance fresh in my mind. 


It may seem like a lot of up front money to start canning; but it is well worth the investment when you are able to start storing real, healthy food that you have grown or purchased instead of having cans of store bought stuff. Plus, you are better prepared to be self-sufficient if and when the S should HTF. 
____________________________________

What you see, is what I do. I simply share my journey of preparing. You might enjoy joining our community at Perky Prepping Gramma on Facebook.


I participate in the Amazon Associate program, where I receive a small % commission for linking products that I recommend. I only recommend products I personally use and like. Your support is very appreciated, anything you choose to purchase through my link, is helping me to be able to share more things that I do with you. Perky Gramma Teaches Amazon link.

How To Pressure Can Green Beans

Want to capture that fresh green bean taste all through the winter? Well, pressure can them. 
Pressure canning is really very easy.
So, I thought I'd share my latest canning adventure. 
I was blessed to be able to glean some green beans from friends. 
First you snap the ends off and break the beans into smaller pieces. This is a great activity for the family to share.
Then you clean the beans by swishing them in water & rinsing them.
Next you will want to wash and rinse your lids, rings and canning jars in warm water. If you are pressure canning anything longer than 10 minutes, Ball Mason Canning Jar Company no longer recommends sterilization, since that will be accomplished in the pressure canner. 
But, I do recognize that habits are hard to break.


Next, you stuff green beans into your canning jars, add water and wipe the rim off with a clean cloth.
Salt is optional: "Salt has no effect on the natural color and texture of canned foods, except for pickles and cured or smoked foods. Follow USDA approved directions, just omit the salt. 
The main reason for using salt in canning is to enhance flavor." 
If you do use salt I recommend canning salt.

You may cold pack or hot pack. Cold pack is simply adding the beans into your jars without cooking (blanching), adding water, sealing then pressure canning.
With hot pack you blanch (to scald briefly in boiling water) the green beans and add boiling water to the jars. Both methods are safe. It's just a choice. 

Here you see I am using the bubble popper/magnetic wand to release to trap air bubbles.


Add a clean lid and ring, tighten it up and place in the pressure canner.
Please note that I am saying pressure canner. It is the safest practice to pressure can green beans.


Add the recommended amount of water to your canner. I am pressure canning pints here and I am double stacking them. So, I placed in the first canning rack, a row of jars and then added the second canning rack.


When the canner is full, then you put the lid on. Note how the All-American pressure canner has solid hooks sort of that slide into place to secure the lid. You will want to make sure that the lid is seated properly, so that there is equal spacing between the lid and the canner all the way round.


Next, when using the All- American canner you start with wing nuts on the opposite  and begin to tighten them down, but completely tightened at this point. 

Then you you do the same thing for the remaining wing nuts. Opposite sides. After all 6 are started, then you go back and tighten them down completely.


Then you pressure can according to the directions. I am doing pints, so I am using 10 lbs. of pressure for 20 minutes. Which means, you start the burner on high until the pressure builds (steam coming out the top for 7 minutes with the AA). Then you add your appropriate weight gauge.

Then after the weight begins to "jiggle", you reduce the temperature so that the gauge spits or spews 1-5 times ever minute.
Set your timers for the appropriate amount of time, mine was for 20 minutes this time.
As you get to learn your stove and canner, you will know exactly how low you are able to reduce the temperature.
Then the timer goes off, then you remove the canner from the heat and let it set until the pressure gauge reads all the way down to zero.
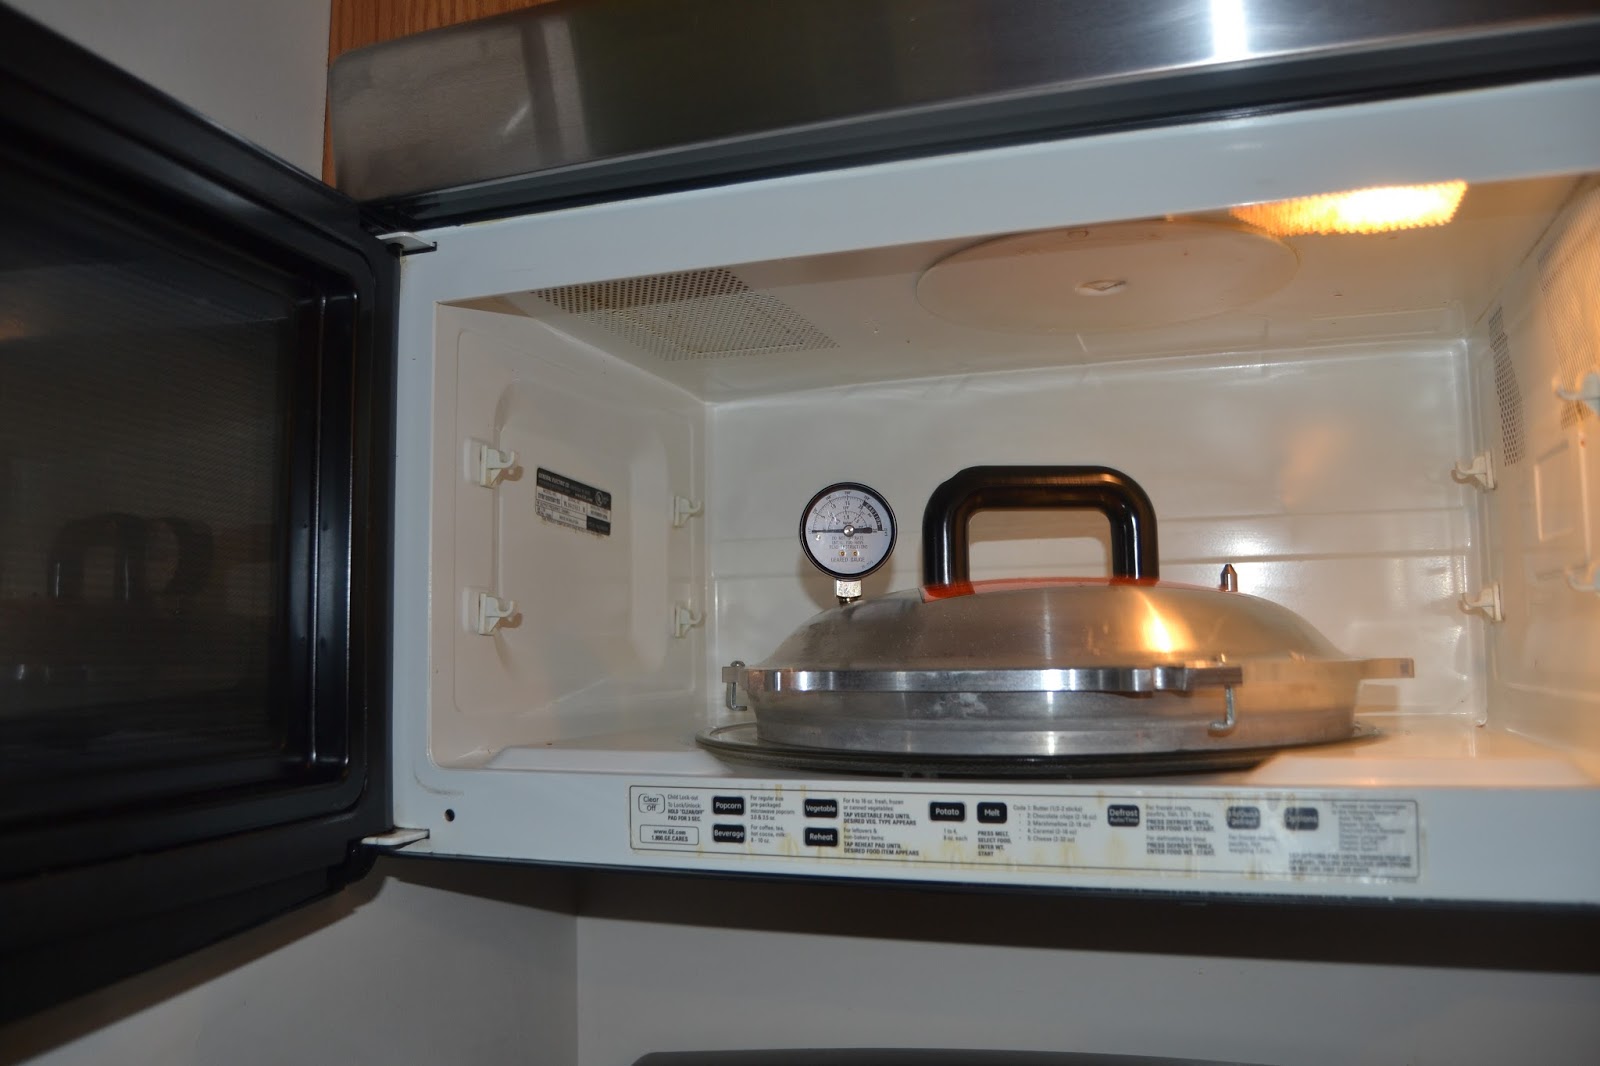
Then you may remove your lid. I find it helpful to drape a towel around the lid edges when I remove my lid so I am not burned by the steam as I open it away from me. Plus, have you ever tried a find a place to set your hot lid down at this point amidst all your canning? I figured out that i could place in in the microwave above my stove in between canning.


Lift the jars out, then the ring and the remaining jars.


Then sit the jars out on a dish towel and let them cool down completely. Listen for the magic "ping". If one of your jars doesn't seal, then put that in the fridge and use. I generally let them sit out over night. Don't these freshly pressure canned beans look yummier than the store bought cans?


The next day, I finish up using these tips in Testing 1, 2, 3...


Thank you for visiting and we would love it if you joined our community  at Perky Prepping Gramma on Facebook. Items I used today:


I participate in the Amazon Associate program, where I receive a small % commission for linking products that I recommend. I only recommend products I personally used and like. Your support is very appreciated, anything you choose to purchase through my link, is helping me to be able to share more things that I do with you. Perky Gramma Teaches Amazon link.

Thursday, August 6, 2015

How to Use Your FoodSaver: Plus 4 Great Tips

Actually we already had the FoodSaver when we started preparing. Mr. Perky had purchased it for freezing up meats. It does a bang up job and really does extend the freezer life of various foods.
But, make sure you get the version that has the accessory tube/port for vacuum sealing. For me, this has been an invaluable tool for prep storage.
Vacuum sealing with the FoodSaver is actually very simple. The items I have stored this way have lasted at least three years and are still in fantastic shape.  


Vacuum sealing or dry canning has really improved our food storage. There are now so many fantastic choices in my pantry now: cereal, grains, beans, powdered item like spices, dehydrated fruits and vegetables and let's not forget my favorite prep chocolate!


1) Add the item you are storing into the jar. TIP: I have found that the funnel that comes with canning utensils it extremely helpful particularly when working with dry ingredients.


2) Place a lid on the jar.
TIP: You may use "used" lids after canning for this purpose. But, I highly recommend only using the best used ones, without nicks. I have found that sometimes these lids will unseal because they can't create a tight permanent seal. 

3) Add FoodSaver attachment (both regular and wide mouth are available). The lid is dated with when I vacuum seal the item in the container.

4) Then attach the nozzle from the accessory port on the Food Saver.


5) Turn on your machine and hit the "accessory" button.


TIP: If you are having difficulties getting a seal, sometimes you may use two lids when sealing & only one will attach. Not sure why this works, but lots of people have to do this extra little step. Then, pop off the nozzle from the accessory tube. 
TIP: Also, I have found that older canning jars have a higher failure rate for vacuum sealing.


6) Take off the lid attachment.


There you have it. Everything from dehydrated chipped beef, blueberries, raspberries, mushrooms, crackers & Amish noodles to storing your favorite chocolate for when the grid goes down.


It really that easy to vacuum seal & store your food for a very long term storage. After your basic purchase you may want to consider a Mityvac Automotive Test and Bleeding Kit, for when the grid is down. 


The Mityvac is simple to use & you will be able to seal and reseal your jars if you learn about "Grid Down: DIY How to Vacuum Seal Food Without Electricity" (How to instructions here). 


Thank you for reading this article. As you see from the pictures, I simple share what I am doing to prepare for my family. We would love it if you joined our growing community on Facebook at Perky Prepping Gramma.
I participate in the Amazon Associate program, where I receive a small % commission for linking products that I recommend. I only recommend products I personally used and like. Your support is very appreciated, anything you choose to purchase through my link, is helping me to be able to share more things that I do with you. Perky Gramma Teaches Amazon link.

Friday, July 31, 2015

Hard Core Truth About Prepping

When you are preparing, there is a HUGE difference between what you think you might use or what you are TOLD you need to buy & actually storing what you use. I am challenging you to face some hard core truths about prepping.
Almost three years ago I started simply sharing my journey. Those who have followed from the beginning can attest that I have really come a long way. The most exciting thing is during that short time we made the decision to buy new property for cash, sell the home we have lived in for twenty years and will be debt free when that happens. We have made unique decisions to divest ourselves of being dependent on the economy as much as possible at this point.
But with the move, I have learned some major lessons about prepping & the mistakes I made. I am planning to write more about this when we get better settled. Perky Prepping Gramma is about to get more hard core. I have always said I am just sharing my journey of a newbie prepper. Well this newbie prepper thought I was following sound advice, but I am singing a whole new tune. You see, I am actually throwing away money that I tied up in items what I now consider non-essential or worthless for our prepping. I am not going to make a list of things you need to buy to be prepared, but by sharing my continuing journey I hope you are able to discern what you and your family actually need to prepare for YOUR life.

Hardcore Truth About Prepping: The first thing I will share is if you aren't using what you are storing, I honestly feel that you are setting yourself up for some serious heartache and failure if the S were to really HTF. It's time to face the reality. Whether you are preparing for a financial crash of the economy or an EMP, it's time to be honest with yourself. Are you serious or a player?
I want to share a blog post from Just Plain Marie. This is her assessment of her food storage goals & the reality of her usage for this past year. Since she is living the life mostly off grid already, you will note the a completely different approach than what you hear being preached on most prepper websites. The further I prepare, the fewer people I actually follow, because I get bored with those that are simply writing stuff vs. those that actually are doing the work. Marie, is actually doing the work. You may have noted I reviewed her cookbook "A Cabin Full of Food" last month.
My commitment to you as always, I will share what & why I am doing things. Plus, I will only recommend books & tools that I and using.
Honestly, just following me on facebook isn't the best way to get the information. Trust me you are missing things if you passively wait for something to show up in our news feed. If you are committed to preparing for your family, I am highly recommending that you sign up to follow the blog posts, at the top right hand corner of this page.
But it is your choice.

Articles  to Read & Tools I Highly Recommend Owning:
These are tools that I strongly believe each serious prepper should work towards owning. If you are doing the work, these will be invaluable to your journey.


How To Use Your FoodSaver: Plus 4 Great Tips
Tips & Mistake to Avoid When Purchasing a Pressure Canner
Dehydrator: Big or Little?


I participate in the Amazon Associate program, where I receive a small % commission for linking products that I recommend. I only recommend products I personally used and like. Your support is very appreciated, anything you choose to purchase through my link, is helping me to be able to share more things that I do with you. Perky Gramma Teaches Amazon link.