Friday, March 20, 2015

Getting to Know the Not So Amish Wife

Mr. Perky has started saying that our new neighbors are going to think an Amish family has moved into our house. 
He caught this picture of me in my new jumper dress from Katie's Mercantile, while I was adding some noodles to storage. Which will be the last noodles I store because now I am going to start hand making my noodles, since I have everything stored. 
Not teaching anything today, just sharing a little of my heart.
Honestly, I had no clue where this journey would be headed when I started out. All I know is that it has really touched a distant memory in my heart and soul.
Our society has gotten so far away from the land it concerns me. I am really enjoying transitioning to the new farmstead, meeting the neighbors. Thursday one of the neighbors asked if their daughter could fish in our pond and I was excited. The is the same neighbor who has been giving us horse manure. 
I want my grandchildren to know where their food comes from, to pet chickens, to fish from our pond. I want them to be able to run barefoot in the grass or lay out at night on a blanket and gaze at the stars.


Awhile ago I started to recognize that what I was doing was something I actually dreamed of as a teenager in the 70's. I wanted a self-sufficient farm with a windmill and all. I drew up plans and everything. Somewhere along the line, I got caught up in just living life and forgot those dreams. 
This is something that I have felt destined to do, returning to the land, sharing with others, teaching as I go. I am grateful to have you all along for the journey, for you add a dimension of joy and hope.
Thank you.


Why I Didn't Buy Pre-Packaged Emergency Food Kits

When I first started storing food, our friends purchased a complete years supply of emergency foods. Since I was responsible for our food storage I seriously contemplated doing the same. I did a LOT of research, pricing and came to the final conclusion that instead of the convenience, I would work at storing what we actually eat. 
The main issue was that whatever pre-packaged set I checked out, there was the strong possibility that I wouldn't actually eat/use probably 70% - 80% of any pre-package kit except in an extreme case.  
For the record, I do have several individual cans of Augason Farms products. They are foods I actually use. I also use their water storage containers, since they are a really good buy.

I will remind you that this is before I knew what prepping was. Instead I embarked on a journey of figuring out what we actually ate, and built our food storage and my skills based on our real preferences. 

Pretty early on I decided I needed to learn about dehydrating and pressure canning. Also building our stores around recipes that we already ate. Basically I would take a recipe and store the foods needed to make that meals. 

Then I discovered the LDS org site for cases of basics like wheat, flour, sugar, beans, oats, plus Mylar bags and oxygen absorbers. This best kept secret, really changed things for me. 


Today's post is really more about encouraging you to think about what you store & why. Don't just blindly follow what others tell you to store. Build on your skills, pick a skill and try it out. I think because I started out not being a "prepper", I was able to create the solution that worked best for us and I encourage you to do the same. 

What others have been purchasing this month:


I participate in the Amazon Associate program, where I receive a small % commission for linking products that I recommend. I only recommend products I personally used and like. Your support is very appreciated, anything you choose to purchase through my link, is helping me to be able to share more things that I do with you. Perky Gramma Teaches Amazon link.
___________________________________________________________________________

The breakdown of the one month kit shown above:
$174.00 @ Walmart $213.77 @ Amazon, just for comparison:
  • 543 total servings
  • Up to 30 year shelf life*
  • Recipe booklet included
  • 21 different food varieties
  • Recipe included on each can
The Augason Farms One Month Food Storage Pack Contains 48 Everyday Size (quart) cans, including:
Bakery
  • 3 Buttermilk Pancake Mix
Cereals & Grains
  • 4 Long Grain White Rice
  • 6 Creamy Wheat Cereal
Drinks
  • 2 Orange Delight Drink Mix
  • 2 Chocolate Morning Moo's Milk Alternative
Eggs & Dairy
  • 1 Dried Whole Eggs
  • 2 Country Fresh 100% Real Instant Nonfat Dry Milk
Fruits
  • 4 Honey Coated Banana Slices
  • 1 Freeze Dried Sliced Strawberries
Meats
  • 1 Beef Flavored Vegetarian Meat Substitute
  • 1 Bacon Bits Flavored Vegetarian Meat Substitute
  • 1 Chicken Flavored Vegetarian Meat Substitute
Soups & Sauces
  • 2 Cheesy Broccoli Soup Mix
  • 3 Creamy Potato Soup Mix
  • 3 Chicken Noodle Soup Mix
  • 3 Southwest Chili Mix
Vegetables
  • 1 Dehydrated Chopped Onions
  • 2 Potato Gems
  • 2 Freeze Dried Sweet Corn
  • 2 Dehydrated Potato Dices
  • 2 Freeze Dried Broccoli Florets & Stems

Thursday, March 19, 2015

How To Wax Cheese (again)...

Who doesn't love cheese, well unless you are lactose intolerant. Cheese is one of those items I really wanted to learn about considering how much Mr. Perky and I consume. It is surprisingly easy to wax cheese for long term storage. It's just a matter of getting all the proper equipment.
First I wanted to share, this block was waxed 7 months ago and has been sitting in a cool, dark, dry place. Look how beautiful it looks.


How To Wax Cheese:
This delightful Gouda has a wonderful taste and I really can't believe it worked so well. 
Let's start with the fact that as you eat the blocks of cheese, you are able to wash & rinse the wax and add it to your next waxing batch. 
Research. First, I read multiply cheese waxing posts on Preparedness Pro's blog & I ordered her DVD “For the Love of Cheese” Resource Guide, with video and written instructions. It was extremely helpful & answers a lot of question. 


Now let's get to it. You will need to have dedicated equipment for waxing, since you won't be able to get these items completely clean again. Get your equipment. You need a double boiler, parchment paper, a thermometer, boar bristle brushcheese wax & muslin.  
(Amazon Associate links)

Seriously? This picture of the double boiler and wax won't post correctly, so please tilt your head to the left to see it properly. 

Then comes the cheese. Use hard cheese. Test it (before buying by pressing your thumb into the cheese, it needs to not leave a thumb imprint to be dry enough) 
Prep & dry the cheese. I cut them into meal sized portions. Wiped it down with vinegar & wrapped it loosely with a paper towel. Then let it it out on the counter to get to room temp. & to dry it out more. Pat it down to remove moisture. Moisture will interfere with the wax adhering process.

Break up the wax (tip: take the plastic wrapping off before you cut it) and melt in a double boiler until your temp. reaches 180 – 212 degrees. 


Wash hands. Dip half of each block of cheese, slowly in & out of the wax. Hold it over the pot for a few seconds to allow the excess wax to drip off.


Gently set on parchment paper (a smooth surface will help eliminate lumps & bumps in the wax). Set the side you just dipped facing upwards. Let it cool for at least 90 seconds.


Then dip the opposite side of the cheese. Dip 3 times (3 layers).


Look how nice they look.


Then brush one more layer on. Look for spaces where it may have not been covered.


Add the labels (I cut them out ahead of time) to the block of waxed cheese and wax a thin coat over the label. It will adhere the label and you can still read the label.


I tried adding one of those canning jar labels to see how it would work. I labeled it first, then dipped it in the hot wax. It was a little gushy, but it worked.


Then, I wrapped up the brush and thermometer up in foil for the next time. I let the wax cool in the double boiler, then packed it all away.
After the wax has cooled sufficiently, then wrap each piece with a piece of cheese cloth, like a gift package. 


Store in a cool, dark place & fairly dry. It should last for years and years (she gives 8-10 years). But I will stress it depends on how well you follow the instructions and how well you store the cheese.
Again, I am going to suggest getting the DVD and written resource from Preparedness Pro's blog. There is entirely too much information to share here, and it is her copyrighted work.
There you have it. My second batch of waxed cheese. (358)
We would love it if you joined our FaceBook community at Perky Prepping Gramma..


Amazon Associate Links for your shopping cart:


Sunday, March 15, 2015

5 Things To Do With Cabbage

Do you need cabbage to go along with your corned beef? 

 I love to eat cabbage. Here are the various ways I have used, stored and eat cabbage.

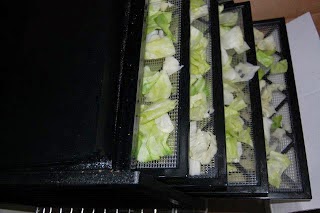
1) How to Dehydrate Cabbage (<---Directions)


2) Cabbage Chips: Now if you choose, at the point where you have steamed that cabbage & before you put them in the dehydrator. you can toss the damp cabbage...  


...with some olive oil and spices of your choice. My favorite is chili powder or Adobo. Then continue the dehydrating process. These are extremely tasty.


After your cabbage is dehydrated properly, then my I have two ways I prepare my cabbage.
First, add some of the cabbage to a pot of water and cook until rehydrated. 


3) Cabbage and Vinegar: The very simplest is just rehydrate, drain and eat with apple cider vinegar. Personally this is the way I grew up eating cabbage.

4) Sauteed Cabbage: Then the second way is sauteed with butter and Adobo spice. This has to be my favorite way to eat cabbage. 


Again, very simple. Rehydrate the cabbage, saute in butter and add Adobo to taste. Adobo is probably my most used spice blend. I use it on most of my vegetables, on meats, particular on baked chicken. It's usually found in the Hispanic food section at the grocery store. Though I do order it online. 


5) How To Make Sauerkraut (<--Directions)


When I get settled in the new house, I am going to make kimchi for the first time. If you haven't had any, it's a spicy fermented cabbage. A friend gave me a gift as a house warming gift. Looking forward to sharing that with you.


Saturday, March 14, 2015

How To Properly Store Sugar(s): Tips, Tricks & DIY Brown Sugar

I vividly remember when I started preparing, trying to find specifics on all the various items I was storing. Specifically, how to store and what measures to employ to insure the best storage method. 
Although refined sugar is prone to absorbing moisture, it is one of those items that you are able to store indefinitely.

Elena Clark recently shared with the community on our Facebook page: "To say sugar stores well is an understatement! My mama gave me 3 buckets of sugar she had stored almost 40 years ago! It's sooo sweet and I've used some canning blueberry syrup."


This picture is sugar I stored 3 1/2 years ago. One of the simplest items to store, if you do it properly.


The keys to remember for sugar storage is cool, dark, DRY. Moisture is the one element that will impact stored sugar the most, causing it to clump up or turn into a brick. Also, you need to store your containers away from concrete/brick walls and don't store on a concrete floor where moisture can accumulate.
Do NOT use oxygen absorbers. They tend to make the sugar clump more. But, instead you could use a moisture absorbing element such as rice, which is what you see in the photo above. I wrapped some rice in a coffee filter and placed it on top of the sugar I stored.

I found these helpful tips on the C & H Sugar website:
Sugar, properly stored, has an indefinite shelf life because it does not support microbial growth.
Storage
Moisture makes granulated sugar hard and lumpy. Once this happens, there is no way to adequately restore it. Always store granulated sugar in a covered container in a cool, dry area.
Store powdered sugar in a cool, dry location (not the refrigerator). When it gets moist, it develops lumps. And because of its physical properties, it tends to absorb strong odors – it can even absorb odors through the package.”
So be mindful of the storage containers.

If you have sugar that has become hard & lumpy don't be dismayed. It is still edible. You could use those lumps when making any recipe where the sugar will be dissolved, such as candy, syrups or jam/jelly.

Bigger isn't always better. Do your price comparisons. I recently found that a 10 lb. Bag of sugar was more economical to purchase than the 50 lb. Bag.

I can attest to the fact that brown sugar doesn't store well since it has a natural moisture content, it hardens into a solid brick. Instead store molasses and add it to sugar to make your own brown sugar.


Brown sugar is simple to make. Add 1 T. molasses to 1 C.of refined sugar to make light brown sugar. 2 T. of molasses added to 1 C. of refined sugar will make dark brown sugar. I actually write the "recipe" on the lid of the canning jar that i store my brown sugar in for easy reference.

Raw sugar has a shorter shelf life.

Might as well talk about honey while we are at it. I store lots of raw, organic honey. Honey also stores for a very long time. Remember pure honey crystallizes and is much easier to melt in smaller containers. If honey is purchased in bulk, simply transfer it to pint canning jars or empty jam jars. Crystallized honey should be melted at lower temperatures. If overheated it could become too thick when cooled.
Hoping to get a beehive this coming year.


3 Easy Steps: Properly Diluting Essential Oils

While I am a complete novice at essential oils, I have added them to coconut oil (the solid kind). This is the first time I have added an oil to fractionated coconut oil in a roll-on bottle.

Frankincense is the first essential oil that I have purchased because I used it up completely. Personally for me, I have found it to very helpful in reducing pain

Since I am so new to this I first consulted Properly Diluting Essential Oils. I actually use this site frequently as a resource. 

1) I re-used the roller bottle that had frankincense in it. I popped out the roller ball assembly.
2) Then I had a 10cc syringe someone had gifted me. I used that to draw the fractionated coconut oil out of the bottle & then squirted it into the bottle. It worked perfectly. 

3) Then I added the drops of oil into the bottle & popped the roller ball back onto the bottle.

"3% Dilution (3 drops per teaspoon of carrier oil; 15-18 drops per ounce) – best used short-term for a temporary health issue, such as a muscle injury or respiratory congestion. Up to 10% dilution is fine, depending on the health concern, the age of the person, and the oils being used."

I am gearing up to make more pre-diluted roll-ons. So, I am gathering additional items like more new roller bottles and syringes. 

Simply sharing my journey....

Amazon Associates links: Most are items I use and recommend, which I receive a nominal commission when you make a purchase. 


Thursday, March 12, 2015

Chicken Soup 100% from Storage: Make It Monday

This week I pressure canned some more chicken broth from a carcass. Then I made soup with loads of garlic for Mr. Perky. He is down with a severe cold. Bless his heart, he just doesn't get sick often and hardly ever takes a day off from work for being sick.

The first on the left is a package of a variety pack of vegetables that I stored early on with my Food Saver.
In the summer of 2012 I started dehydrating (associates link) veggies. The package has peas, asparagus, green beans and more. Initially I dehydrated frozen vegetables to get them into storage.
Then yellow squash (fresh) and in the last container is corn (frozen), I've now gone with growing my own non-hybrid and non-GMO. After that first large batch of mixed vegetables, I started storing each vegetable separately.


Storing the dehydrated veggies separately gives me more freedom when I use them. The one on the left is celery, The one on the right is garlic.


I mostly use chicken for my soups. In this saucepan here you see the mix pack, plus some corn, squash, mushrooms and celery. At the last minute I also added a couple slices of dehydrated ginger to the soup. Just enough to give it a little kick and added medicinal value.
I simmer them covered in water until they are tender, added water as needed & cook down so there is barely any water left. I like the concentrated veggie broth and then add the chicken broth.


Remember the vegetables will rehydrate when you add the water and simmer them so you don't have to add a lot of vegetables volume wise when starting a soup. I once went over board and added too many veggies to my pot. 


Then I add the pressure canned chicken is added to the veggie and chicken broth. For the last tens minutes, I add some noodles I have stored. I do things by taste so it is hard to give you an exact recipe. Hopefully this helped.