Saturday, June 27, 2015

DIY How To Make Vanilla Extract

Why do we put things off? My excuse is time, but this takes maybe 15 minutes max, when you have on the ingredients on hand.
Now, I know there are people that can not even have alcohol in the house  so I found a recipe that is alcohol free, gluten free, sugar free & vegan. I have the link at the bottom.


Making your own vanilla extract is so very simple.

1. Slice down the length of the vanilla bean and put the bean(s) in a bottle. I am making small batches here. Small bottles, I cut the beans in smaller pieces, so they would fit in the bottles. O.k. I am making myself laugh at the simple directions.  EDITED: I was using 4 oz. bottles and used one vanilla bean for each bottle.
2. Pour vodka over the beans. Not in your mouth. In the bottle. The beans need to be covered. Note: Personally I think the best type of alcohol for extract has a neutral favor. So go for it. Though I have read about using other types of alcohol which creates a different flavor profile.
3. Shake that bottle several times a week.
Here is a slammin song to shake to...


Love Israel Houghton. So do my dogs. I kid you not, I am playing this vid while writing the post and they all jumped and started dancing around. I tell you, I have a great life.
Step 4. Wait about 8 weeks. I keep tasting it, to check and see how it is doing. 
Then you will some delightful homemade pure vanilla extract. Way better than the store bought. 

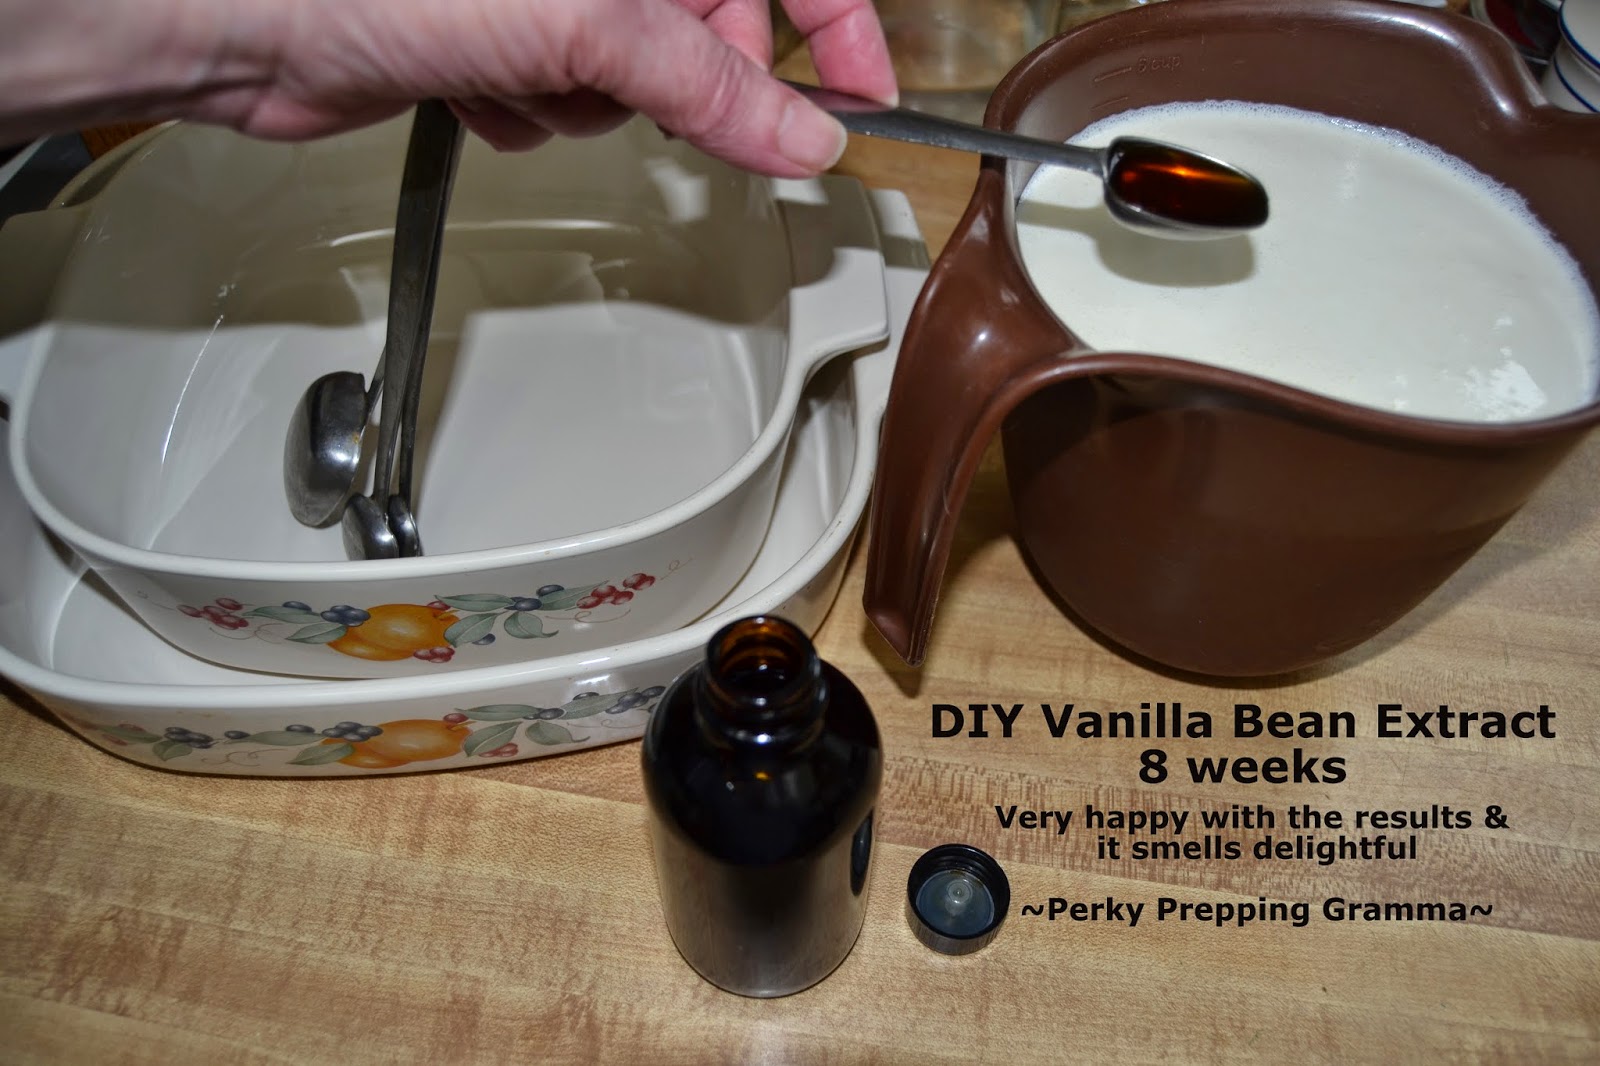
Update: The vanilla extract has reached it's 8 weeks extraction point & look...


I am planning on leaving the beans in there awhile longer to develop more flavor and a richer brown color. 
You are able to leave the beans in as long as they are submerged. The flavor just evolves.

If you will note, I have made my vanilla extract in dark amber bottles. I feel that this helps keep preserve the extract in darkness. If your pure vanilla extract is keep in a cold, dark location if should keep indefinitely.

Now, I know there are people that can not even have alcohol in the house, I found a recipe that is alcohol free, gluten free, sugar free & vegan. DIY Alcohol-Free Vanilla Extract by Desserts with Benefits.

The first time I used vanilla beans from Yoder's Market and got the smaller bottles from Amazon. 
I ordered more vanilla beans today (011315). I am planning ahead for Christmas gifts. 

What you see here are things I try. If you like this article, please feel free to join our community on Facebook
 (Perky Prepping Gramma).
Items I have used in making the vanilla extract:

   
I participate in the Amazon Associates program, where I receive a small recent commission for my recommendations and there is no extra cost to you. Personally, I only share items I have used and like. Each time you use my store for any purchase it helps make a dream possible. Thank you.

Ways to Save & Earn Money When You Shop Online

I am going to start sharing various ways to get your finances under control. This is a strange post to start with, but I know people are going to continue to buy things online so you might as well earn a little something back while doing so.
If you order things online here are a couple little tips that will able you to earn cash back, or qualify for other  things like free shipping.

First there is Shop at Home. I am not sure how I even found this site. But if you already shop online at places like, Walmart, Target, Kohl's  or others you are able to get a % cash back.
Now there are multiple ways to earn some cash.  Every time I am I going to make a purchase at Walmart, I log in at Shop at Home and find the latest deal for Walmart and link through. Then I start shopping. This takes a while to accumulate the cash, but I am getting a check in the mail this week for $20.
Just so you know, I use a debit card, not a credit card when shopping here.


Now you know I am all about getting out of debt and staying out of debt. I do have one credit card, it's from Amazon. When I make a purchase, I immediately click into my bank and pay that amount off through on line bill paying. Therefore I am still paying cash per se, but carry no balance or pay any interest. 
With that being said, you receive a certain amount off an order when you first sign up for the Amazon credit card.  You also receive a small percentage of cash back periodically, which you are able to then apply to an order.
One year ago I signed up for Amazon Prime (cost $99 a year). At first I bulked, but I now really appreciate the various privileges. Try Amazon Prime 30-Day Free Trial was enough to convince me of its value.  The FREE Two-Day Shipping has been my favorite. I also enjoy the free streaming movies and t.v. shows.
In some larger cities they are now offering same day shipping (I usually shop at night and receive it the next day) which is pretty amazing. 

* FREE Two-Day Shipping on millions of items
* Instant streaming of thousands of movies and TV shows
* Secure, unlimited photo storage with anywhere access
* Unlimited, ad-free access to over a million songs and hundreds of playlists
* Borrow books from the Kindle Owners' Lending Library
* Early access to select Lightning Deals on Amazon, and every event on MyHabit.com

After the free trial Prime is $99 per year. I just renewed my Prime membership this week. 

Well, these are just a couple tips. If you are going to shop make it work for you.
I will be sharing more soon on getting out of debt, because I am going to share how we got out of debt, are staying out of debt and were finally able to get our new home debt free.

Sunday, June 21, 2015

Pinterest Announcement

I am going to be tarting a new board which I hope you find fun.
Perky Gramma Teaches This is what it is about:
This is a story, a personal journey of transitioning from a city mouse into a country mouse. My dear husband (Mr. Perky) and I started on this journey  in the summer of 2012. Our life was working day in and day out, living with typical debt and really didn't think we would be able to retire. Over time we have been able to transition from dependency to self-sufficiency.
Through hard work & focus we have managed to get out of debt, drastically cut down on our expenses through learning "old fashioned skills" like growing our own garden, canning and dehydrating. My hope is to share helpful hints from real life experiences that you are able to share.
You are invited to join me on this journey. Grab a cup of coffee, hang around, read other posts. I have been blogging on various subjects (designing worship experiences and stages and being prepared for emergency situations) for over 10 years and I thought it was time to focus on our newest adventure with this blog geared towards our new self-sufficient lifestyle and homesteading.
Please feel free to join our community of Facebook at Perky Gramma Teaches, we would love to have your share what you are doing & value your journey.


Now for your reading pleasure:
Once upon a time a city mouse went to visit his cousin in the country. This country mouse was down-to-earth, and he loved his cousin and made him welcome.  Beans, cheese, and bread were all the country mouse had to offer, but he offered them freely. The city mouse, being used to gourmet cuisine, turned up his nose at this country fare.


"I cannot understand, Cousin, how you can put up with such poor food as this, but of course you cannot expect anything better in the country.  Come with me and I will show you how to really live. When you have been in city a week, you will wonder how you could ever have stood your simple country life."
No sooner said than done, the two mice set off for city and arrived at the city mouse's residence.  "You will want some refreshments after our long journey," said the polite city mouse and took his friend into a grand dining room.  There they found the remains of a feast, and soon the two mice were eating up tarts and cakes and all that was nice.
Suddenly, they heard growling and barking.  "What is that?" asked the country mouse.  "It is only the dogs of the house," answered the other.  "Only!" said the country mouse. "I do not like to hear that sound at my dinner table.”  Just at that moment the door flew open, and in came two huge dogs. The two mice had to scamper down from the table and run off.  
"Good-bye, Cousin," said the country mouse.  "What! Going so soon?" said the other. "Yes," he replied. 
"Better beans and bread in peace than cakes and tarts in fear."
Wait there is more...


I recently purchased and posted about the UCO Candlelier review above. My main needs were something to use that didn't require electricity & something with enough light that I could read books by. It's fantastic!


I participate in the Amazon Associate Program. I do receive a small percentage of the sales generated by my recommendations on my post. I only recommend items that I personal use and like. I really appreciate your support. 

Sunday, June 14, 2015

Testing 1, 2, 3...

You put a lot of work, time and money into pressure canning food. When you are done canning, you just put the jars on the shelf, right? WRONG! I often say "there are questions that newbies don't even know to ask". I don't believe I have seen a list of the simple, yet very important steps to take AFTER you finish a canning batch to optimize and protect your hard work. In my mind each of these little steps are to protect the safety of my family & are so easy to do.
1. When you are finished canning a batch, gently set them out on a dish towel. Allow them to cool down.
2. Listen for the "pings". Though if you are using Tattler lids, they don't ping.


I tend to tap the lids periodically during this time, just in case there is a jar that doesn't seal. Recently, while I was pressure canning green beans, I found one jar that hadn't sealed. If you do this early enough, you are able to pop that jar in the fridge and still be able to use it. 


3. Let the jars cool down completely. Personally, I nestle the jars and cover with another clean dish towel. This will keep drafts off of the jars. I call this tucking them in and letting them sleep overnight. 

4. The next day, remove the rings & wash the jars. When I am washing the jars I actually fiddle with the lids to see if I am able to pop the lid off. Once, I had entire batch of pork where the lids popped off during this stage. This was the day my DH decided to check our the pressure canner in the middle of the canning process. I was sitting in the living room and heard a distinct change in the pressure! I sprang out of my seat and ran into the kitchen and there was DH holding the pressure gauge in his hand. You can imagine my dismay. This was early on in my canning. The entire batch had to be disposed off. If I had just stored this batch, I may have never known the batch hadn't sealed.

5. Leave those rings off.
For me there could be a chance that a jar contents could spoil, while rare - it does happen. If that happens pressure builds up and the seal will break on the lid.
The broken seal on the lid is the indicator, particularly if it doesn't start smelling, that you need to throw that container away.


6. Then I set them out on the counter for a few days and label the lids with a sharpie. 
At this point in my house, my jars go to a staging area. They stay there for a couple weeks. I periodically check them to insure they are still sealed. The jars are then rotated into storage area. 

7. THIS IS IMPORTANT: Stored in a cool, dark, dry place.
Optimal storage temperature is 50-70 degrees. The cooler the storage area is, the longer the food will last. 
"Do not store jars above 95° F or near hot pipes, a range, a furnace, in an insulated attic, or in direct sunlight. Under these conditions, food will lose quality in a few weeks or months and may spoil. Dampness may corrode metal lids, break seals, and allow contamination and spoilage."
(NCHFP Storing Home Canned Food)
8. Inspect all your jars once a year. 

Just to clarify, for safety's sake you ALWAYS use a new lid when canning. Once I have used a lid for pressure canning & it is in decent condition, it goes into a special jar. I will use those lids for vacuum sealing dry goods.
Last, but not least, did you know that you can actually wash sharpie off of the lids? It takes a little elbow grease, but I do it all the time. 

We are so glad you dropped by to visit today and would love to have you visit our Facebook community at Perky Prepping Gramma


I participate in the Amazon Associate program, where I receive a small % commission for linking products that i recommend. I only recommend products I personally used and like. Your support is very appreciated, Anything you choose to purchase through my link, is helping me to be able to share more things that I do with you. Perky Gramma Teaches Amazon link,
Featured at the Homestead Bloggers Network

Saturday, June 13, 2015

Everything I Really Needed To Know, I Learned Growing Up On A Farm

Recently Mr. Perky and I were having lunch at a little diner in our new area. I found this photo copy of a cropped newspaper article in a page protector and posted with a thumbtack on the dingy wall. I have tried to locate who the author was, to no avail and thought long and hard about sharing this heart touching piece of farm life wisdom. 


Everything I Really Needed To Know, I Learned Growing Up On A Farm
Author Unknown
Several years ago Robert Fulghum, a columnist for the Kansas City Times, wrote a story titled “Everything I Ever Really Needed To Know, I Learned in Kindergarten.” It was an instant hit with readers and led to a best selling book. Because imitation is the sincerest form of flattery, I thought I'd copy Fulghum's approach but twist it a little. So here goes:
Honesty. I learned it is better to point out that lame heifer to a buyer rather than wait for the buyer to find her in the herd-or worse, not find her.
Charity. I learned the importance of giving to those in their hour of need. It could be taking a casserole to someone's home after a funeral or combining the wheat field of a farmer who has been injured.
Life and death. I've seen calves, lambs, pigs, puppies and kittens born. But I also witnessed death and the harshness of nature before I was three years old.
Compassion. I've seen my dad get off his tractor to move a bird's nest out of the was so he could cultivate a field.
Faith. I've watched the planting of tiny seed and had the assurance that they would sprout and make a good crop. I've watched a newborn calf struggle to its feet and understood that this fragile animal wold grow into a productive cow.
Work ethic. I remember looking out at a field full of hay bales and wondering if we would ever get them loaded and hauled to the barn. I came to realize that if you word steadily and stick to it those bales will slowly disappear from the field.
Patience. I know everything happens according to nature's schedule. We can't speed it up or slow it down; we can only work within its constraints.

Yes, just about everything I know worth knowing I learned and continue to to learn from farm families and farm life. I bet a lot of you feel that way too.

Here is the picture of the article I took. Maybe this will reach enough people and I will able to credit the author.
                             

Wednesday, June 10, 2015

Jar Box (TM) Review (Part Two)

I am not obsessed with Jar Boxes, it is just where I am in the process of moving stuff from one house to the other. Packing up canning jars...
First I did random recent jars in my kitchen.


Next I filled up the boxes with my canned chicken. I am glad I have a Zaycon chicken pickup coming soon. I am low on chicken. This has been transported already.


Mostly chicken here.
Next, I unloaded my storage area of snacks, which has loads of chocolate.
Filling more jar box containers:
Various dark chocolate covered candy & biscotti's, chocolate bars (both milk & dark), some cookies, orange slices, m & m's, a few chips & crackers, mocha powder & vanilla bean powder and some dehydrated sliced oranges. Plus, I try to keep specialty holiday items we use like walnuts & dried dates. Same principle applies here of “use one, buy two”. Here they are packed and stacked. 


Here they are heading to the truck for transport.


When I was growing this snack portion of our stores, I made sure we had a least one years worth. This doesn't include store box cake and brownie mixes, plus a lot of cocoa powder.


These are all completely filled now

Here is a link to my initial review post on why I chose to finally get the Jar Boxes: Jar Box (TM) Review (Part One)

Friday, June 5, 2015

Just a Chat about the Prepping Journey

I believe that how you prepare is mostly determined by how real you feel the threat could be in your life. I would safely say that at the very least preparing for a 72 hour emergency event is something most people should do. I often wonder what makes people not prepare.
What prompted this post was planning to go see a movie with one of my friends. 

Adding it up it was $7 for popcorn, $5 for a soda, $6 for movie candy & $12.50 for the tickets for a total of $30.50!

What first got me thinking was the outrageous prices of the movie concessions, which at times I do indulge. I don't know about you, but our income doesn't seem to keep up with inflation. What I have found is that preparing has saved me money in the long run. Because I am often using my storage items when I cook, etc. I find that I paid less money for the item that what it currently would cost if I was to run out to the store.
That includes the use of larger ticket items like my preparedness tool trinity: the FoodSaver, pressure canner and dehydrator (associates links). I use these items all the time. I saved up my money and purchased high quality tools for my preparing. I am able to store away fresh produce from my garden or when I find a great sale. I am no longer dependent on running to the store when I use up a certain item, because I happen to have several more stored away.
The second point that got me thinking, was the total of $30.50. Through out our journey that is about what I spend once or twice a month to maintain/increase my preps. With obvious exceptions of the larger things we saved for and purchased. It doesn't take a lot of money to be prepared for emergencies.
Plus, it doesn't take all that long, if you are focused. 

Granted prepping is not the most important thing in my life. But, I do think about it most everyday and stack up working on projects on the weekends. Because the reason we prep is very compelling to us. 
I sort of fell into blogging about prepping. I started my Perky Prepping Gramma persona on FaceBook so I could interact on other sites, without getting odd questions from friends & family. I quickly started routinely setting monthly goals and then sharing about what I had accomplished. I found that it tended to keep me on target with my goals. Then to my surprise people started following me.
There may come a time where I need to decide to continue blogging or sign off. It will be dependent upon developing a stream of income once we get settled on our farm. 
Just a little news I haven't shared yet: I am in the process of started sort of a mirror site geared more with "homesteading language". I want to be able to share these principles on my personal page & reach out to a larger audience. There are several people I know that have said they want to start learning these types of skills, but freak at the concept of preparedness. Go figure. So these new sites will also start the journey from the beginning.
Anyway, here is your chance to get involved before the crowd. There are only a few posts so far and won't be posting the same thing on both sites. Though you may see "old" posts which are updated.
Perky Gramma Teaches (on Facebook)

Perky Gramma Teaches (blog)
Until such a time, I will continue to share my journey and let you know that you really are able to do this.